English
 français
 Deutsch
 español
 italiano
 português


Box 18
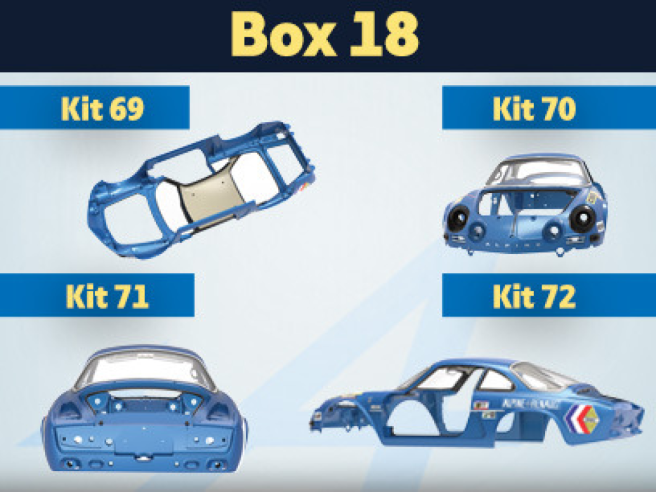
Kit 69 - Montage du ciel de toit et des loquets de commande des glaces de custode
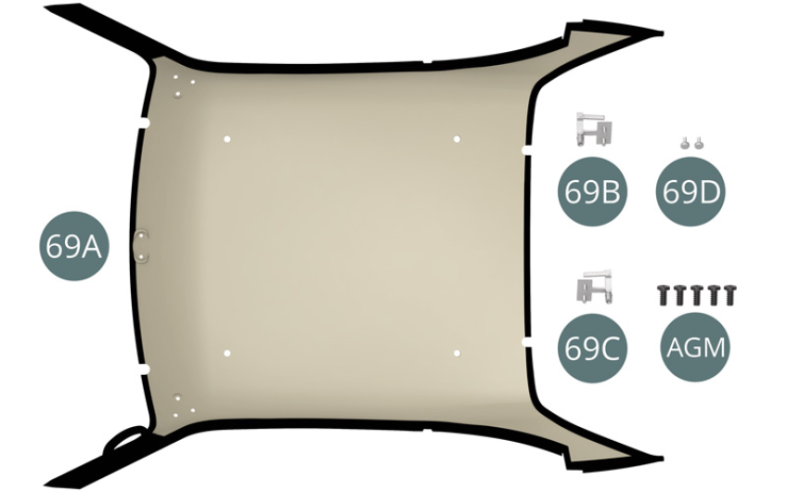
Parts of kit
- 69A Ciel de toit
- 69B Loquet de glace de custode gauche
- 69C Loquet de glace de custode droite
- 69D Bouton (x 2)
- AGM Vis M 2,0 x 3 mm (x 5)
Etape 1
- 69D Button (x 2)
- Screw AGM M 2.0 x 3 mm (x 5)

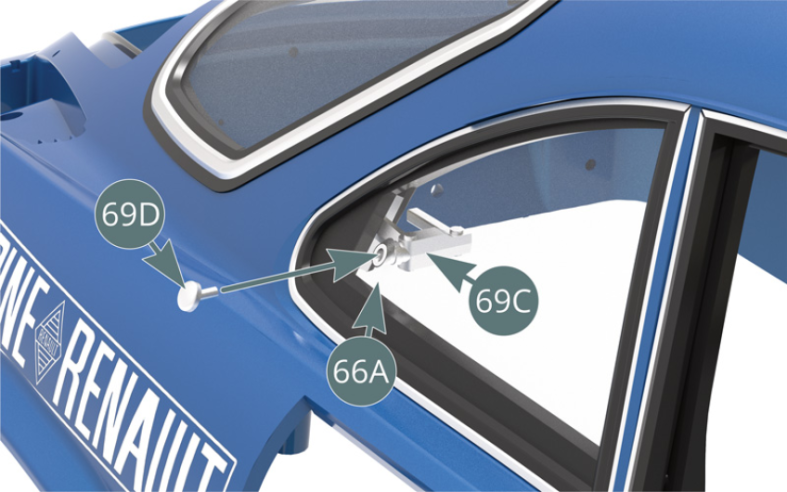
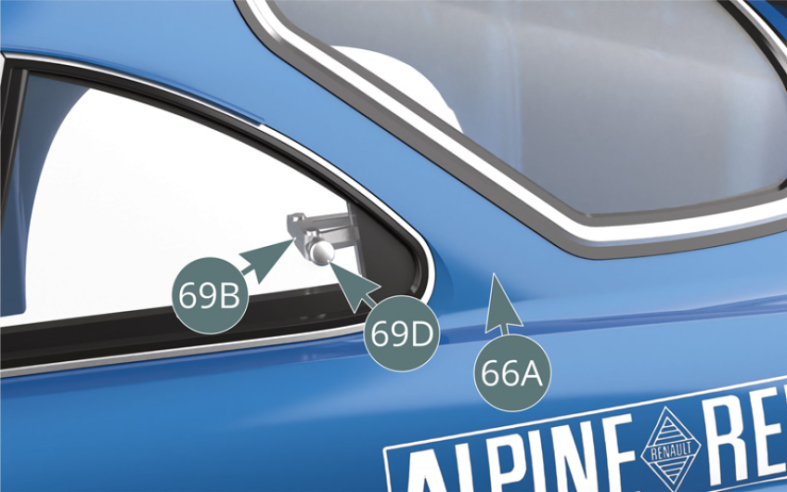
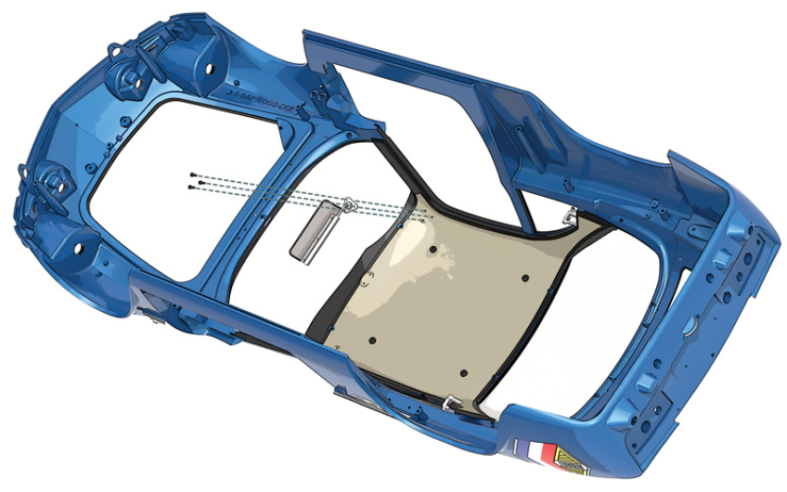
Retourner la carrosserie 66A et positionner le loquet de commande 69C sur la face intérieure de la glace de custode droite située à l’arrière de la carrosserie 66A.

Etape 2
Turn the body over (66A) and position the right latch of the quarter window (69C) on the inside of the right quarter window located at the rear of the body (66A).
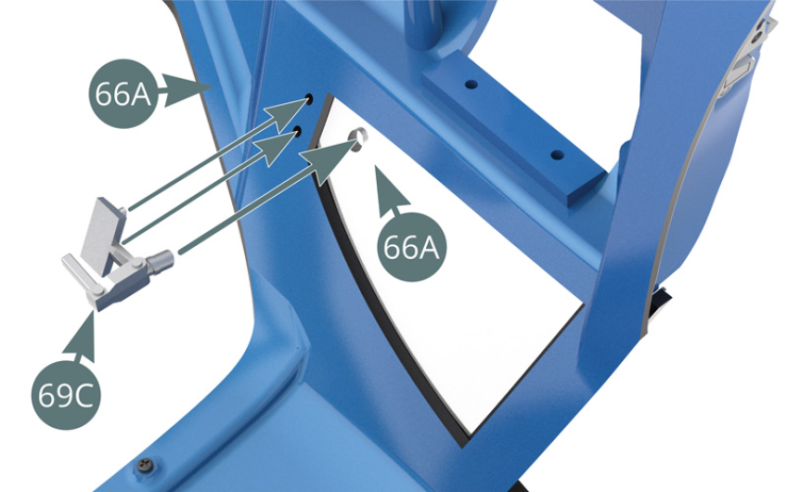
Détacher un bouton 69D de la grappe de moulage et le positionner sur le loquet de commande 69C du côté extérieur de la glace de custode droite.
Etape 3
Detach a button (69D) from the sprue and place the button on the right control latch (69C) on the outside of the right quarter window.

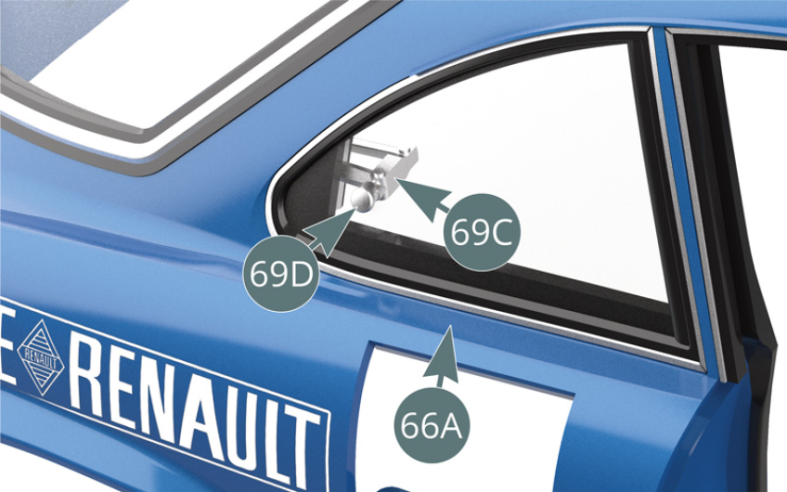
Le loquet de commande 69C et le bouton 69D sont fixés sur la glace de custode droite de la carrosserie 66A.

Etape 4
The right latch (69C) and button (69D) are now fixed onto the right rear window of the body (66A).
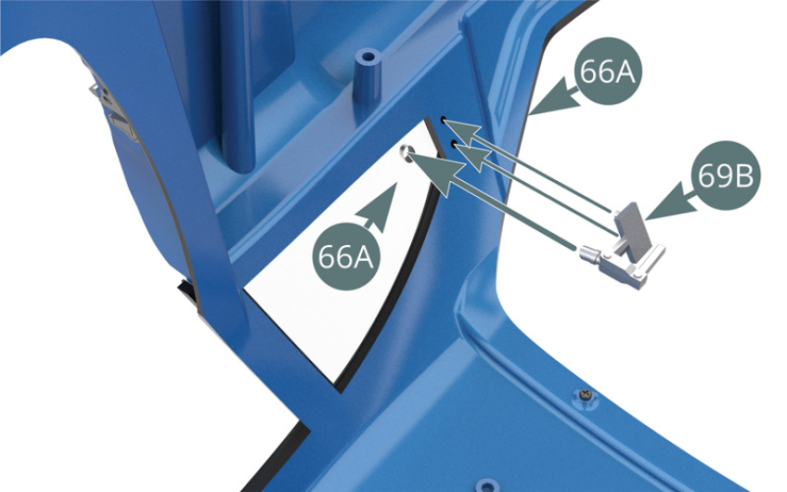
Retourner à nouveau la carrosserie 66A et positionner le loquet de commande 69B sur la face intérieure de la glace de custode gauche située à l’arrière de la carrosserie 66A.
Etape 5
Once again turn the body (66A) over and position the left latch (69B) on the inside of the left quarter window located at the rear of the body (66A).

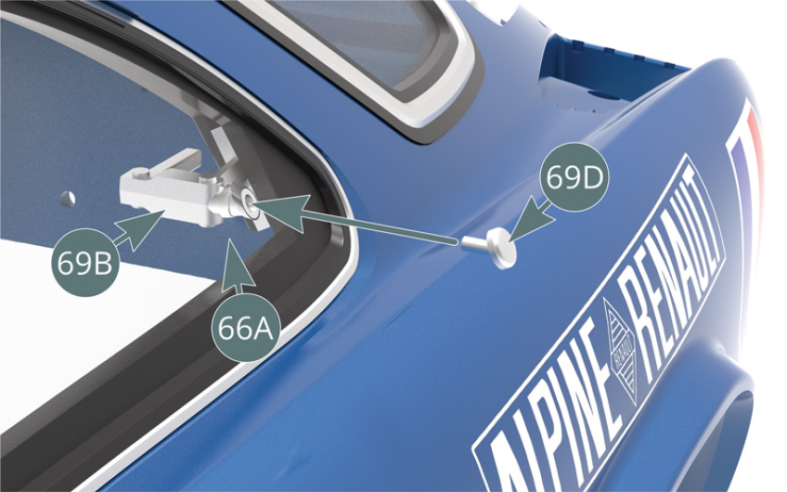
Détacher un bouton 69D de la grappe de moulage et le positionner sur le loquet de commande 69B du côté extérieur de la glace de custode gauche (illustrations ci-contre et ci-dessous).
Etape 6
Detach a button (69D) from the sprue and place the button on the left control latch (69B) on the outside of the left quarter window (illustrations opposite and below).


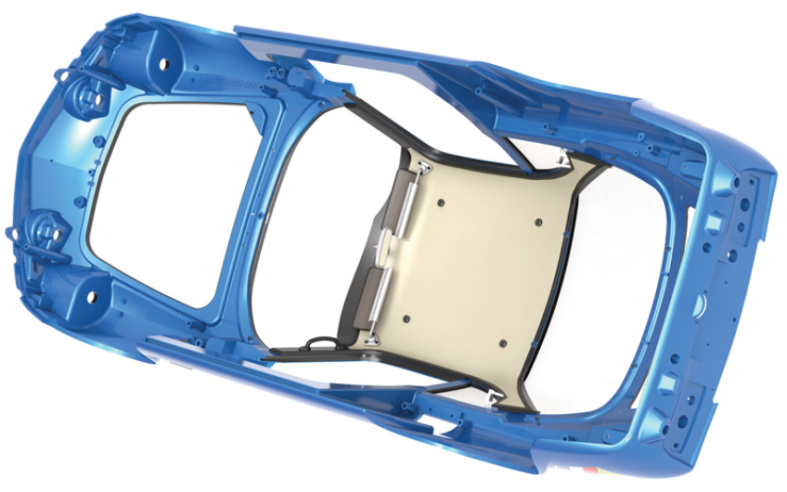
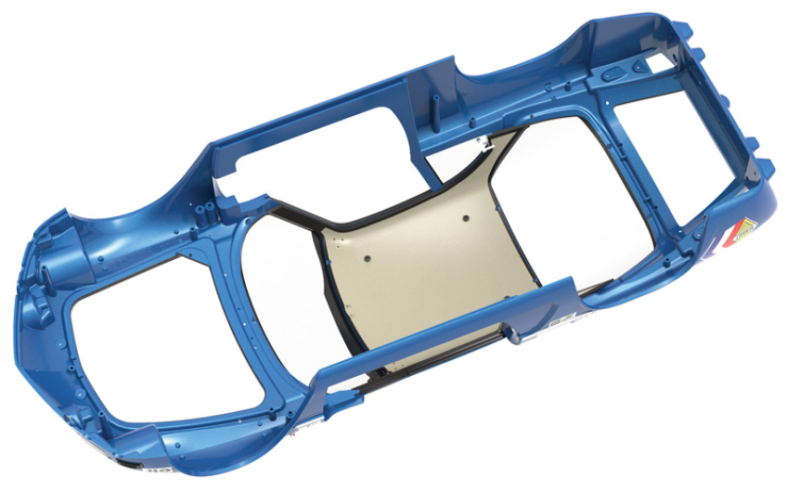
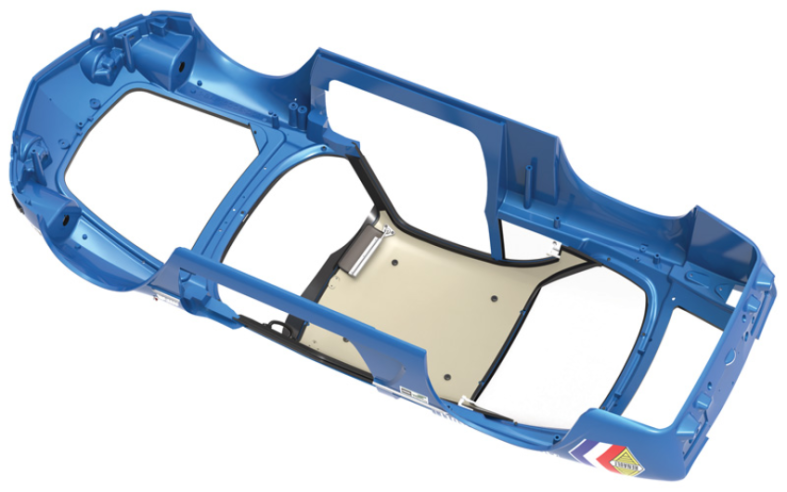
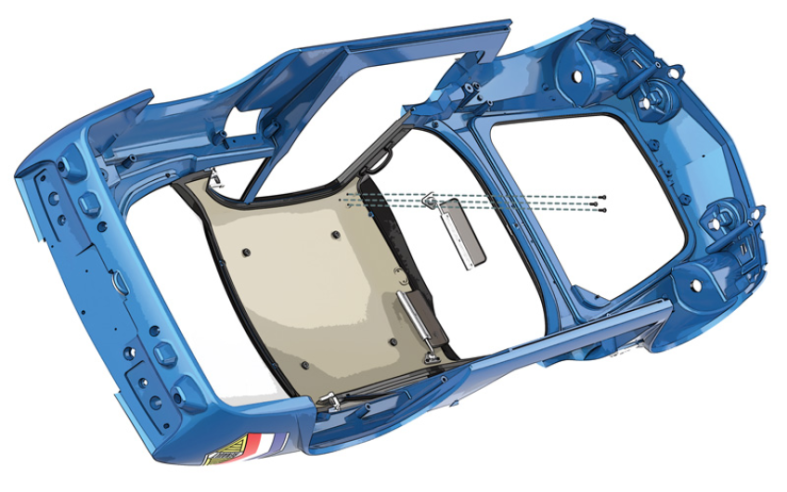
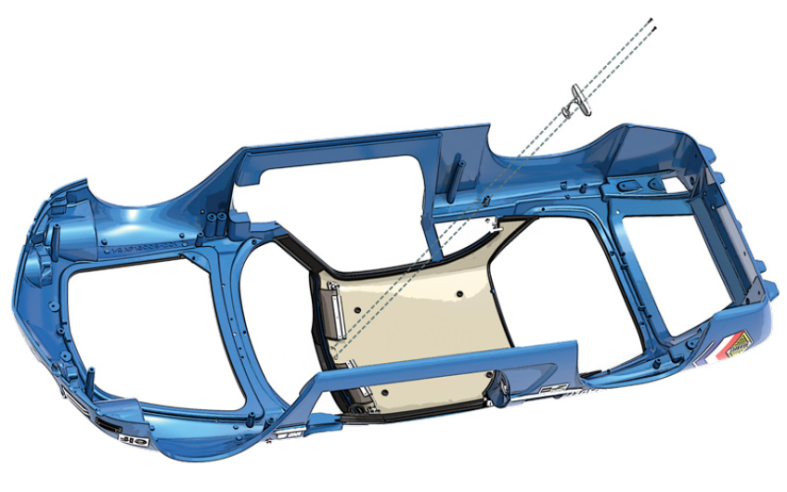
Positionner le ciel de toit 69A sur la partie intérieure de la carrosserie 66A en passant derrière les loquets de commande droit 69C et gauche 69B, puis le fixer avec quatre vis AGM.
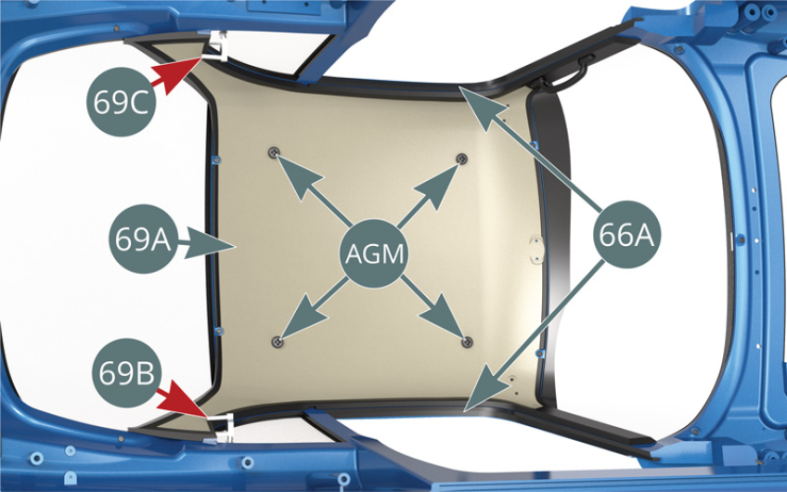
Schéma d’assemblage
Position the roof lining (69A) on the interior part of the bodywork (66A) passing behind the right (69C) and left (69B) latches, then secure with four AGM screws.

Vue générale


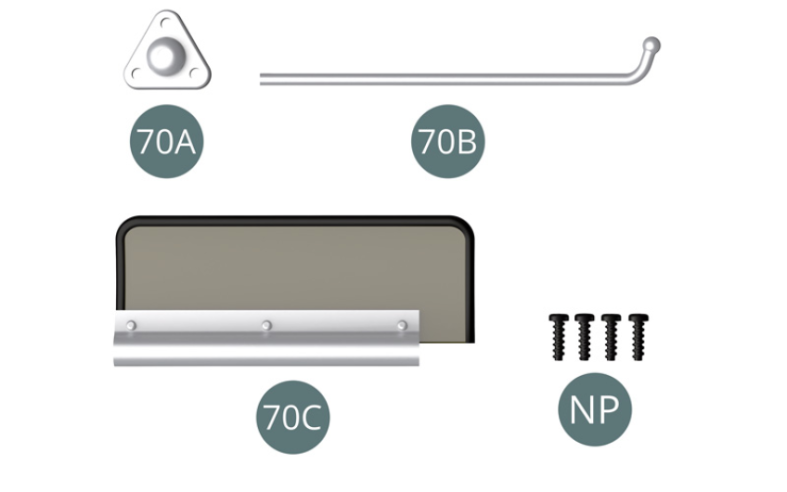
Kit 70 - Assemblage et montage du pare-soleil gauche
Parts of kit
Etape 1
- 70C Left sun visor
- Screw NP M 1.2 x 4 mm (x 4)
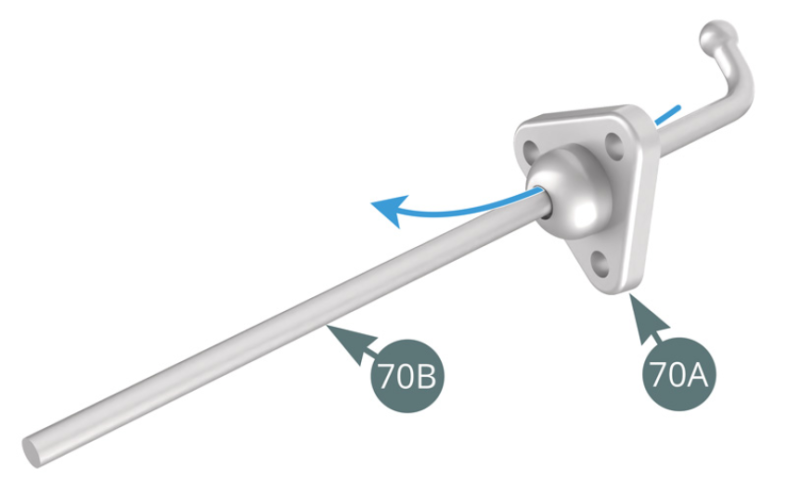
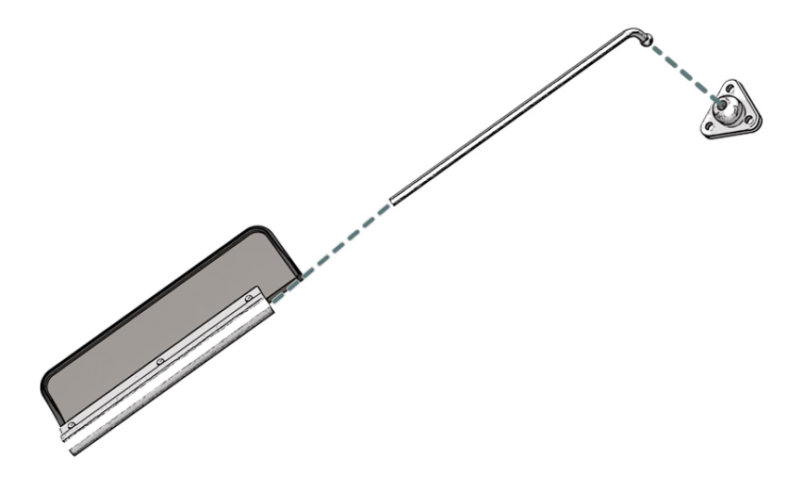
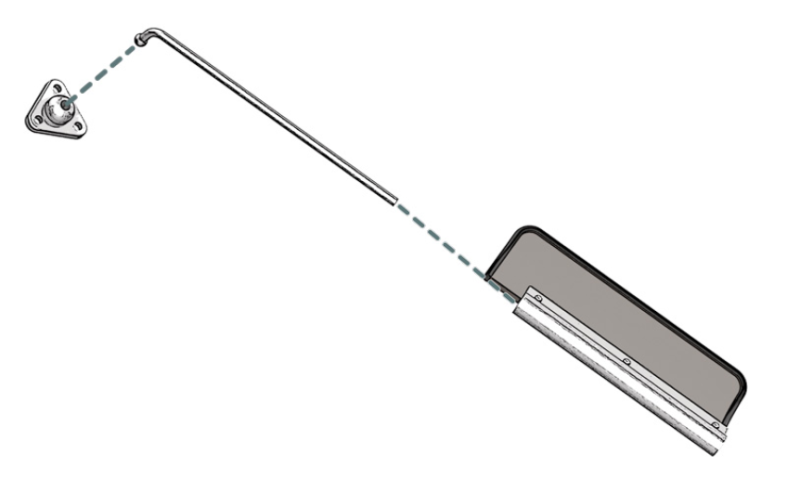
Engager la tige 70B dans le trou central du support 70A. Positionner le pare-soleil gauche 70C sur la tige 70B.

Etape 2
Engage the rod (70B) in the central opening of the support bracket (70A). Slide the left sun visor (70C) into the rod (70B).

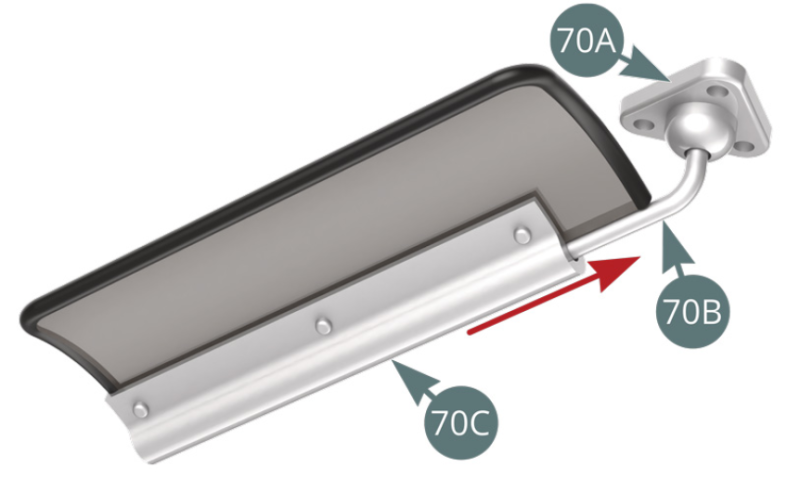
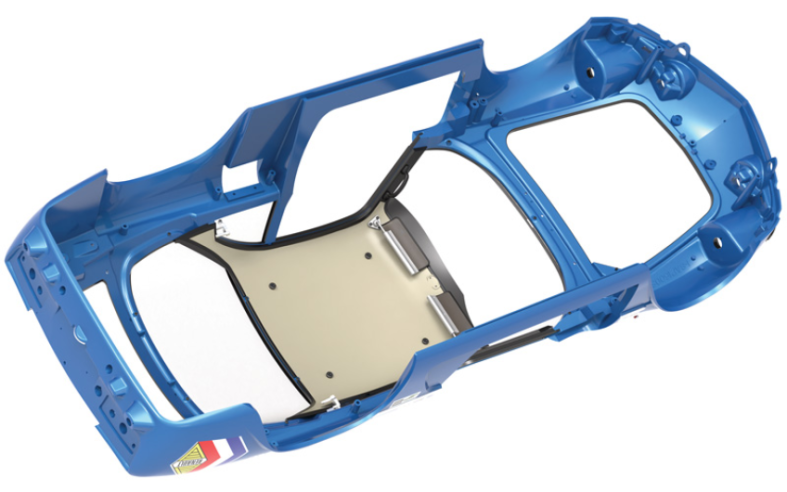
Positionner le support de pare-soleil gauche 70A à l’angle avant gauche du ciel de toit 69A, puis le fixer avec trois vis NP.

Schéma d’assemblage
Place the left sun visor support bracket (70A) at the left front corner of the roof lining (69A), then secure it with three NP screws.
Vue générale

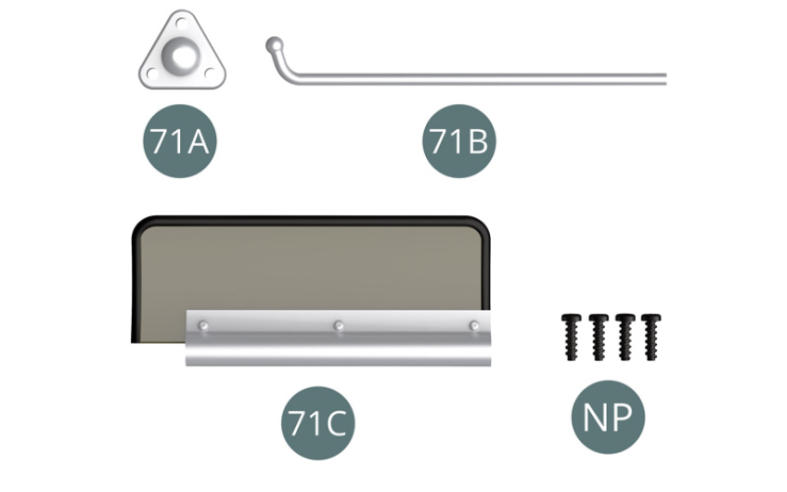
Kit 71 - Assemblage et montage du pare-soleil droit
Parts of kit

Etape 1
- 71C Right Sun visor
- Screw NP M 1.2 x 4 mm (x 4)
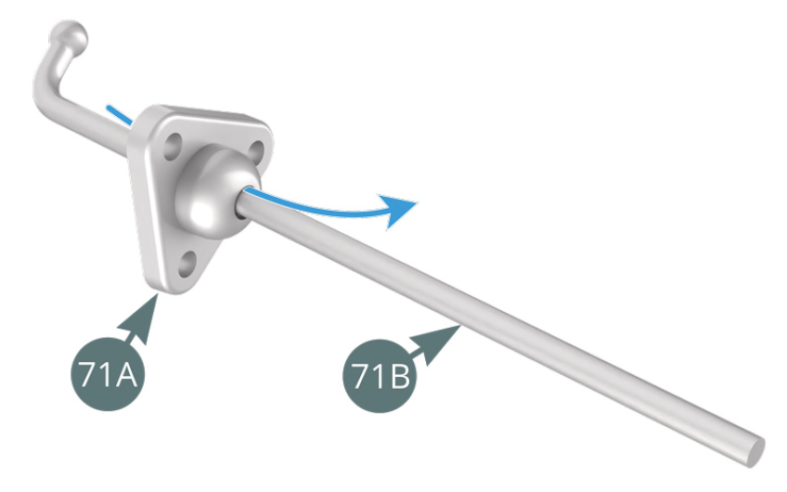
Engager la tige 71B dans le trou central du support 71A. Positionner le pare-soleil droit 71C sur la tige 71B.
Etape 2
Engage the rod (71B) in the central opening of the support bracket (71A). Slide the right sun visor (71C) into the rod (71B).


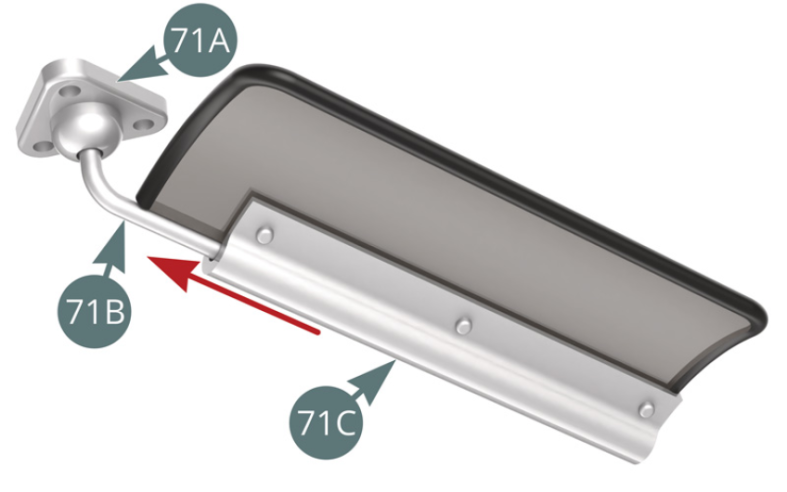
Positionner le support de pare-soleil droit 71A à l’angle avant droit du ciel de toit 69A, puis le fixer avec trois vis NP.
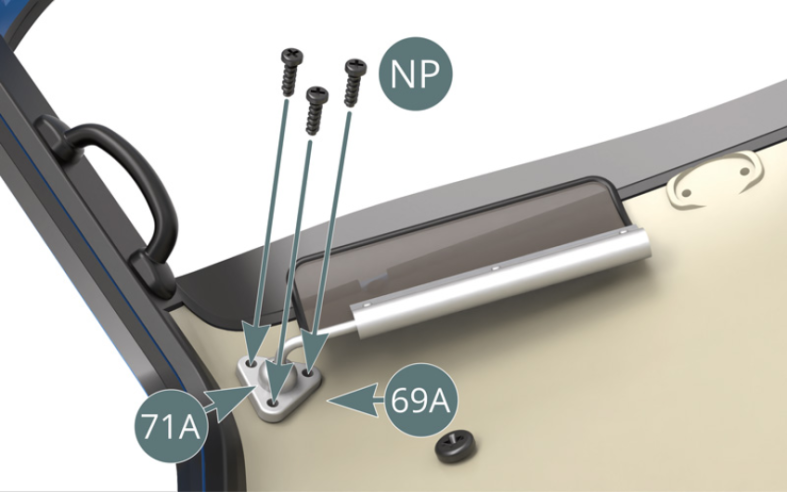
Schéma d’assemblage
Place the right sun visor support bracket (71A) at the right front corner of the roof lining (69A), then secure it with three NP screws.

Vue générale

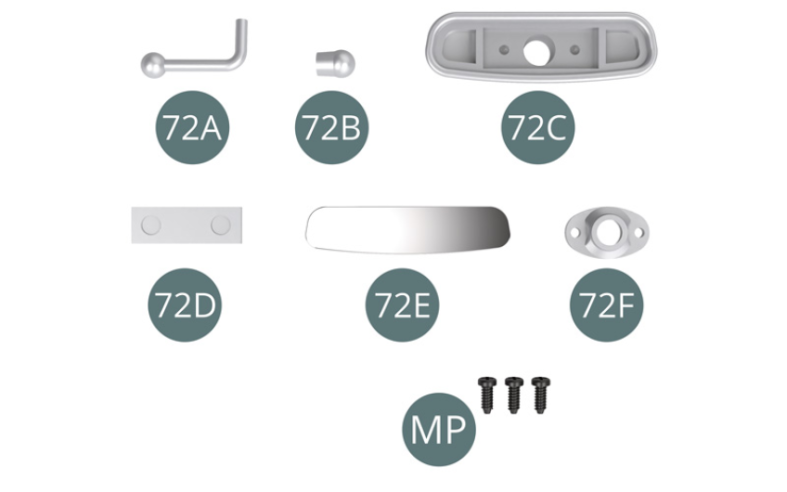
Kit 72 - Assemblage et montage du rétroviseur intérieur
Parts of kit
Etape 1
- 72E Rearview mirror
- 72F Mirror support
- Screw MP M 1.2 x 3 mm (x 3)
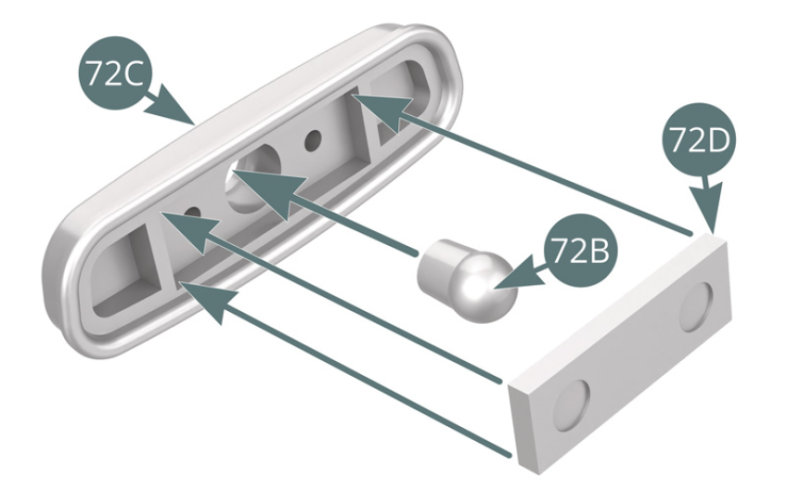
Positionner la rotule 72B dans le rétroviseur 72C, puis positionner la plaque de maintien 72D par au-dessus et dans le logement prévu sur le rétroviseur.

Etape 2
Place the ball joint (72B) into the mirror (72C), then place the support plate (72D) from above into the recess provided on the mirror.
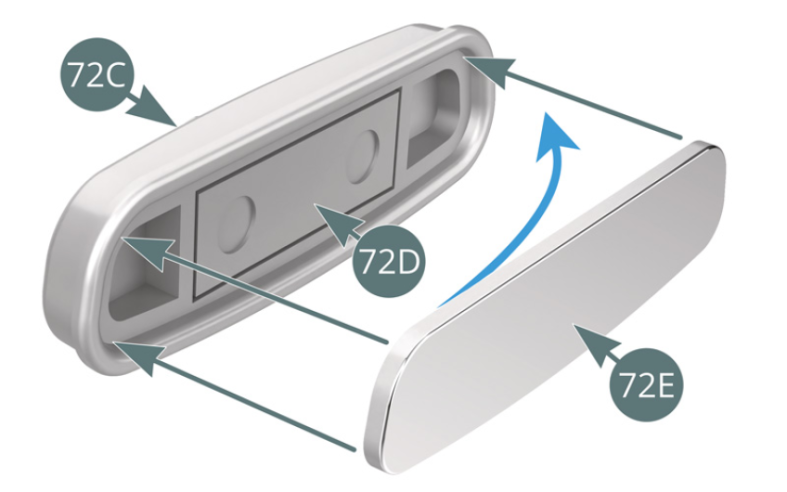
Détacher le papier support à l’arrière du miroir 72E (flèche bleue) et coller celui-ci sur le rétroviseur 72C.

Etape 3
Remove the backing paper from the back of the mirror (72E) (blue arrow) and affix it to the rearview mirror (72C).
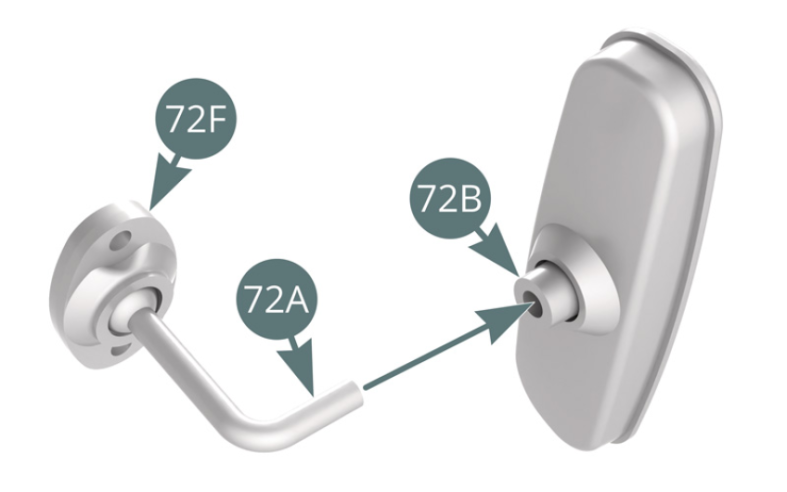
Engager le bras-pivot 72A dans le trou central du support de rétroviseur 72F.
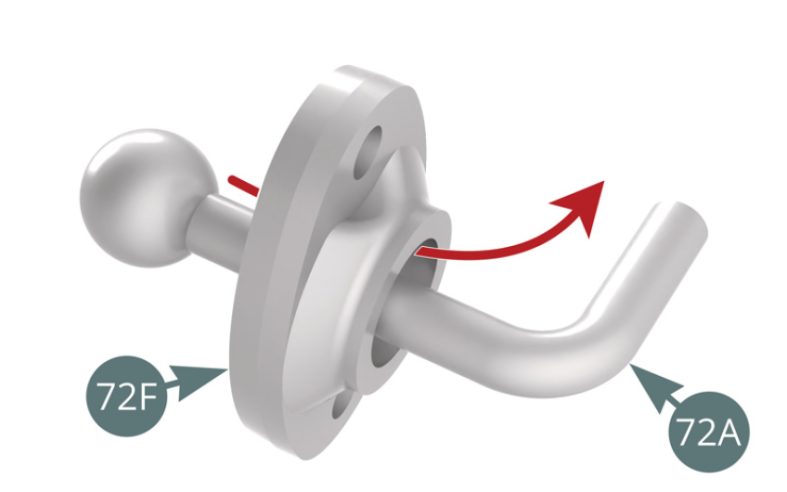
Etape 4
Engage the pivot arm (72A) into the center opening of the mirror support (72F).

Positionner le bras-pivot 72A dans la rotule 72B.

Etape 5
Place the pivot arm (72A) into the ball joint (72B).
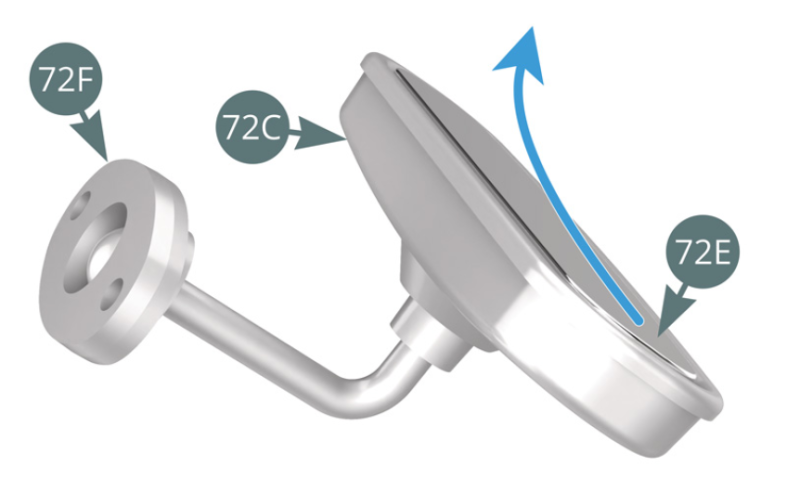
Détacher le film protecteur transparent du miroir de rétroviseur 72E (flèche bleue).

Etape 6
Remove the transparent protective film from the rear-view mirror (72E) (blue arrow).
Positionner le support de rétroviseur 72F sur le ciel de toit 69A, puis le fixer avec deux vis MP.
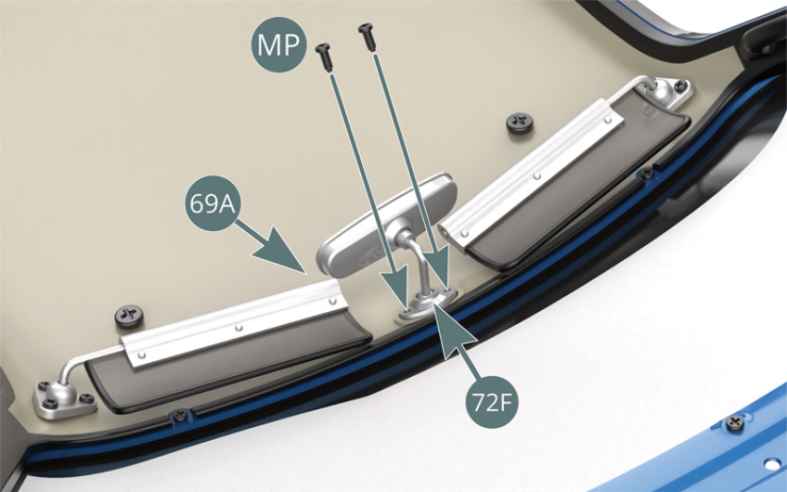
Schéma d’assemblage
Position the mirror support (72F) on the roof lining (69A), then secure it with two MP screws.

Vue générale