English
 français
 Deutsch
 español
 italiano
 português


Box 21
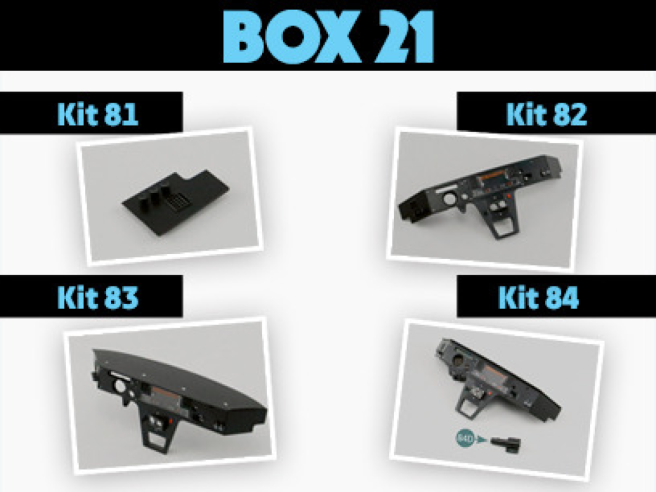
Kit 81 - Panneau latéral gauche du tableau de bord
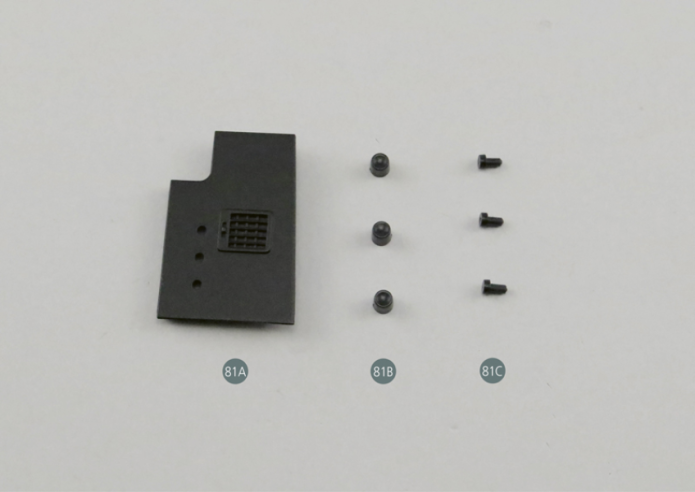
Parts of kit
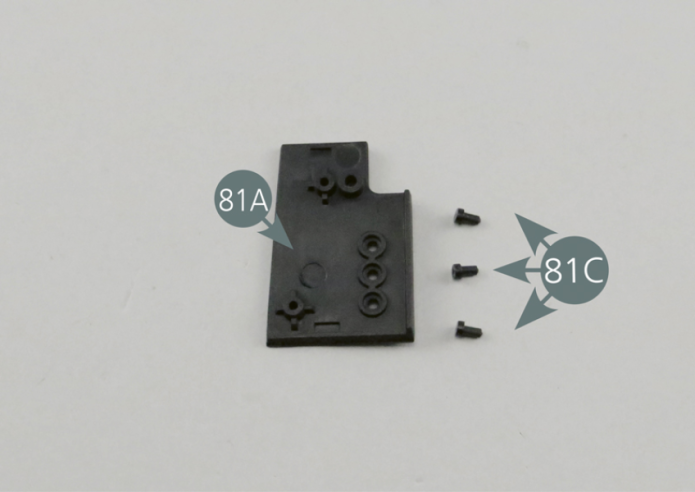
- 81A Panneau latéral gauche du tableau de bord
- 81B Interrupteur (x 3)
- 81C Attache d’interrupteur (x 3)
Etape 1
- 81C Switch clip (x 3)

Prendre le panneau latéral gauche du tableau de bord 81A et le placer face interne tournée vers le haut.
Etape 2
Take the left side panel of the dashboard (81A) and place it with the inside facing upwards.

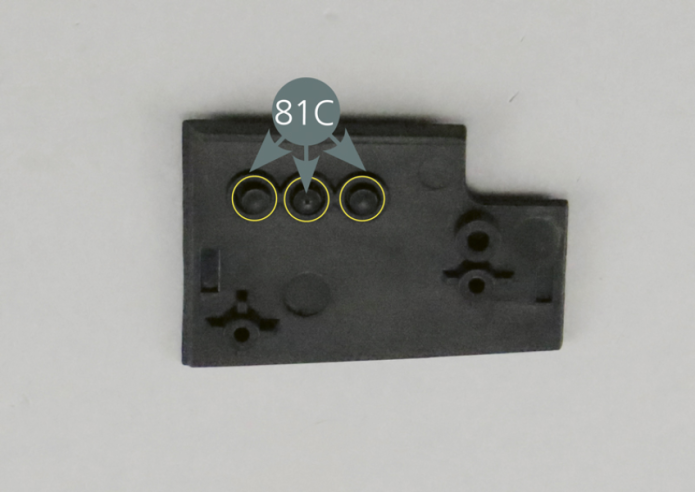
Engager les trois attaches d’interrupteur 81C dans les logements comme indiqué sur la photo.

Etape 3
Engage the three switch clips (81C) into the slots as shown in the photo.
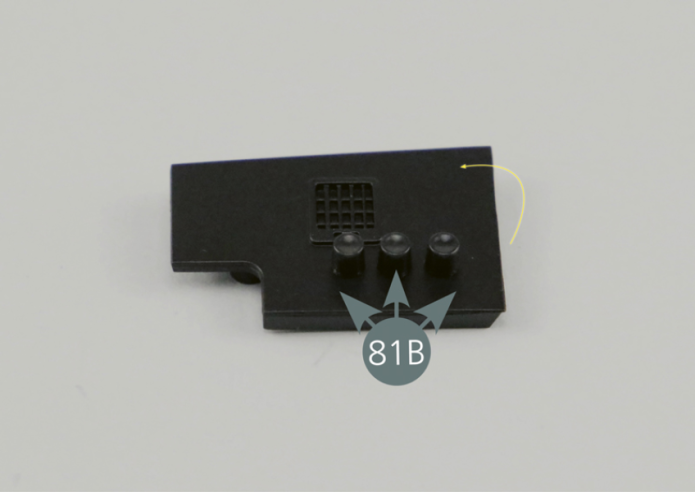
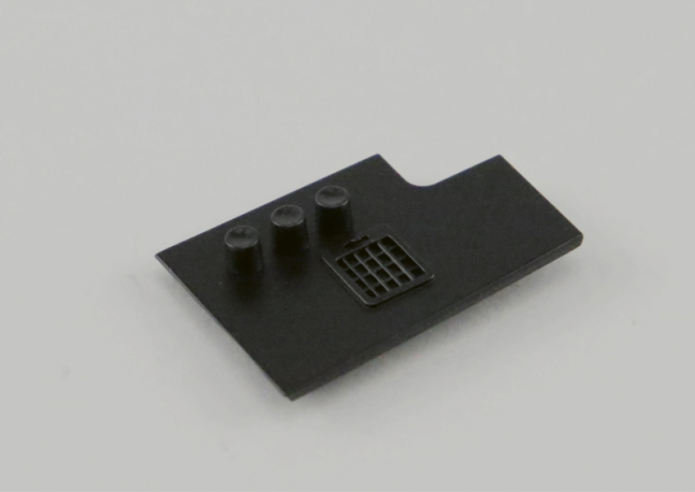
Retourner le panneau 81A et positionner les trois interrupteurs 81B sur les trois attaches 81C.
Vue générale
Flip the panel (81A) and place the three switches (81B) on the three clips (81C).
Kit 82 - Panneau du tableau de bord (2)
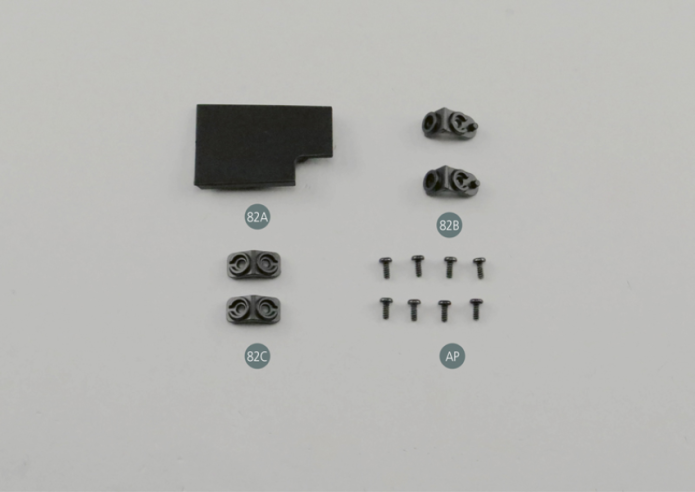
Parts of kit

Etape 1
- 82C Side fastener (x 2)
- Screw AP P 1.7 x 4 mm (x 8)
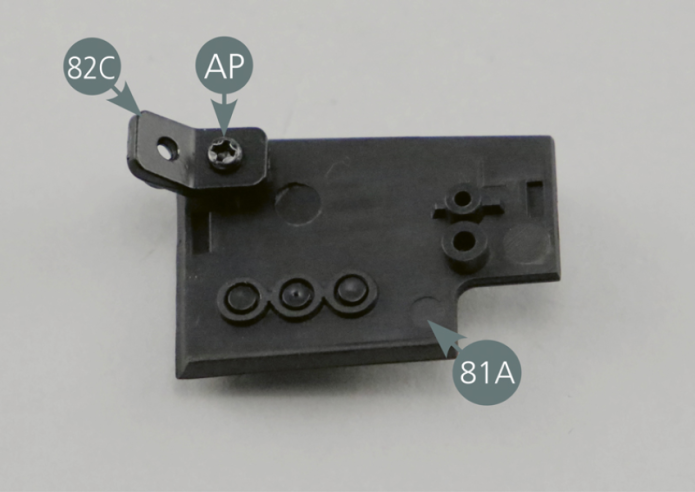
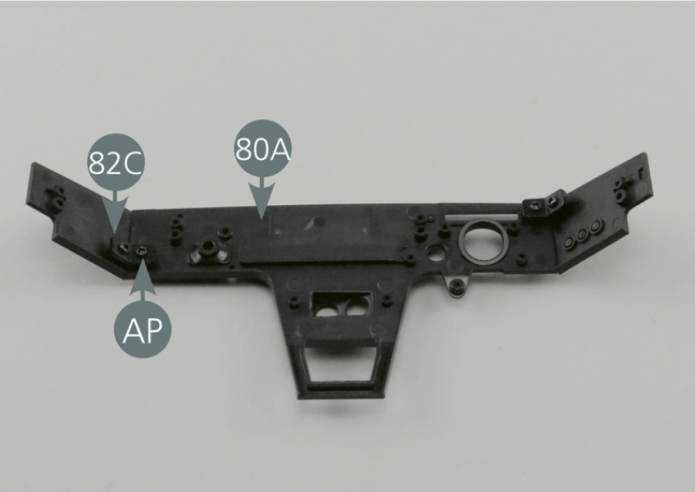
Prendre le panneau latéral gauche 81A et le placer face interne tournée vers le haut. Positionner une attache 82C sur le coin supérieur et le fixer avec une vis AP. Positionner ensuite le panneau latéral gauche 81A sur le côté du panneau du tableau de bord 80A et le fixer avec une deuxième vis AP.

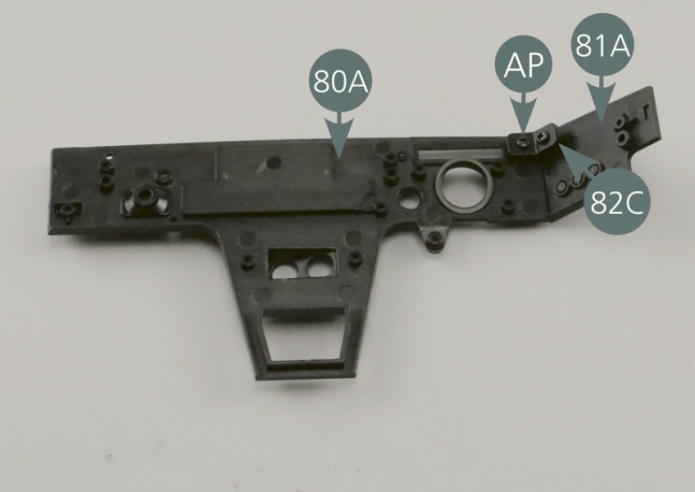
Etape 2
Take the left panel (81A) and place it with the inside facing upwards. Place a fastener (82C) on the upper corner and secure with an AP screw. Then place the left panel (81A) on the side of the dashboard panel (80A) and secure it with a second AP screw.

Prendre le panneau latéral droit 82A et le placer face interne tournée vers le haut. Positionner une attache 82C sur le coin inférieur et le fixer avec une vis AP. Positionner ensuite le panneau latéral droit 82A sur le côté du panneau du tableau de bord 80A et le fixer avec une deuxième vis AP.
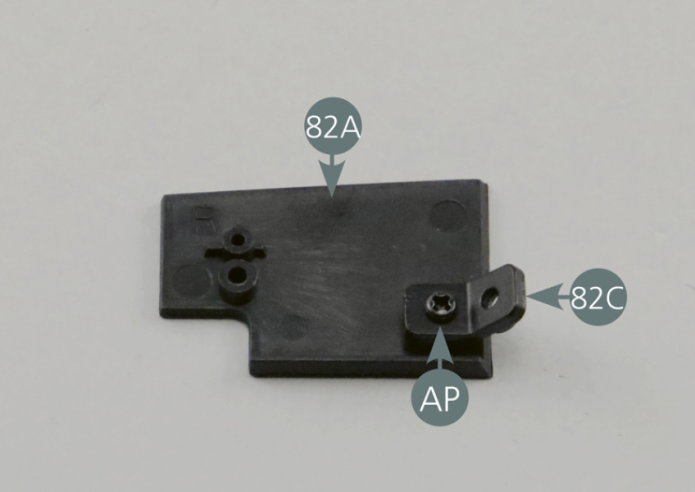

Etape 3
Take the right panel (82A) and place it with the inside facing upwards. Place a fastener (82C) on the lower corner and secure with an AP screw. Then position the right panel (82A) on the side of the dashboard panel (80A) and secure it with a second AP screw.

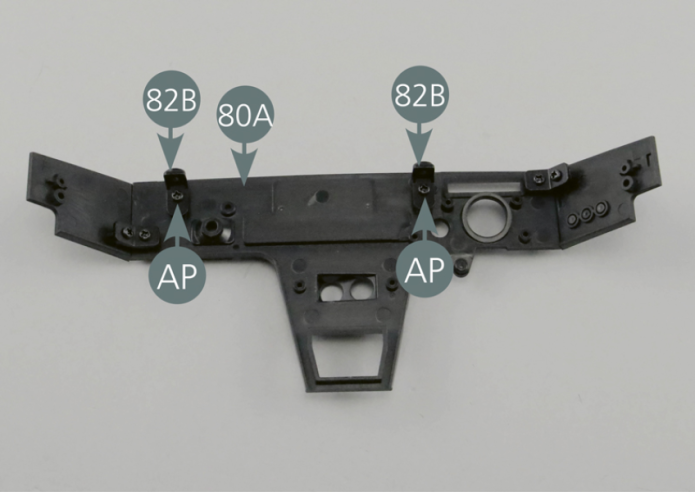
Maintenez le panneau du tableau de bord 80A avec la face interne tournée vers le haut. Positionnez les deux attaches 82B près du bord supérieur comme indiqué sur la photo et les fixez avec deux vis AP.
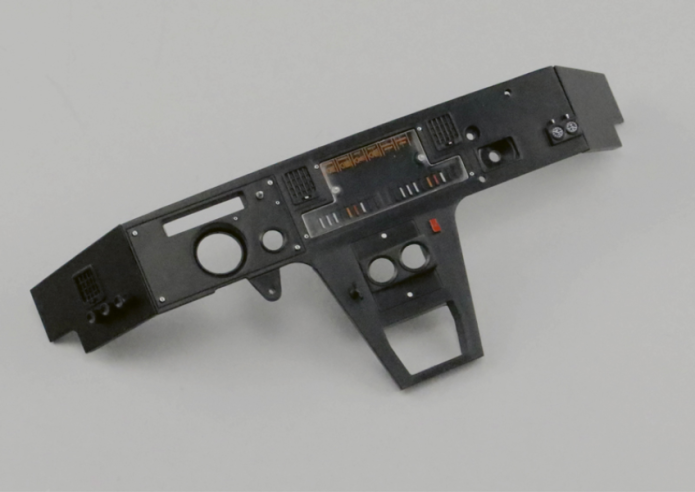
Vue générale
Hold the dashboard panel (80A) with the inside side facing up. Position the two fasteners (82B) near the top edge as shown in the photo and secure with two AP screws.

Kit 83 - Panneau du tableau de bord (3)
Parts of kit
Etape 1
- Screw AP P 1.7 x 4 mm (x 5)
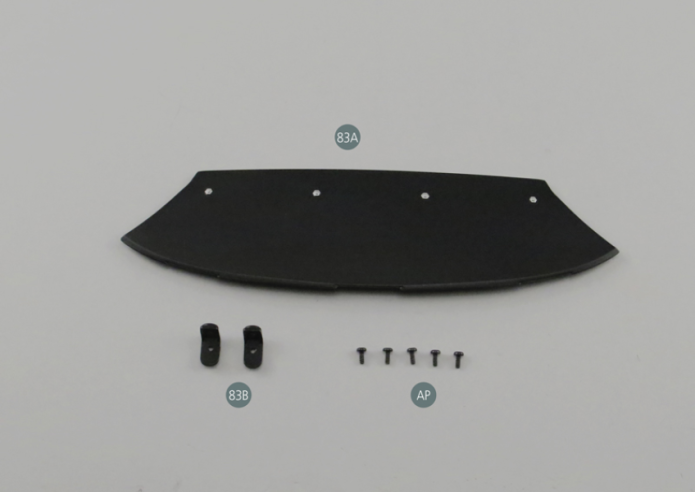
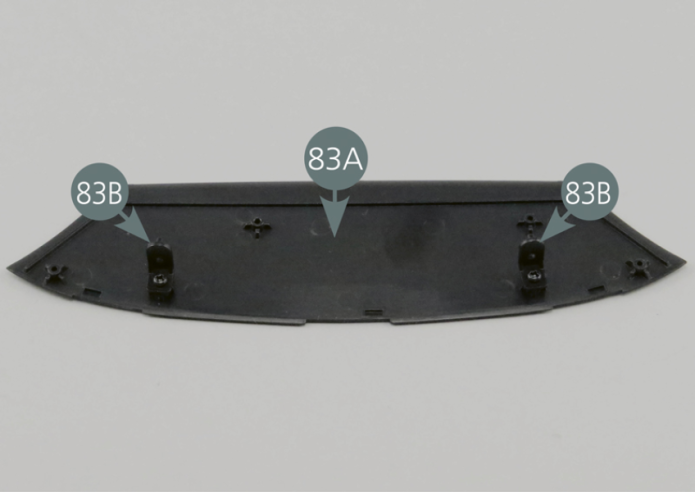
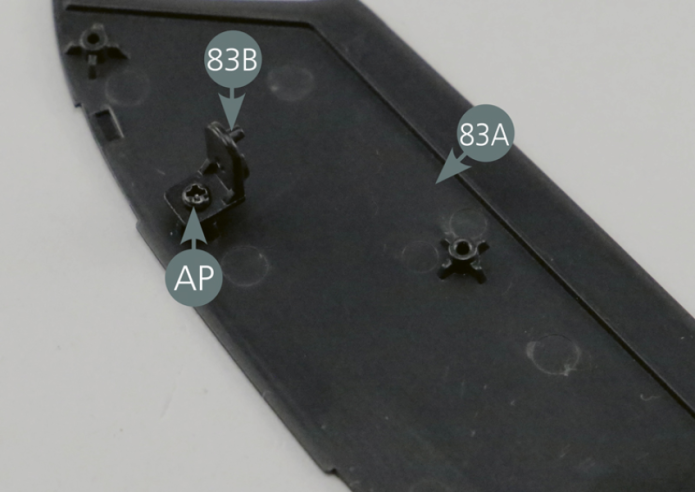
Prendre le panneau supérieur 83A et le placer face interne tournée vers le haut. Positionner des attaches 83B, par le côté le plus court, sur les logements du panneau supérieur et les fixer avec une vis AP.


Etape 2
Take the top panel (83A) and place it with the inside facing upwards. Position fasteners (83B), short side, on the upper panel housings and secure with an AP screw.
Positionner l’ensemble du tableau de bord du montage 82 sur le panneau 83A, en engageant les extrémités des attaches 82B dans les logements correspondants. Puis fixer les attaches avec deux vis AP.
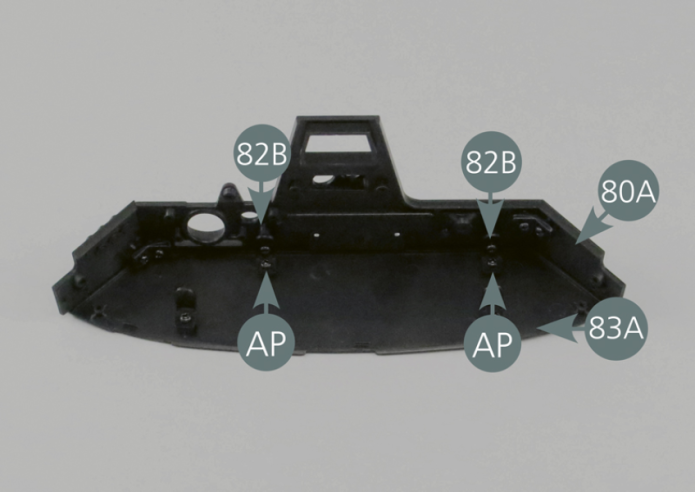
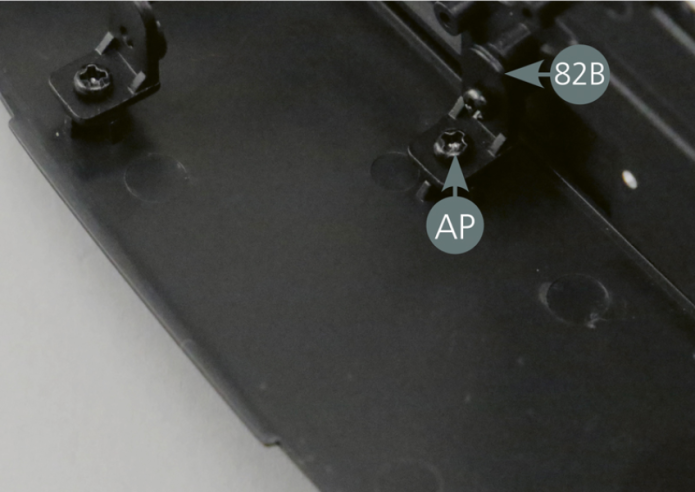
Position the entire dashboard assembly 82 on the panel (83A), engaging the ends of the fasteners (82B) in the corresponding housings. Then secure the clips with two AP screws.

Vue générale


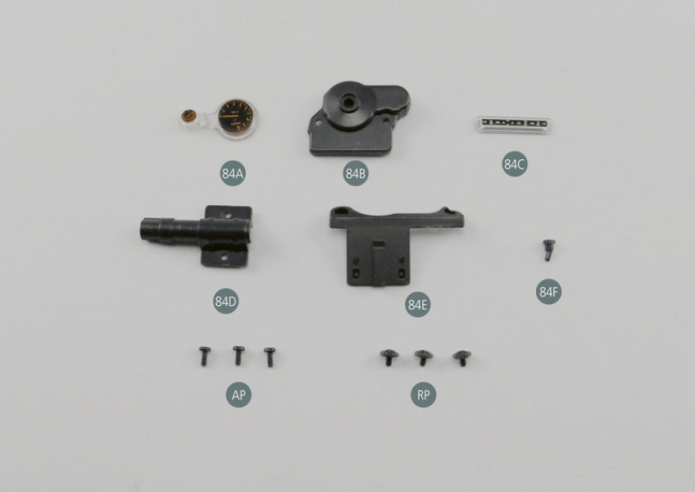
Kit 84 - Panneau du tableau de bord (4)
Parts of kit
Etape 1
- 84E Lower dashboard panel plate
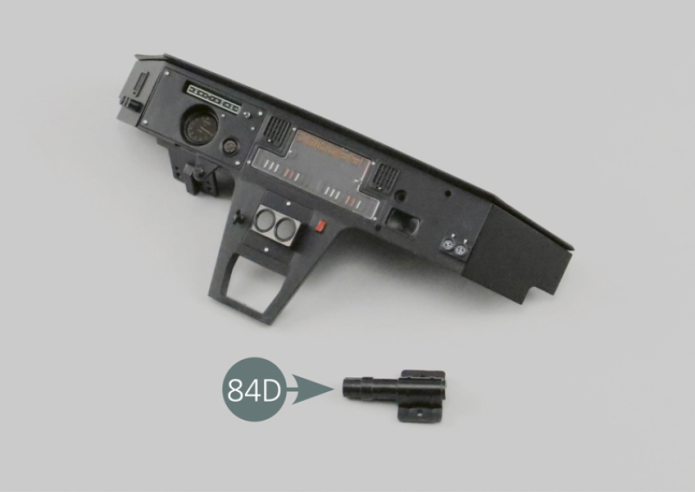
- 84F Dashboard button
- Screw AP 1.7 x 4 mm (x 3)
- Flat head screw RP 1.7 x 3.5 mm (x 3)
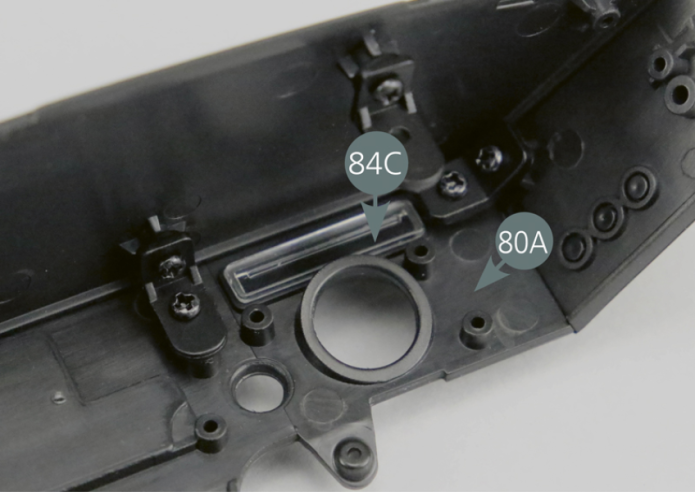
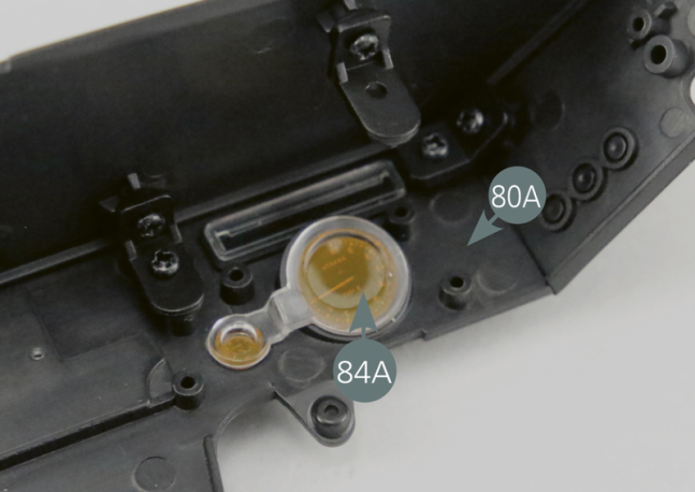
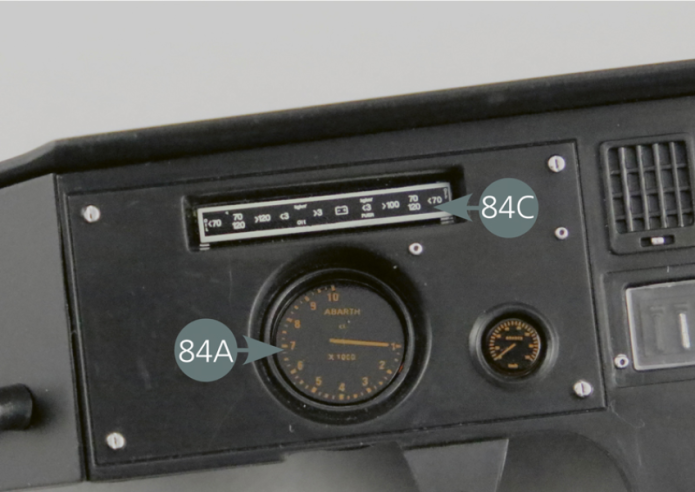
Positionner la barrette de témoins indicateurs 84C dans le logement prévu sur le panneau du tableau de bord 80A. Vérifier l’orientation correcte de la barrette (photo step 2). Positionner ensuite la jauge et le compte-tours 84A.


Etape 2
Position the indicator light strip (84C) in the slot provided on the dashboard panel (80A). Check the correct orientation of the bar (photo step 2). Then position the indicator and the rev counter (84A).
Positionner le cache arrière de la jauge 84B sur le panneau du tableau de bord et le fixer avec deux vis AP. Vérifier le montage final en retournant la face avant du panneau du tableau de bord.
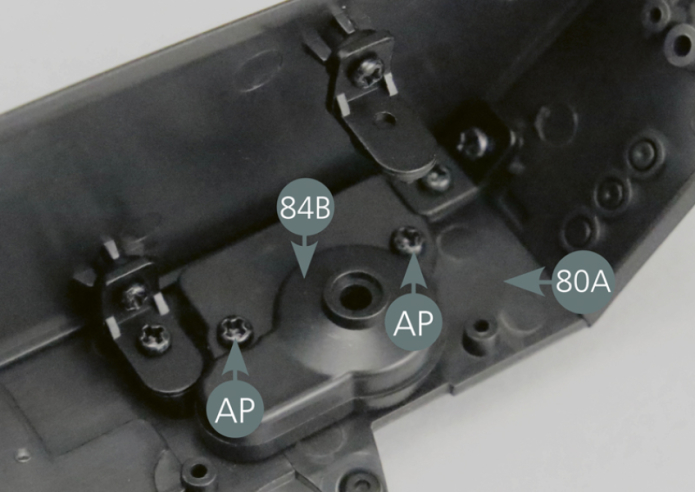

Etape 3
Place the rear indicator cover (84B) on the dashboard panel and secure with two AP screws. Check the final assembly by turning the front of the dashboard panel over.

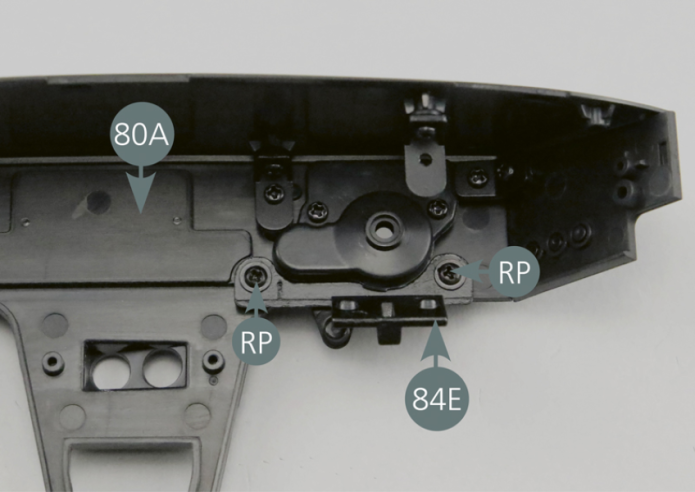
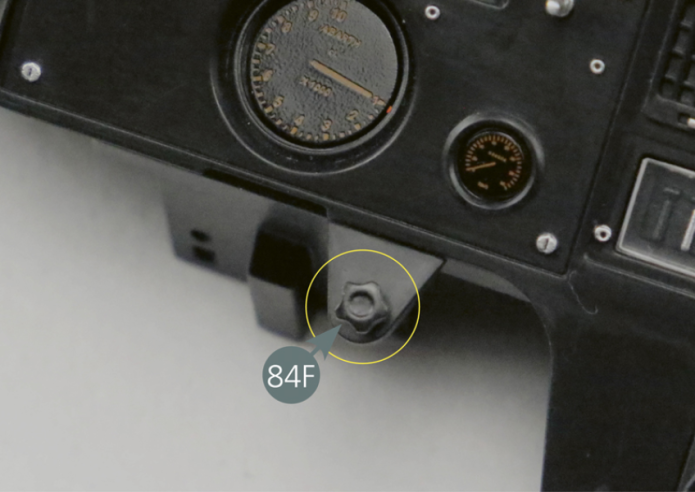
Positionner la plaque inférieure du tableau de bord 84E sur la face arrière du panneau du tableau de bord comme indiqué sur la photo et la fixer avec deux vis RP. Positionner le bouton 84F sur le tableau de bord comme indiqué.

Vue générale
Position the lower dashboard panel plate (84E) on the rear of the dashboard panel as shown in the photo and secure it with two RP screws. Position the button (84F) on the dashboard as per picture.