English
 français
 Deutsch
 español
 italiano
 português


Box 20
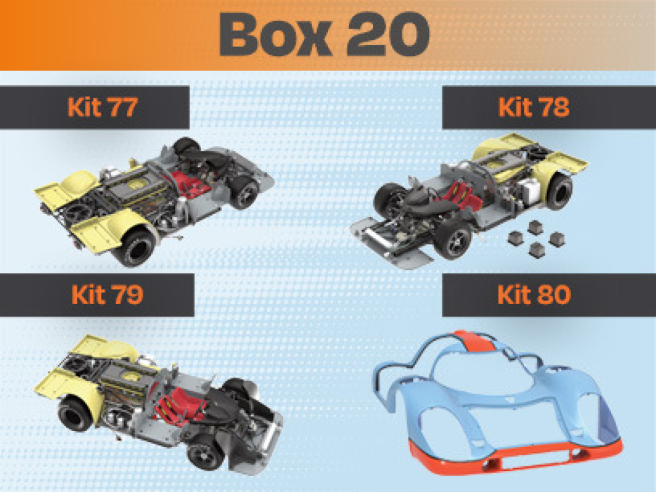
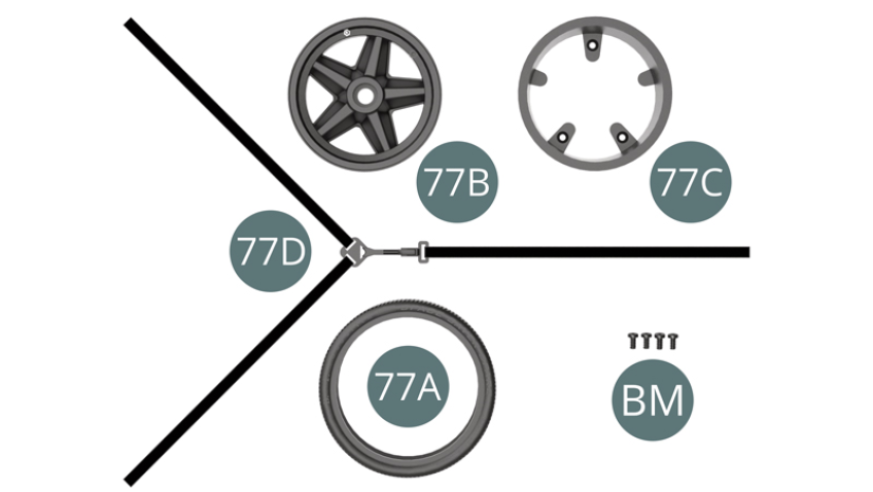
Kit 77
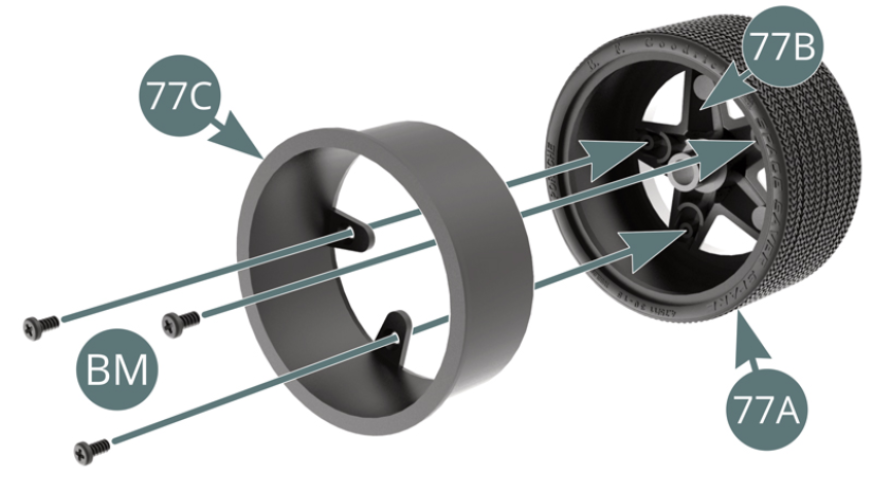
Parts of kit
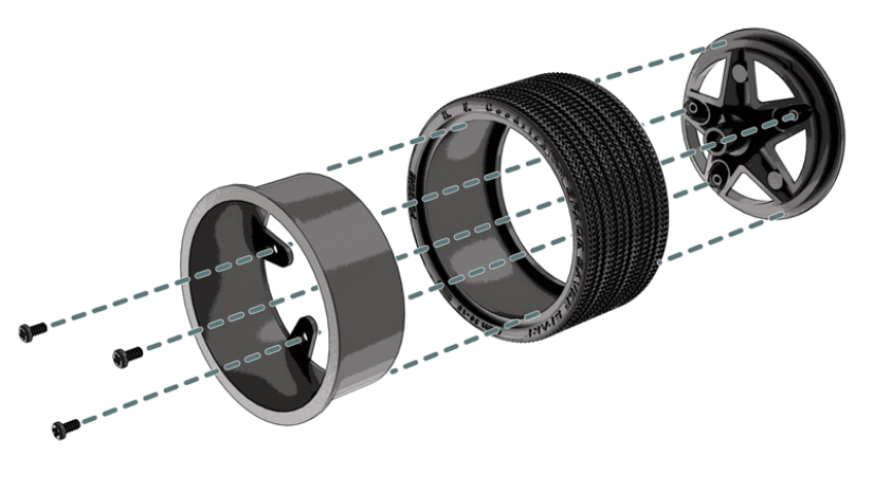
- 77A Spare tyre
- 77B Outer rim
- 77C Inner rim
- 77D Spare wheel strap
- BM Screw M 2.0 x 4 mm (x 4)
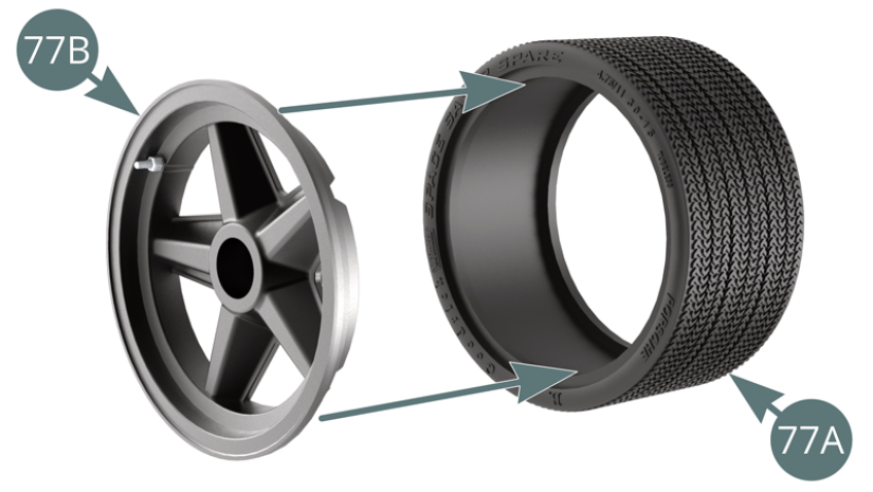
Step 1
Position the outer wheel rim (77B) into the spare tyre (77A). Position the inner wheel rim (77C) into the spare tyre (77A), aligning it with the outer rim (77B) and secure it with three BM screws.
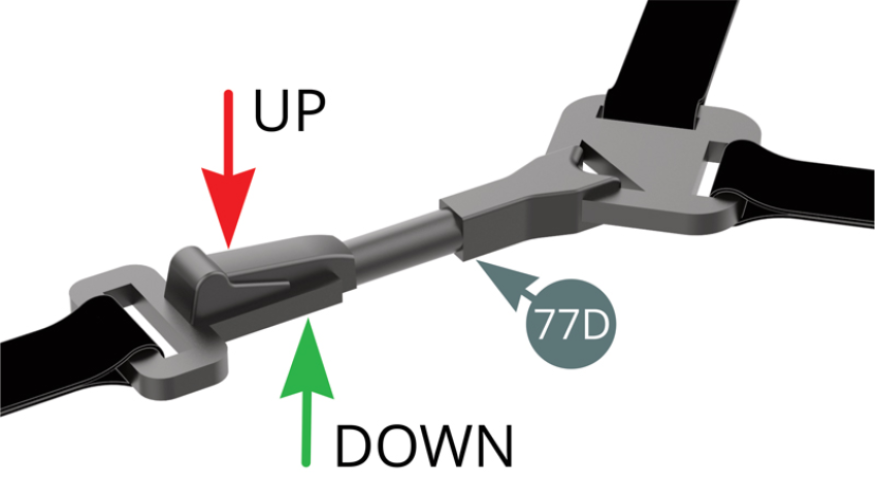
Step 2
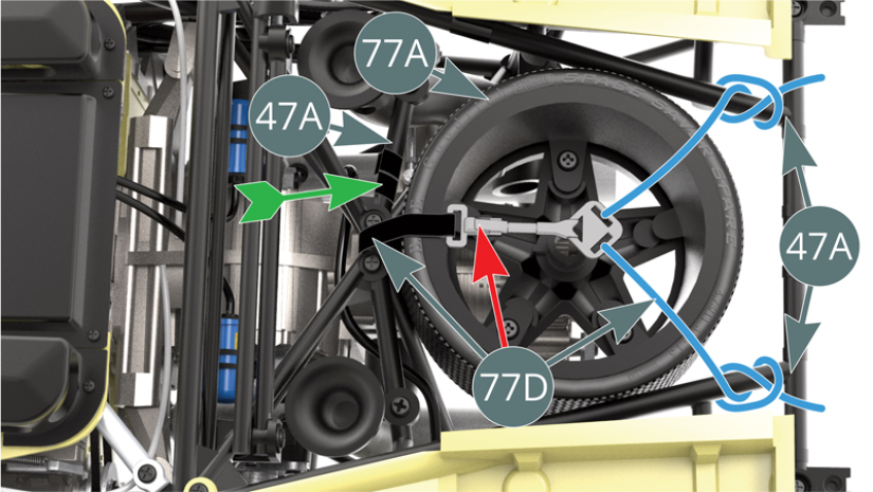
Check that the quick release lever is pointing upwards when the spare wheel strap (77D) will be attached on top of the spare wheel. Lay the spare wheel strap (77D) backwards with the quick release lever pointing downwards (green arrow) also see the following illustration. Tie the spare wheel strap (77D) to the upper frame bar (47A) - do not tighten the knot fully at this time. Mark the place for the spare wheel on the reinforcement frame (45A).
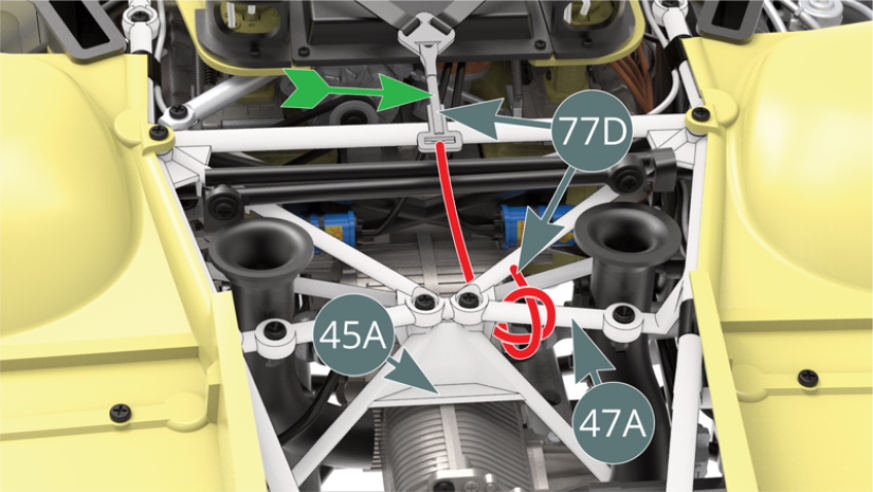
Step 3
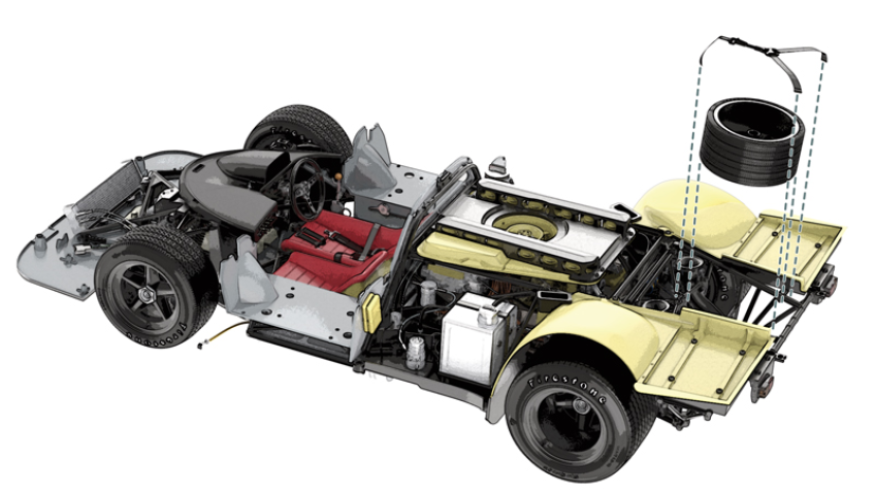
Position the spare wheel on the reinforcement frame (45A) and between the two upper frame bars (47A).
Tilt the spare wheel strap (77D) over the spare tyre (77A), with the quick release lever now pointing upwards - red arrow. Adjust the tightness of the knot on the upper frame bar (47A) - green arrow. Finish securing the spare wheel by tying the two free ends - shown in blue - of the spare wheel strap (77D) to the upper frame bars.
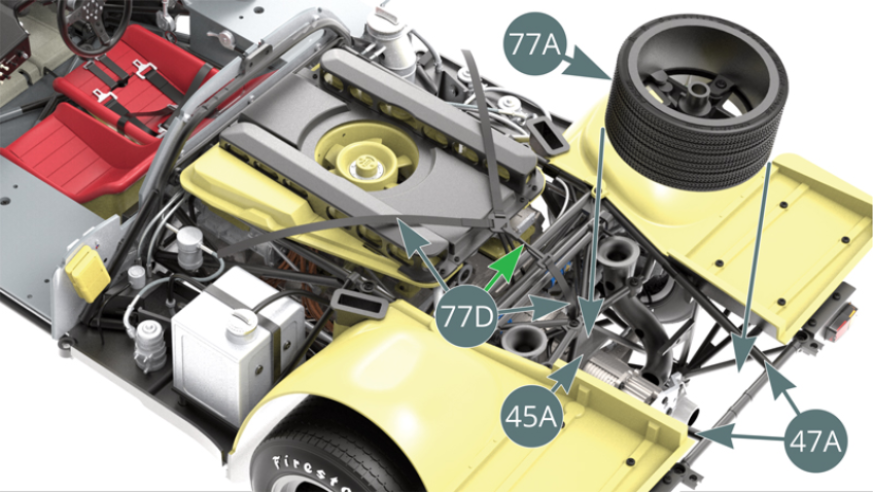
Step 4
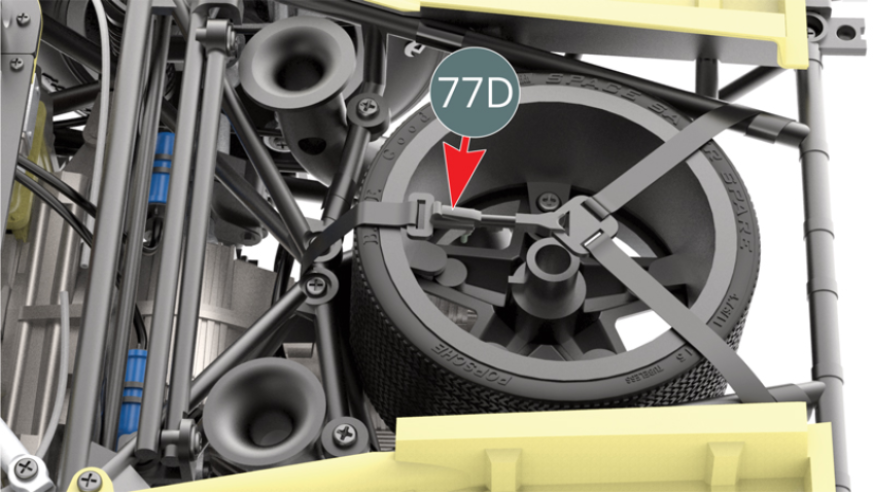
The spare wheel is secured with the spare wheel strap (77D) on top.
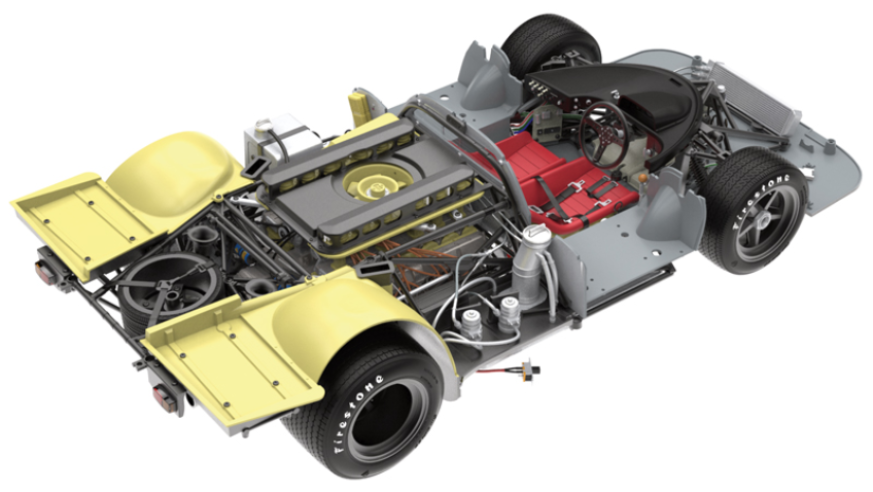
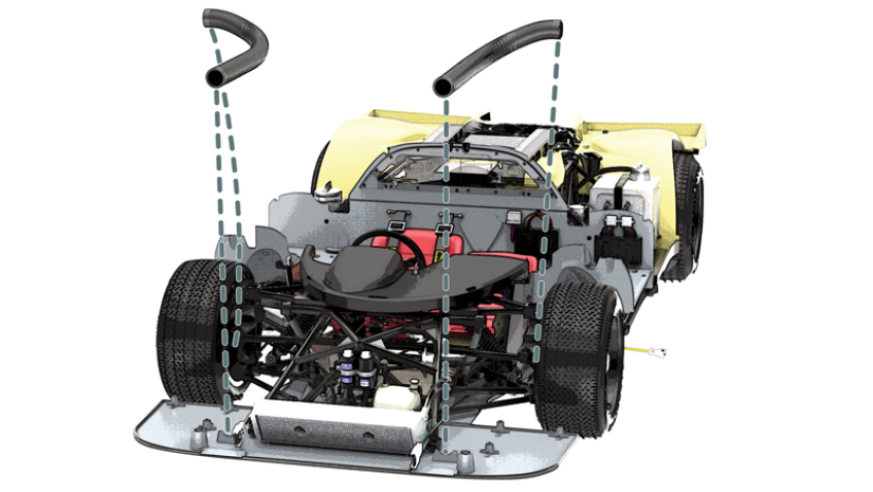
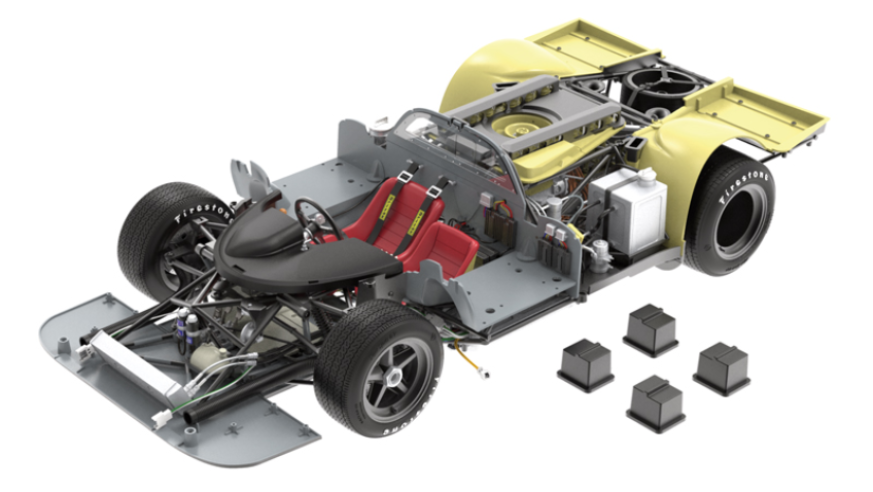
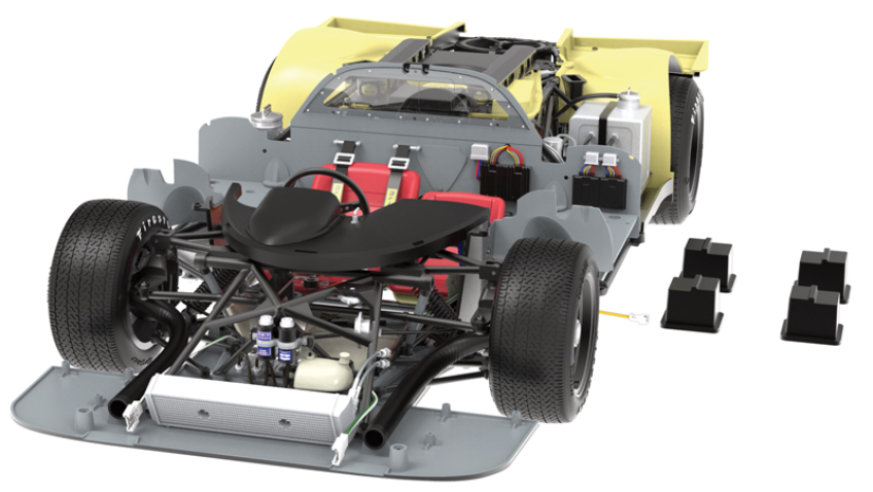
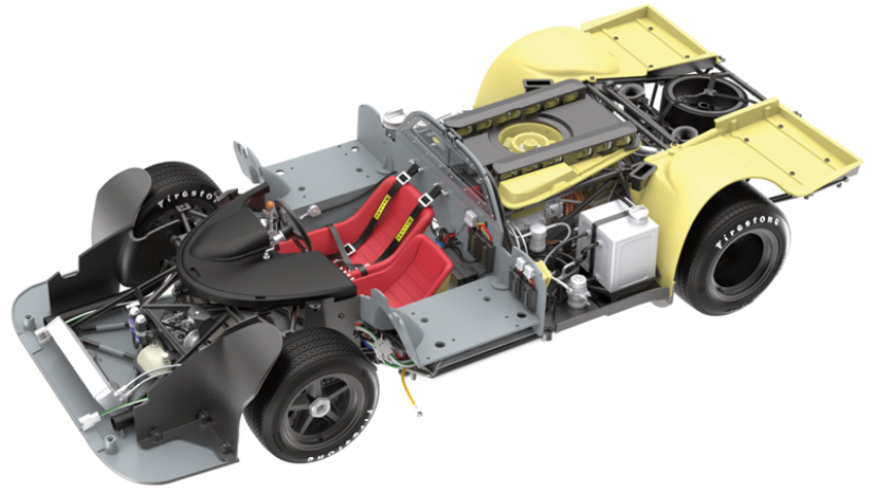
ASSEMBLY DIAGRAM
GENERAL VIEW
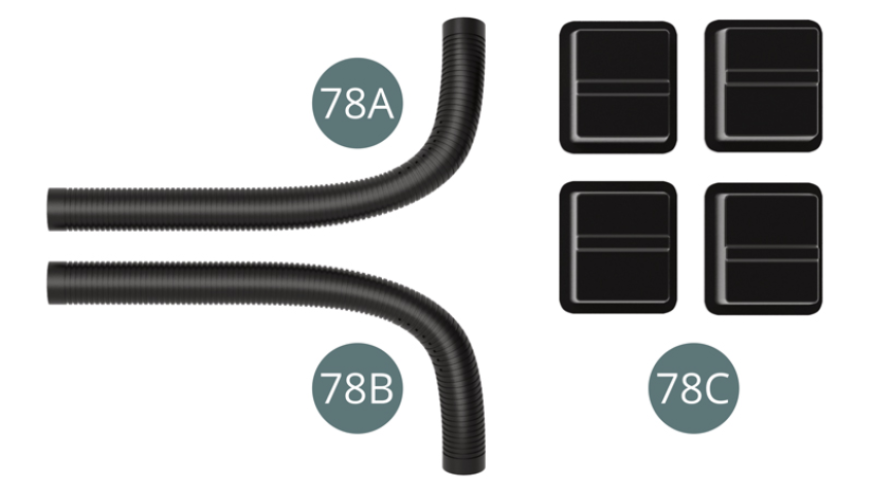
Kit 78
Parts of kit
- 78A Front left brake cooling jacket
- 78B Front right brake cooling jacket
- 78C Brake Support (x 4)
Step 1
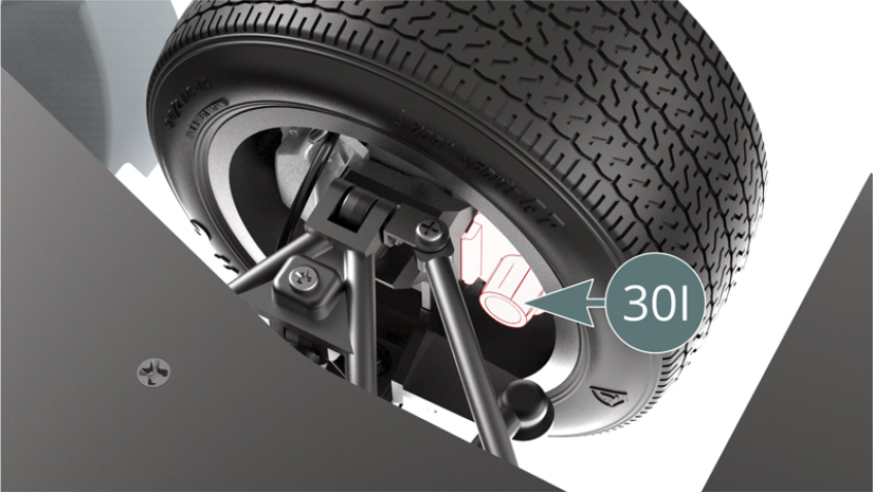
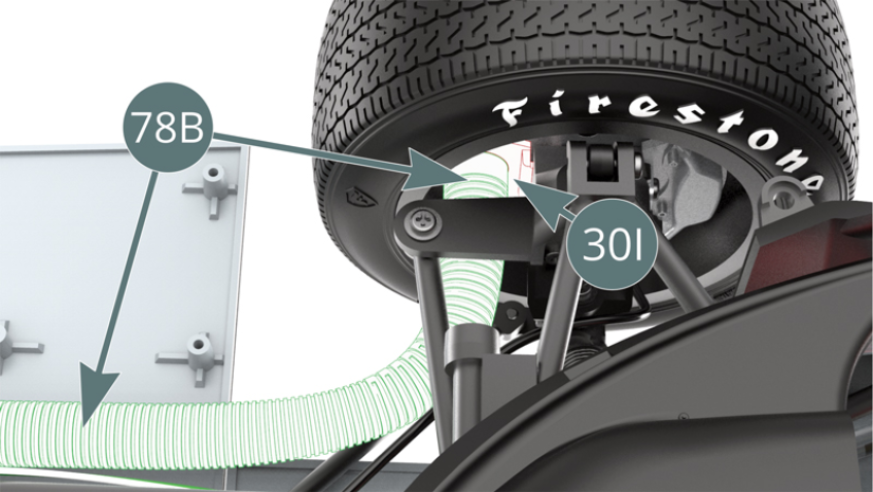
Locate the air intake on the right brake bailer (30I) - seen here from below - located in the right front wheel.
Position the right brake cooling jacket (78B) over the air intake on the right brake bailer (30I) - seen here from above.
Step 2
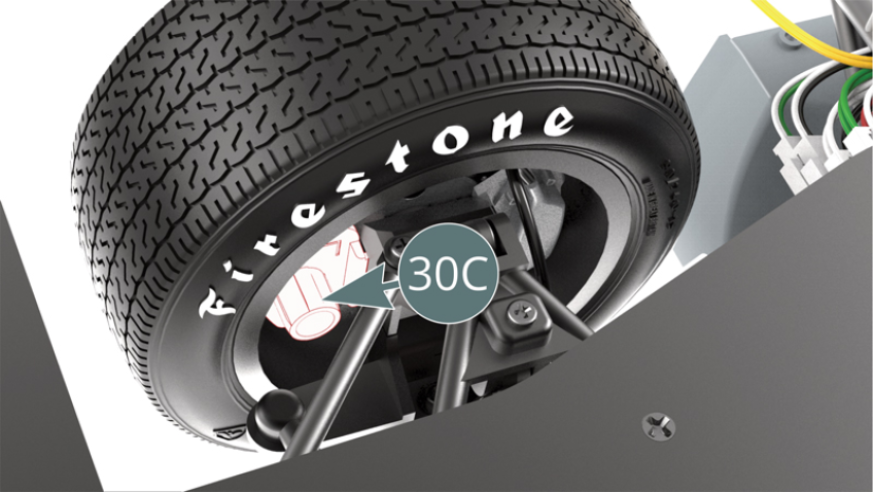
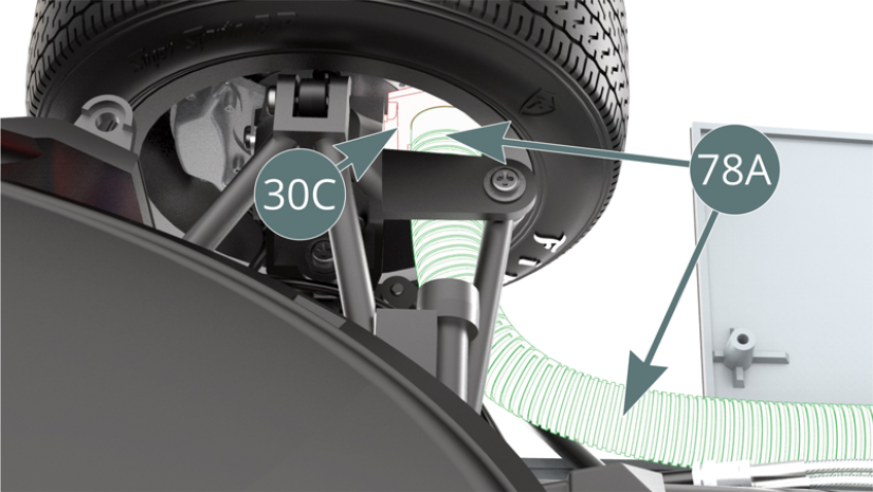
Locate the air intake on the left brake scoop (30C) - seen here from below - located in the left front wheel.
Position the left brake cooling jacket (78A) over the air intake on the left brake scoop (30C) - seen here from above.
Step 3
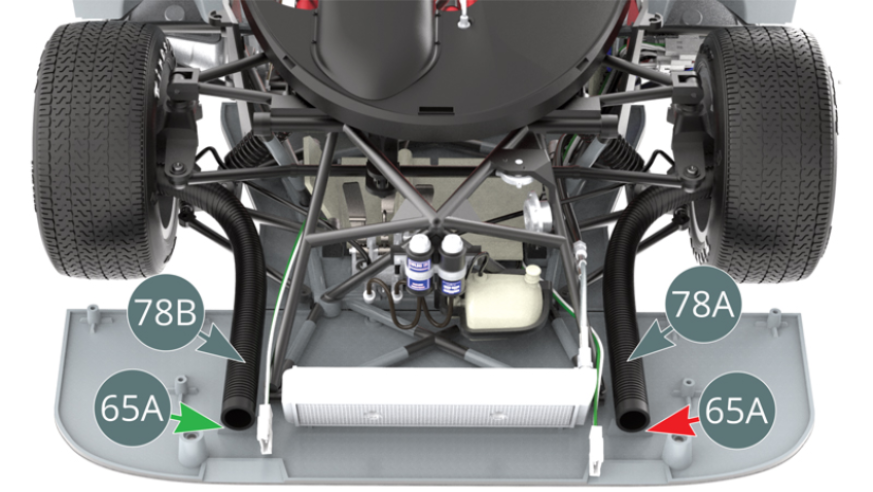
Adjust the right (78B) and left (78A) brake cooling jackets so that they rest in the right (green arrow) and left (red arrow) slots respectively at the front of the flat front floor (65A).
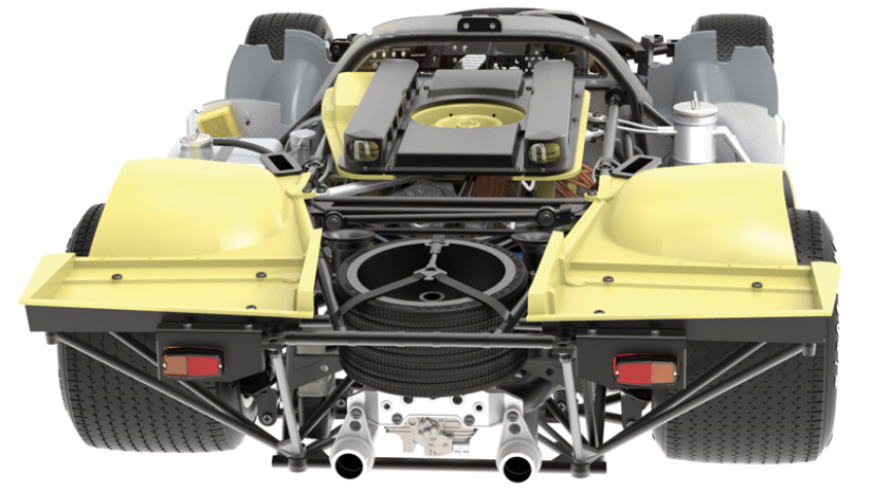
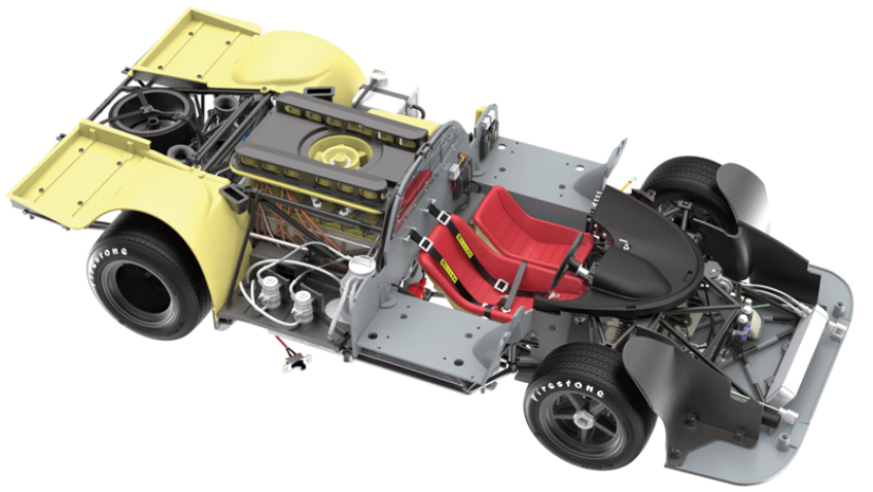
ASSEMBLY DIAGRAM
GENERAL VIEW
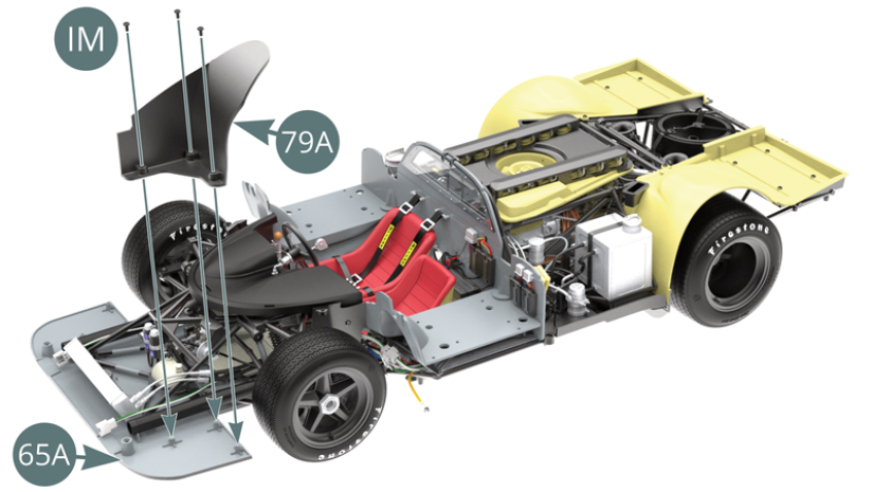
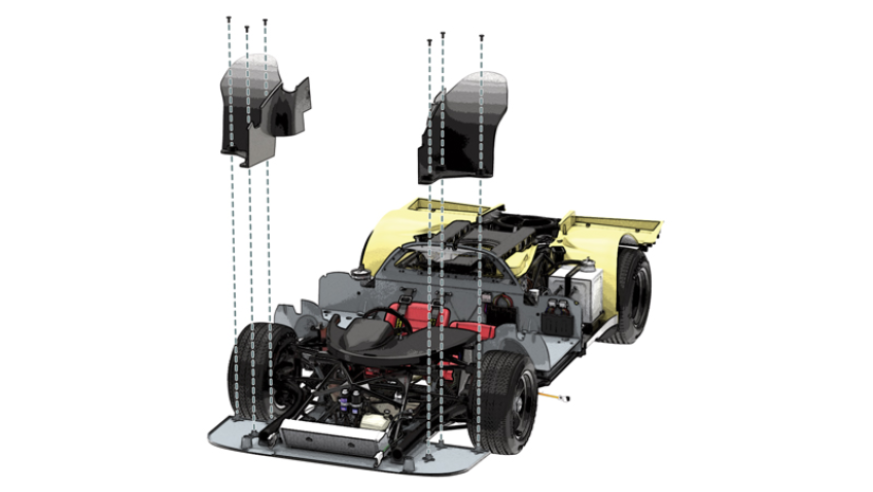
Kit 79
Parts of kit
- 79A Wheel arch, left
- 79B Wheel arch, right
- I Screw M 1.7 x 3.5 mm (x 8)
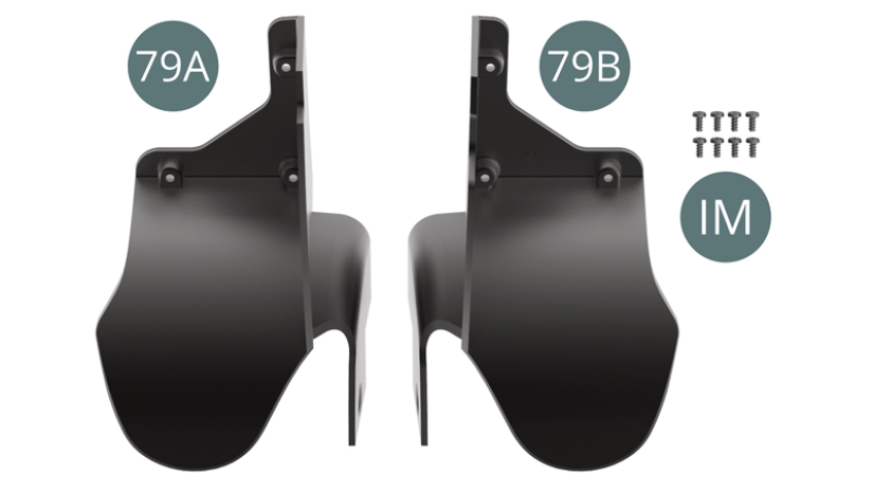
Step 1
Position the left wheel arch (79A) on the front flat floor (65A) and fix it with three IM screws. Position the right wheel arch (79B) on the front flat floor (65A) and secure with three IM screws.
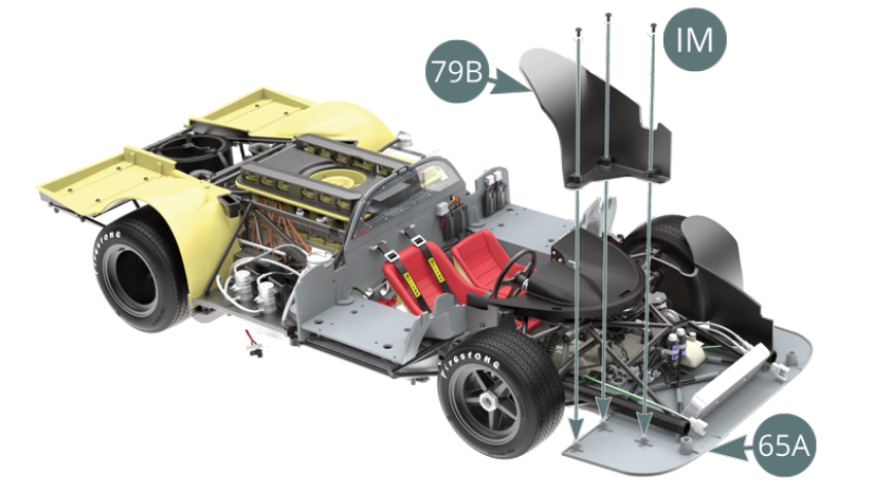
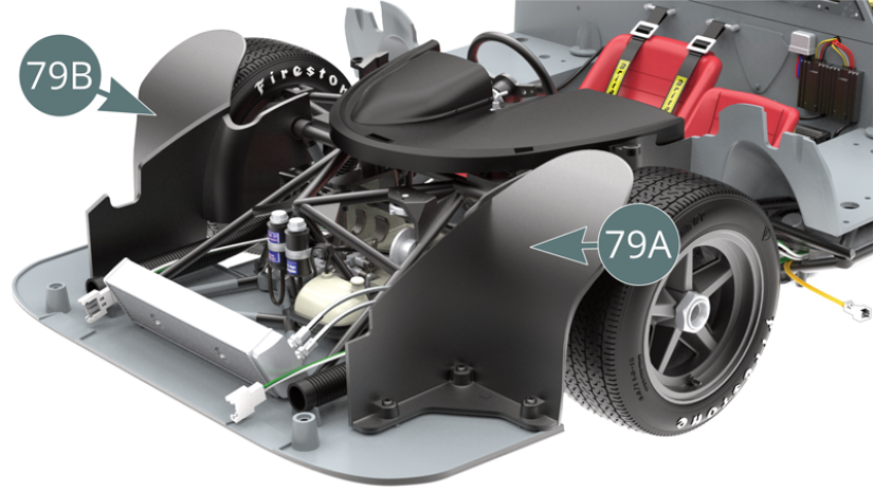
Step 2
The right (79B) and left (79A) wheel arches are attached to the frame.
ASSEMBLY DIAGRAM
GENERAL VIEW
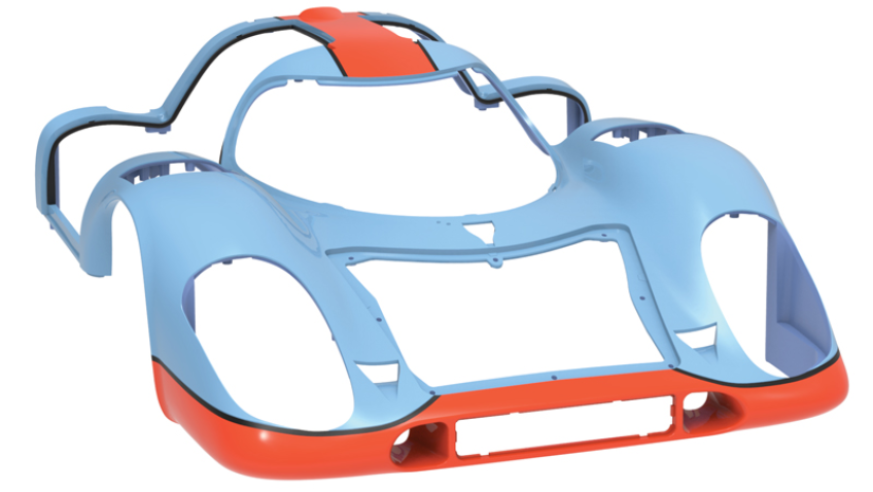
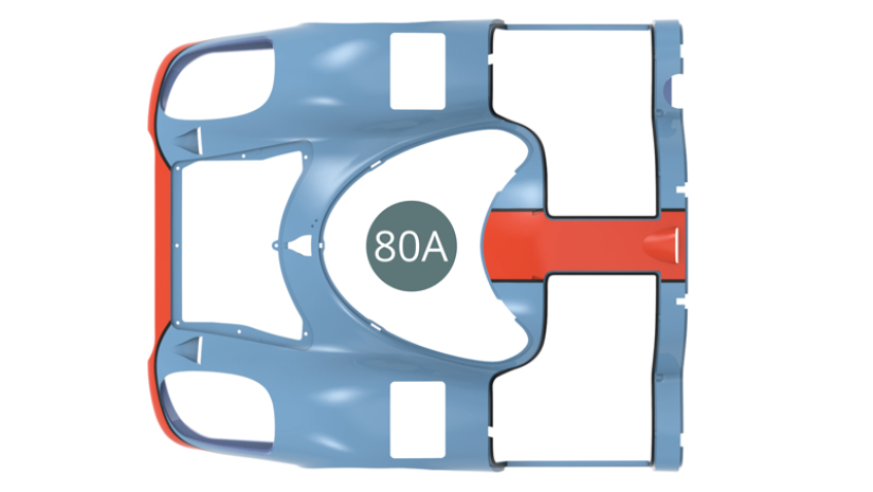
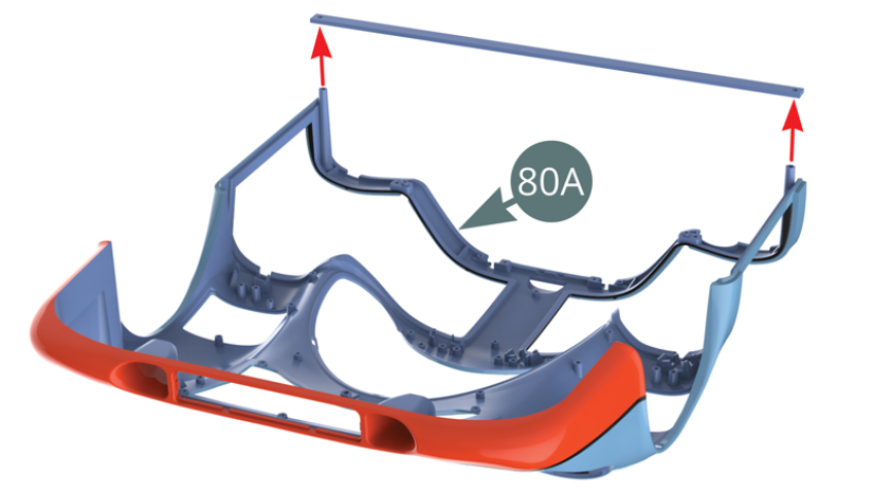
Kit 80
Parts of kit
- 80A Bodywork
Step 1
Turn the body (80A) over and unscrew the screws at the right and left ends of the cross support (shown opposite and below).
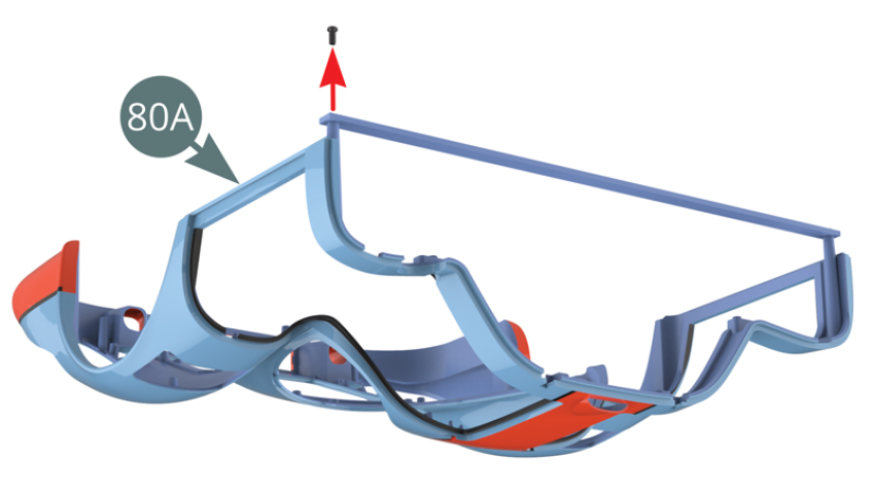

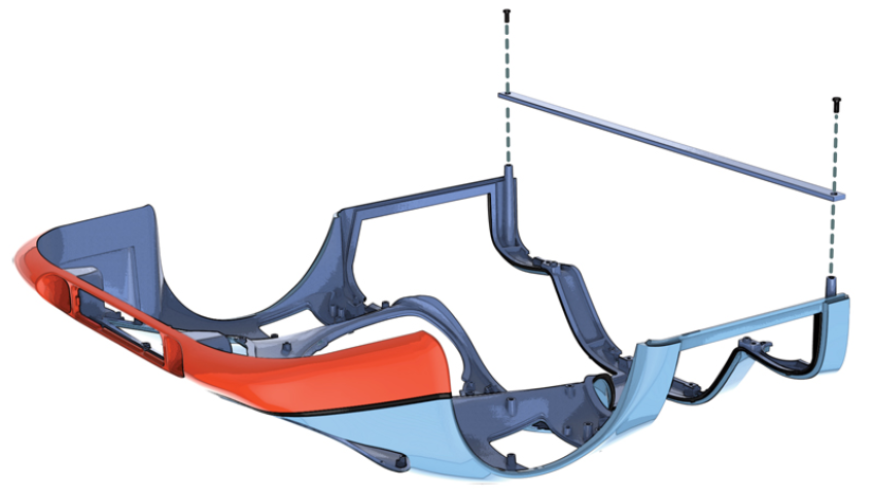
Step 2
Detach the cross support from the body (80A).
ASSEMBLY DIAGRAM
GENERAL VIEW