English
 français
 Deutsch
 español
 italiano
 português


Box 11
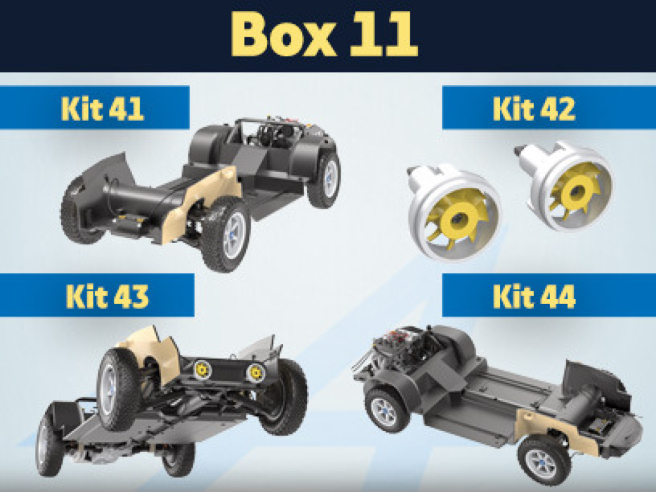
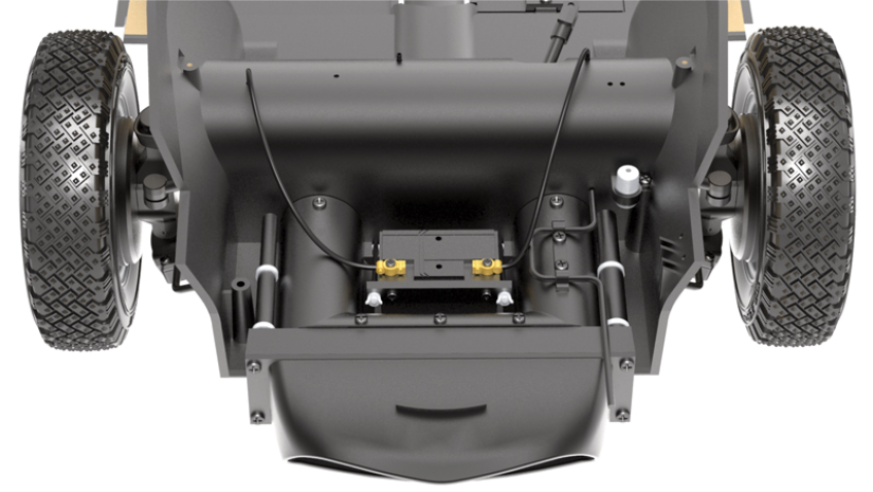
Kit 41 - Assembly and installation of the battery
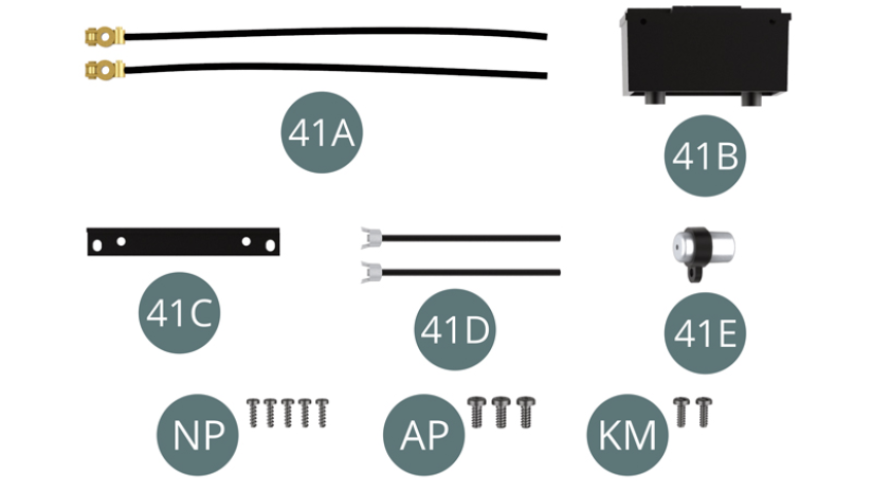
Parts of kit
- 41A High voltage cable with terminal
- 41B Battery
- 41C Retaining tab
- 41D Fixing rod
- 41E Reservoir
- Screw NP M 1,2 x 4 mm (x 5)
- Screw AP M 1,7 x 4 mm (x 3)
- Screw KM M 1,4 x 4 mm (x 2)
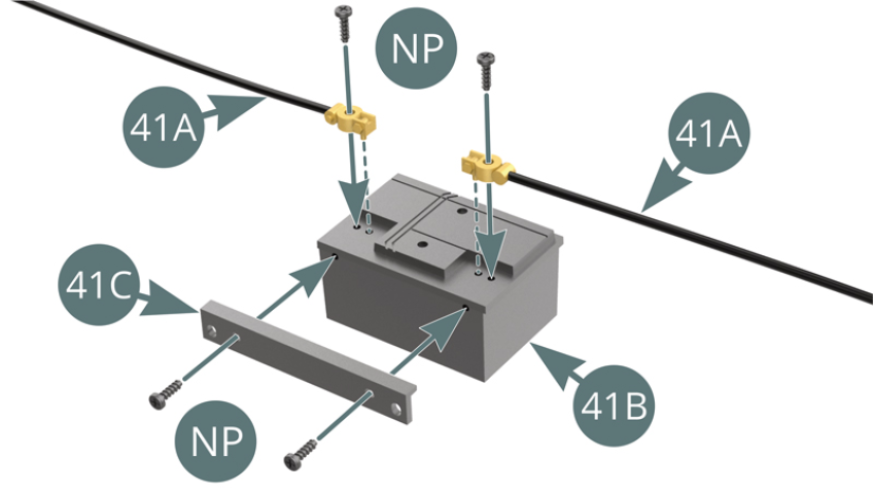
Step 1
Place the two voltage cables (41A) with their terminal on the batterie and secure these with two NP screws. Place the retaining tabs (41C) on the battery and secure with two NP screws.
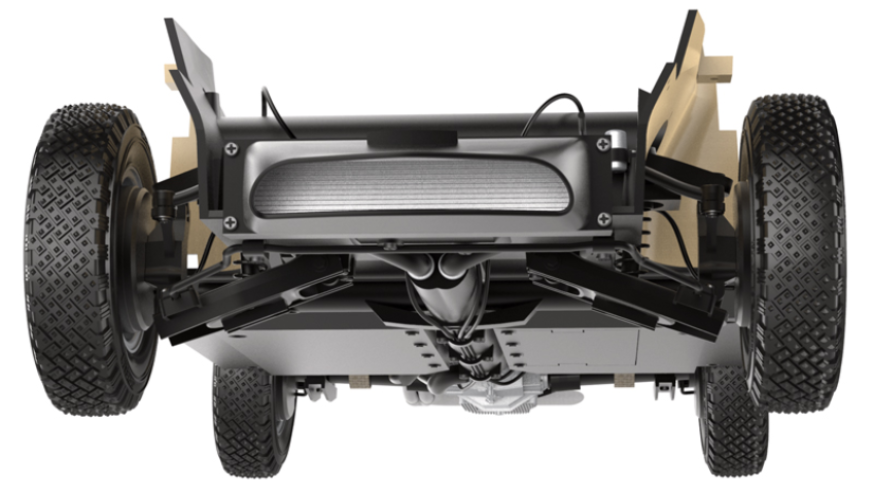
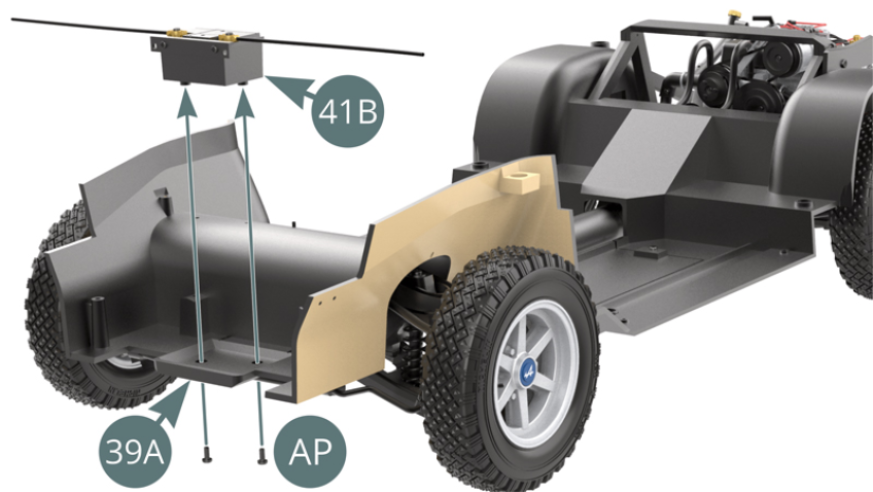
Place the batterie (41B) on the front plate of the chassis floor (39A) and fix it from below with two AP screws.
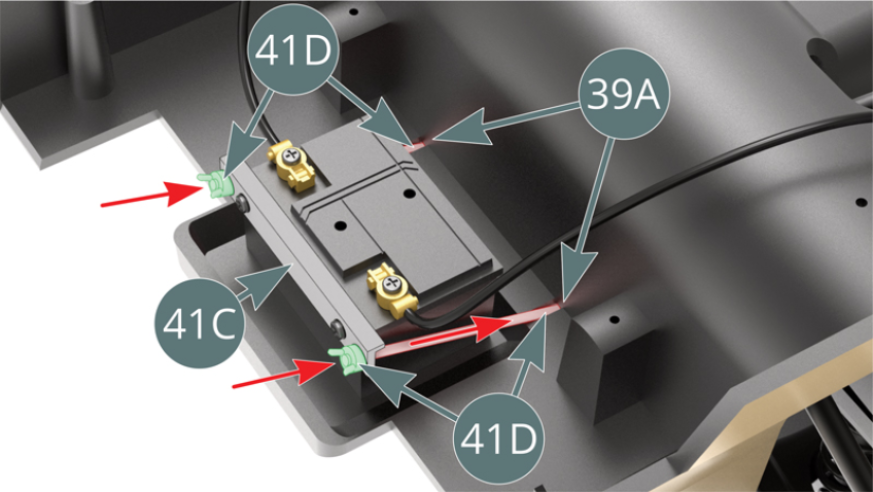
Step 2
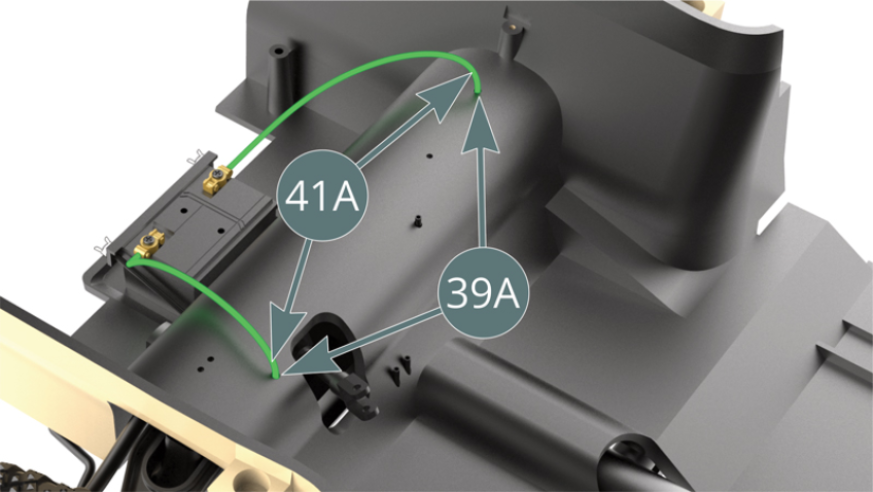
Pass the two fixing rods (41D) across the retaining tabs (41C) and then into the holes provided in the chassis floor (39A). Engage the ends of the two high voltage cables (41A) into the holes provided in the chassis floor (39A).
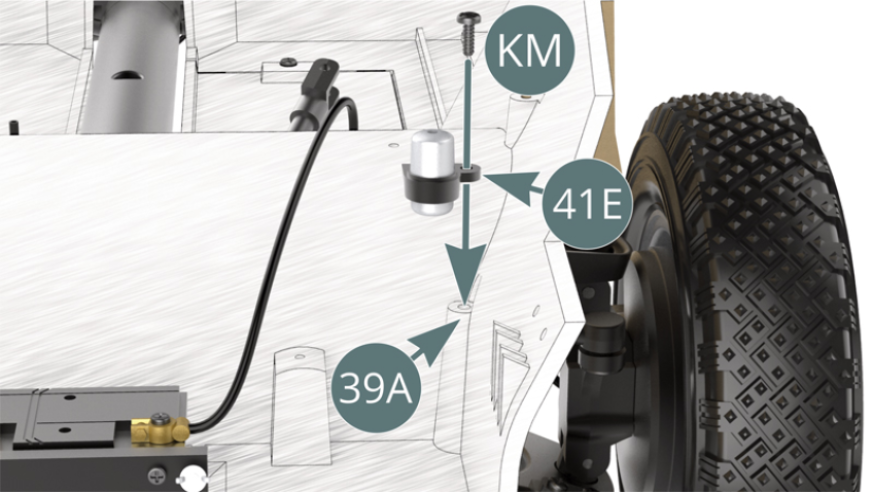
Step 3
Place the reservoir (39E) onto the chassis floor (39A) with one KM screw.
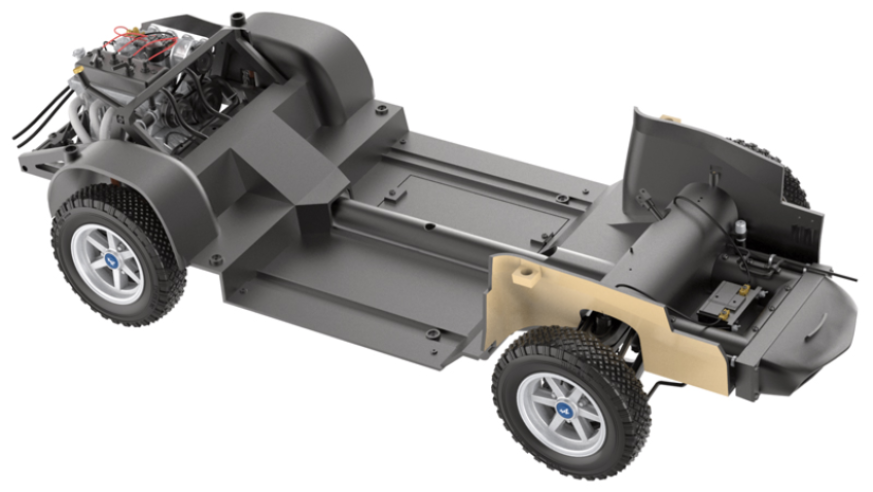
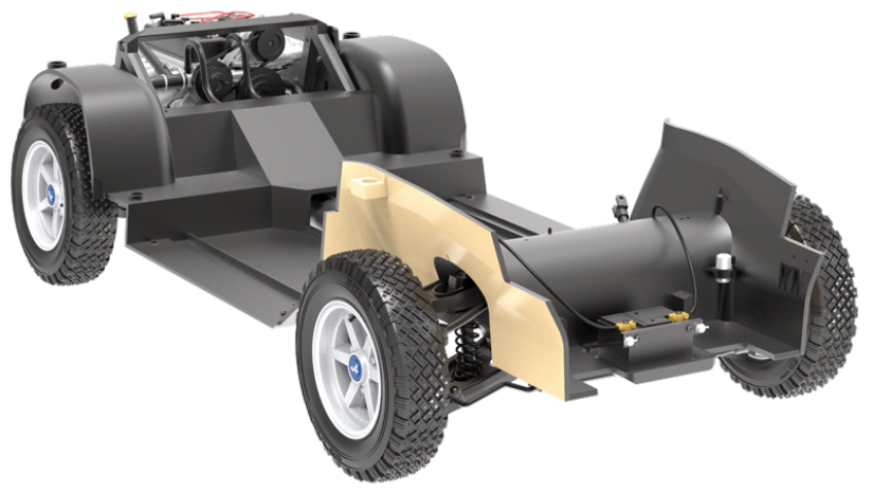
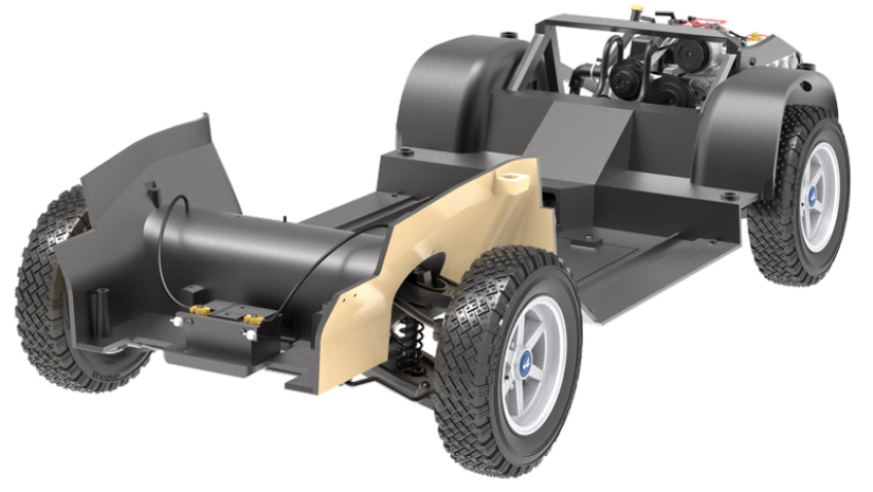
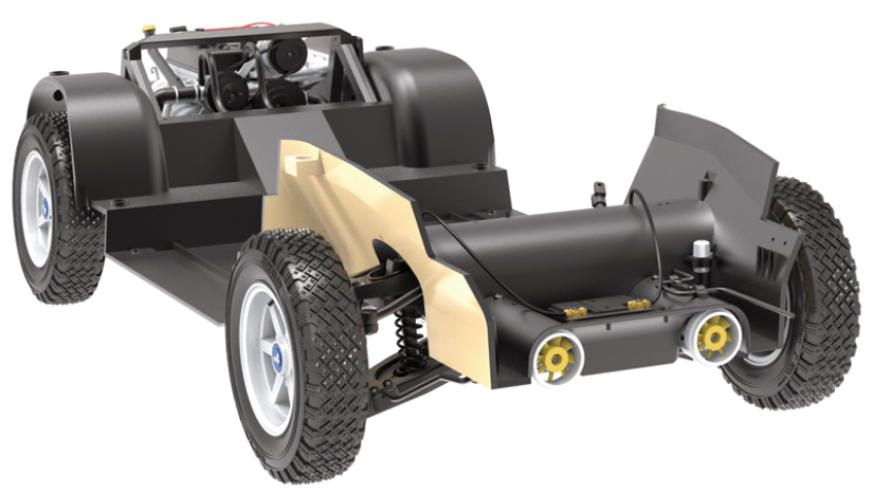
ASSEMBLY DIAGRAM

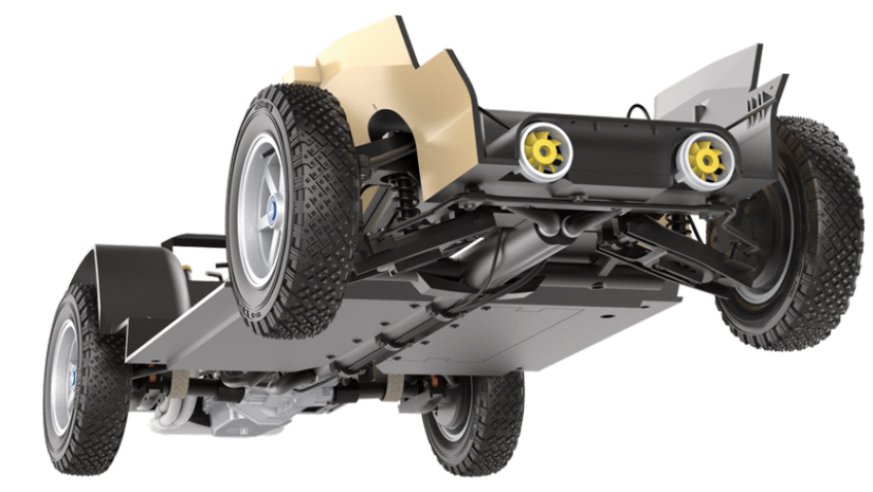
GENERAL VIEW
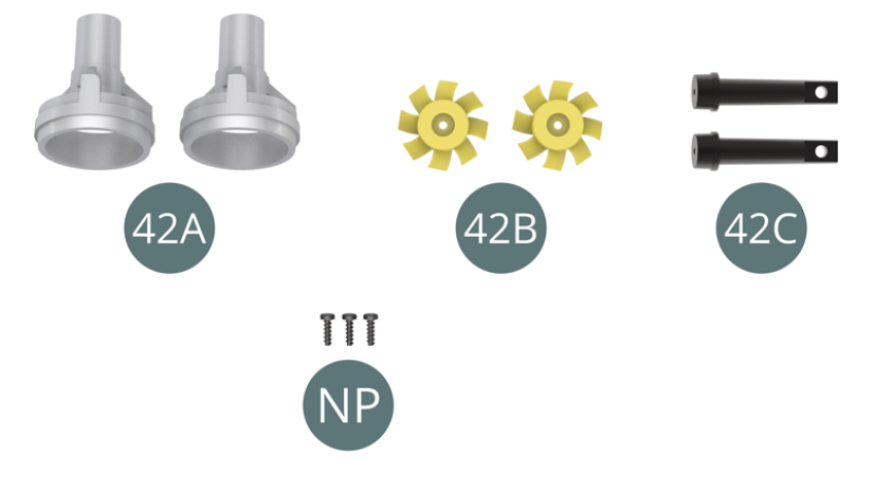
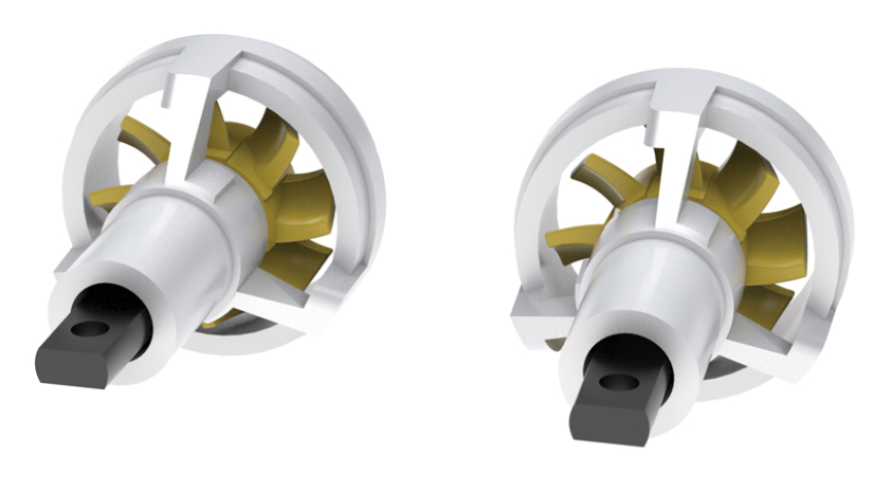
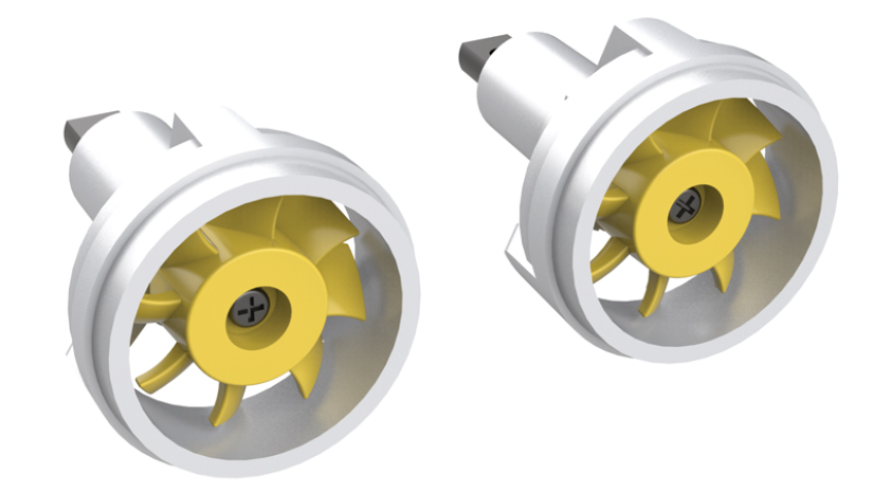
Kit 42 - Assembly of the radiator cooling fan
Parts of kit
- 42A Housing radiator cooling fan (x2)
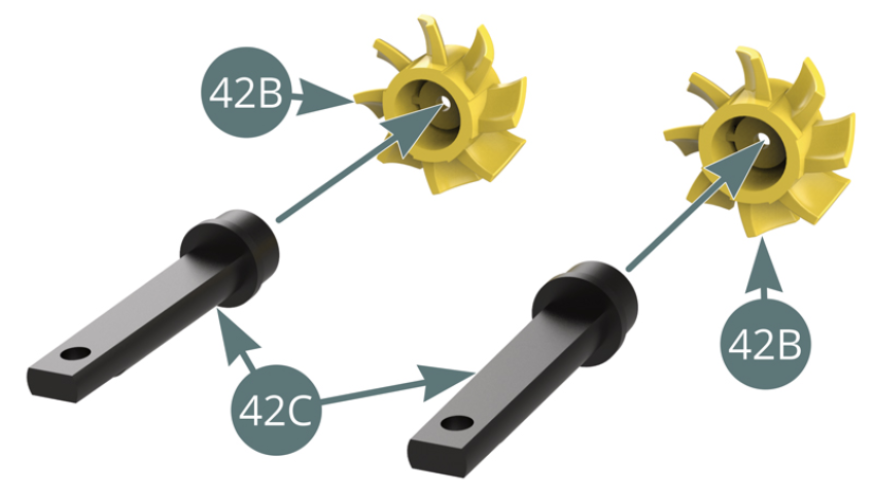
- 42B Radiator cooling fan (x2)
- 42C Radiator cooling fan axis (x2)
- Screw NP M 1,2 x 4 mm (x3)
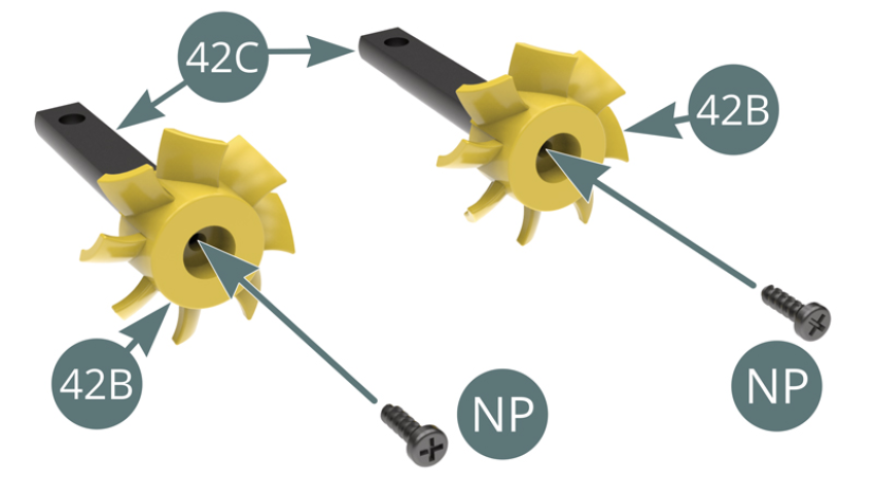
Step 1
Place the two radiator cooling fans onto the two radiator cooling axis (42C). Secure the cooling fans onto the radiator cooling axes with two NP screws.
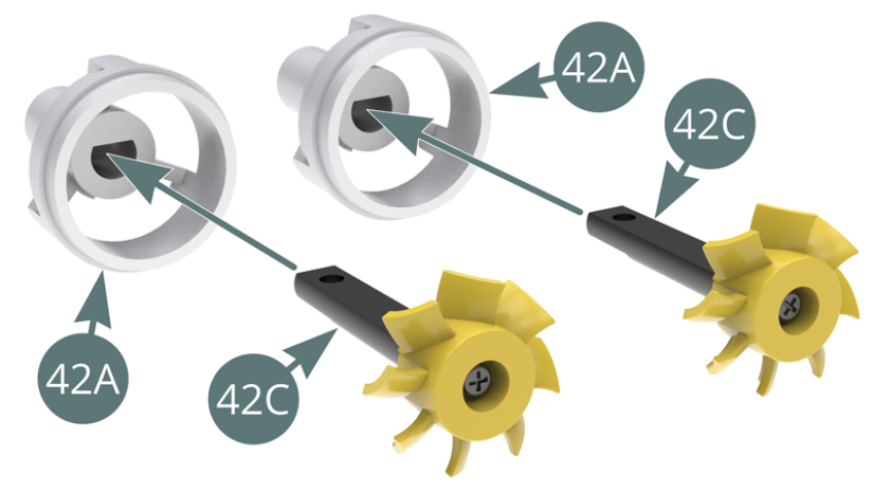
Step 2
Position the two radiator cooling axes (42C) into the two radiator housings (42A).
ASSEMBLY DIAGRAM
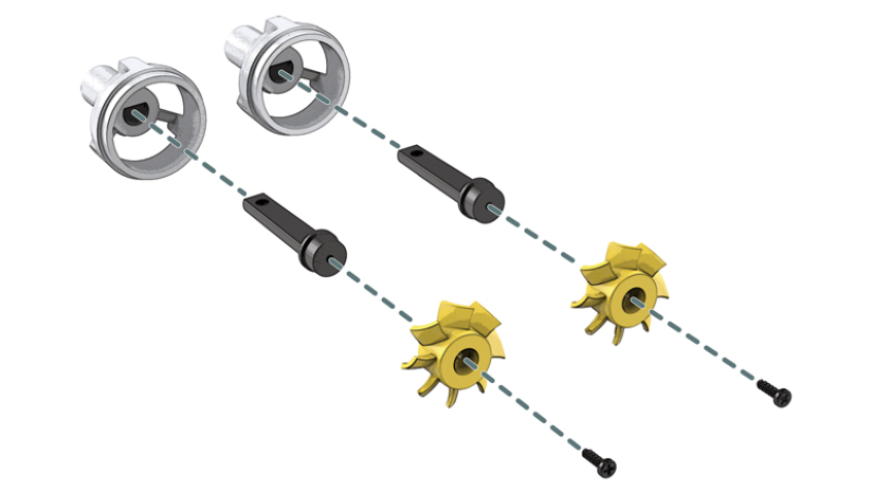
GENERAL VIEW
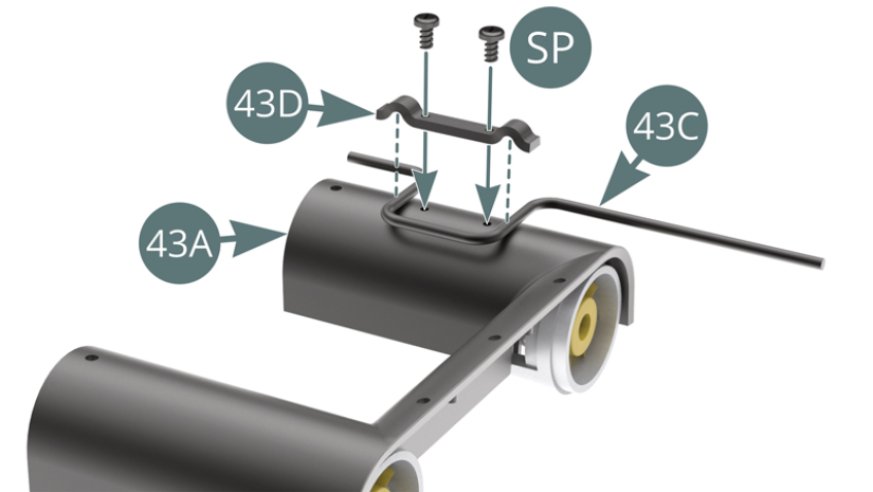
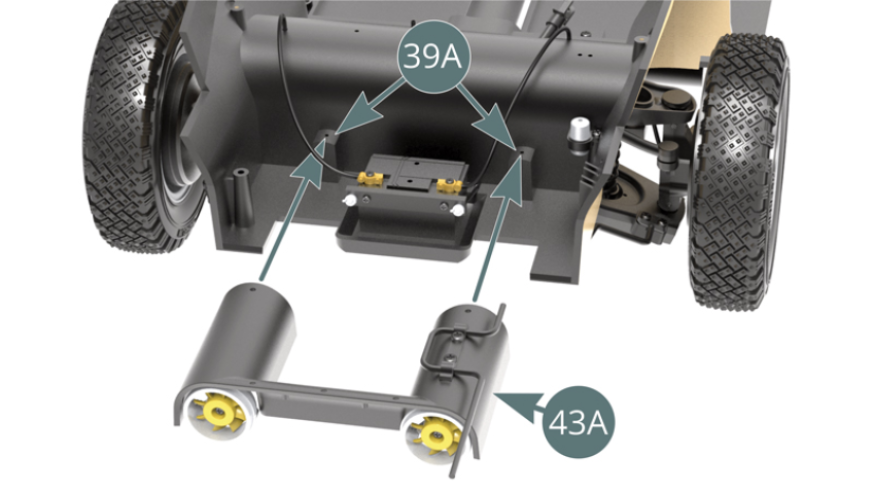
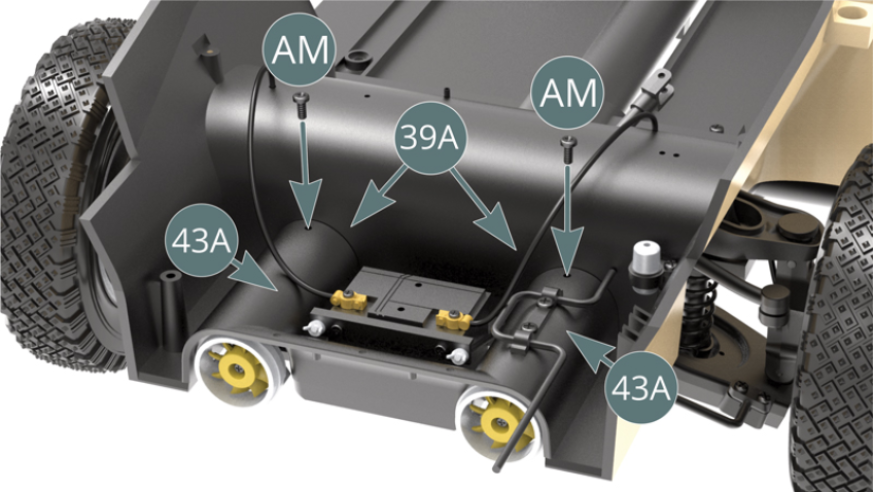
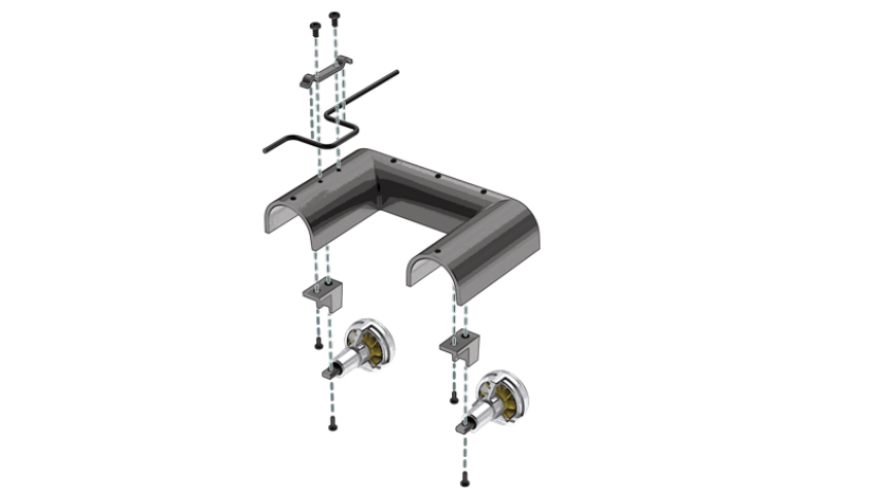
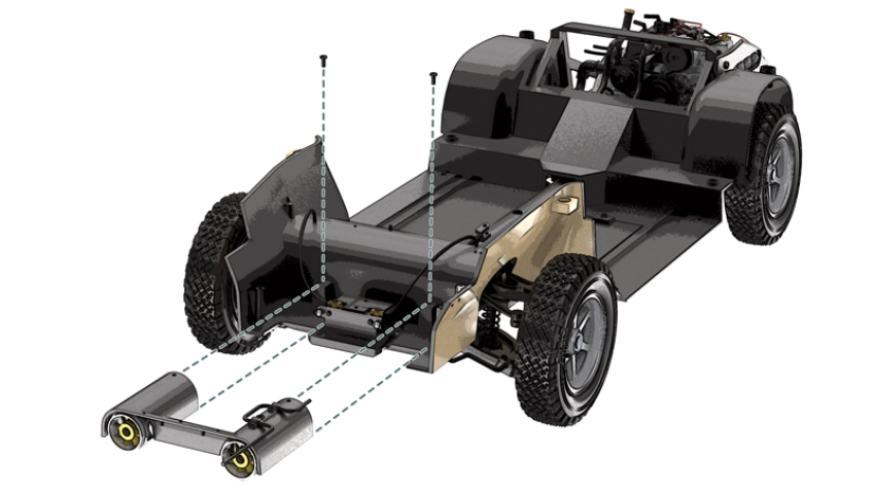
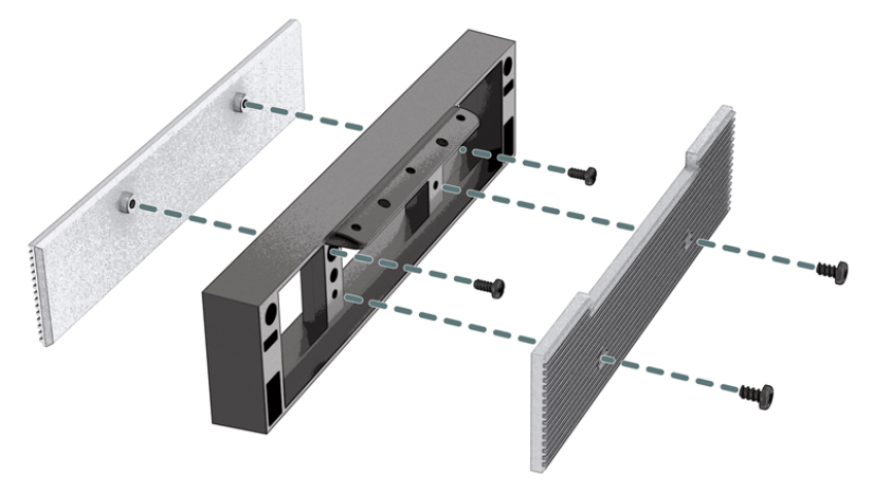
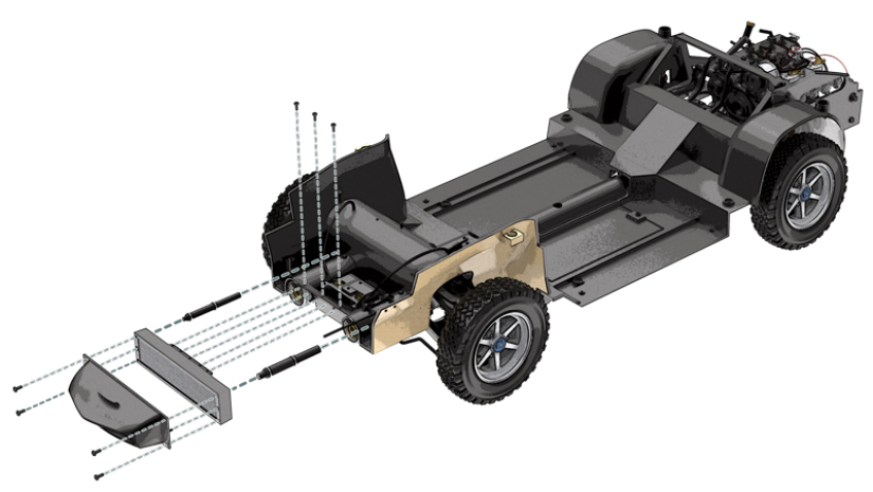
43 - Assembly and installation of the ventilation duct
- Screw KP M 1,4 x 4 mm (x 3)
- Screw SP M 1,7 x 3 mm (x 3)
- Screw AM M 1,7 x 4 mm (x 3)
- Screw ACP M 1,4 x 3 mm (x 3)

Step 1
Place the radiator cooling axes (42C) onto the supports (43B) and fix these with two KP screws (make sure that these two radiator housings are assembled in the right direction – as indicated by the red arrows). Place the two supports (43B) onto the ventilation duct (43A) and secure with two ACP screws).


Step 2
Attach the jack (43C) onto the ventilation duct (43A) using the clamp (43D) and fix with two SP screws.
Step 3
Place the ventilation duct on the protruding parts of the chassis floor (39A) and secure with two AM screws (see the above picture).
ASSEMBLY DIAGRAM
GENERAL VIEW
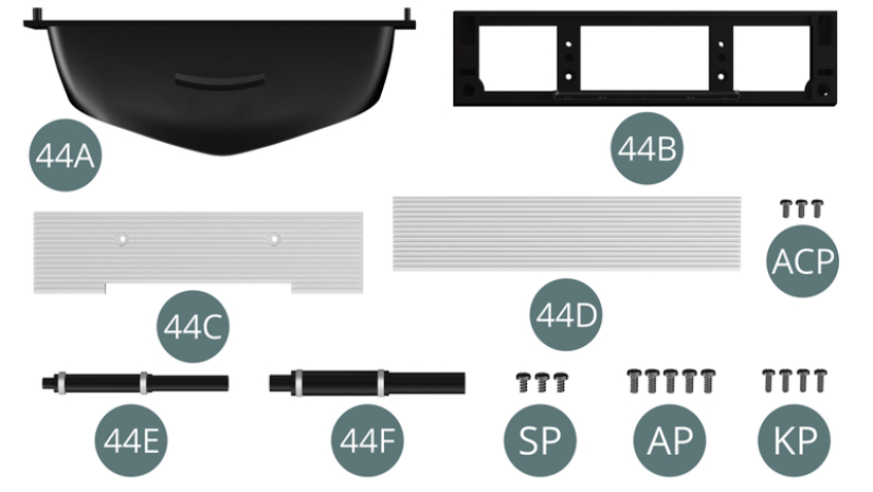
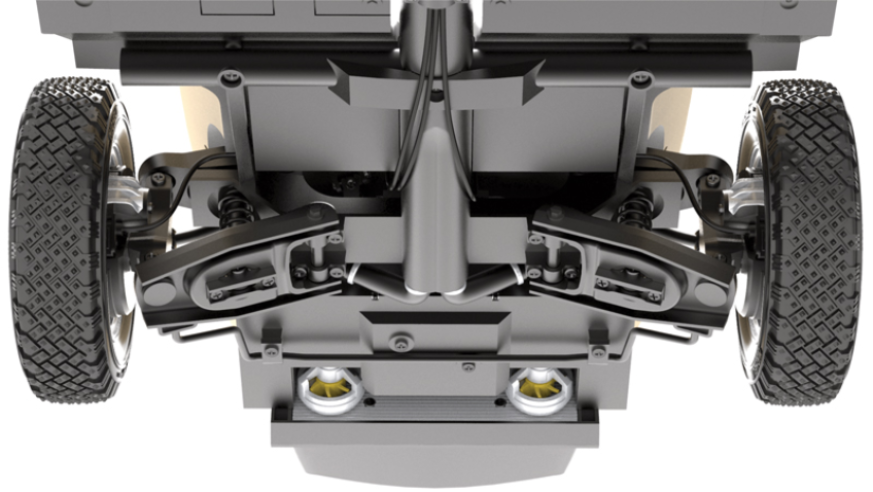
Kit 44 - Assembly and installation of the front water radiator
Parts of kit
- 44A Radiator cover
- 44B Radiator frame
- 44C Rear grille
- 44D Front grille
- 44E Water hose
- 44F Water hose
- Screw ACP M 1,4 x 3 mm (x 3)
- Screw SP M 1,7 x 3 mm (x 3)
- Screw AP M 1,7 x 4 mm (x 5)
- Screw KP M 1,4 x 4 mm (x 4)
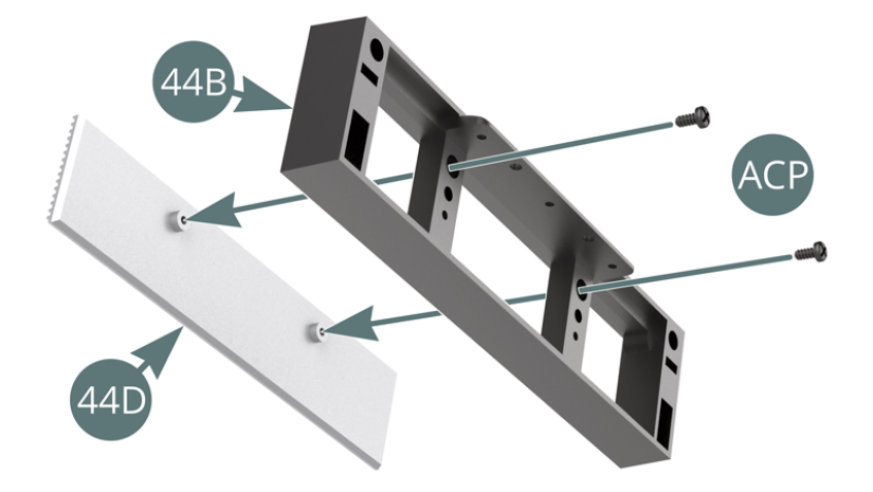
Step 1
Place the front grille (44D) onto the radiator frame (44B0 and secure with two ACP screws.
Place the rear grille (44C) onto the radiator frame (44B) and secure with two SP screws.
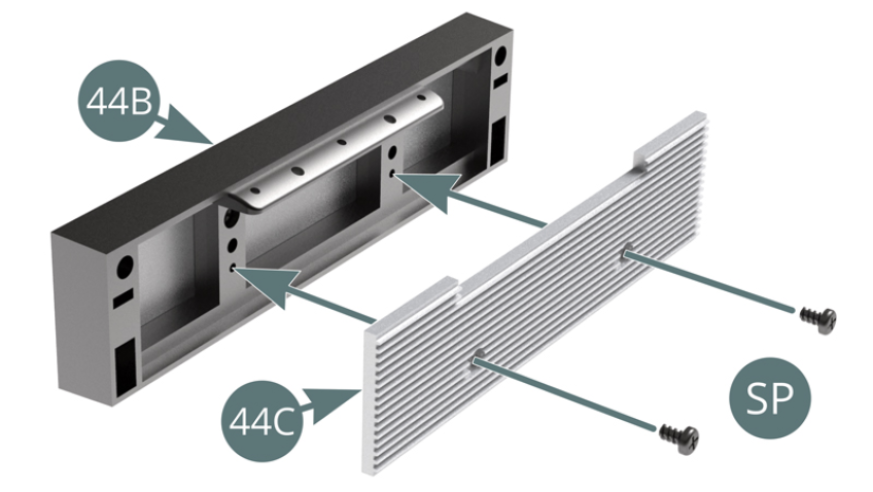
Step 2
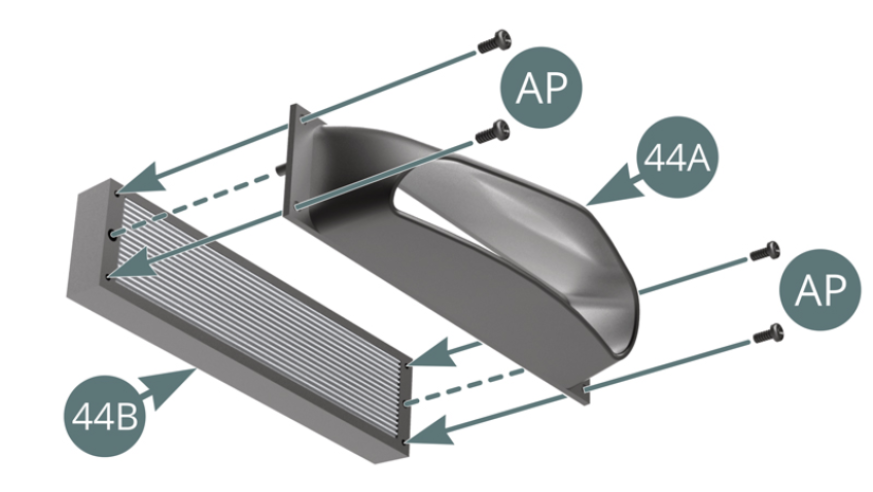
Position the radiator cover (44A) onto the radiator frame (44B) and fix with four AP screws.
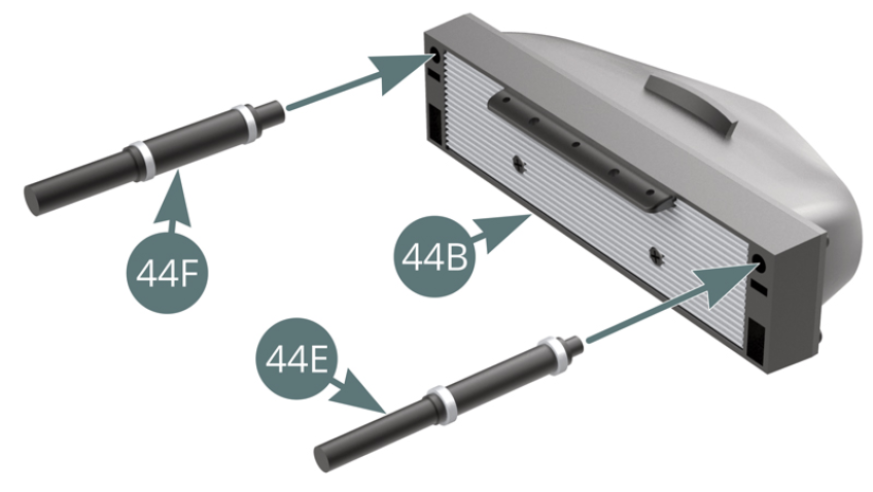
Place the two water hoses (44F&44E) into the radiator frame (44B).
Step 3
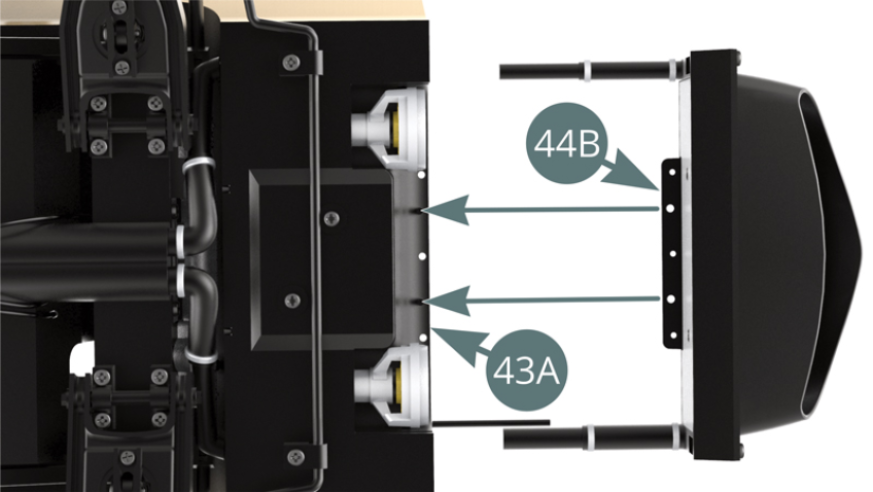
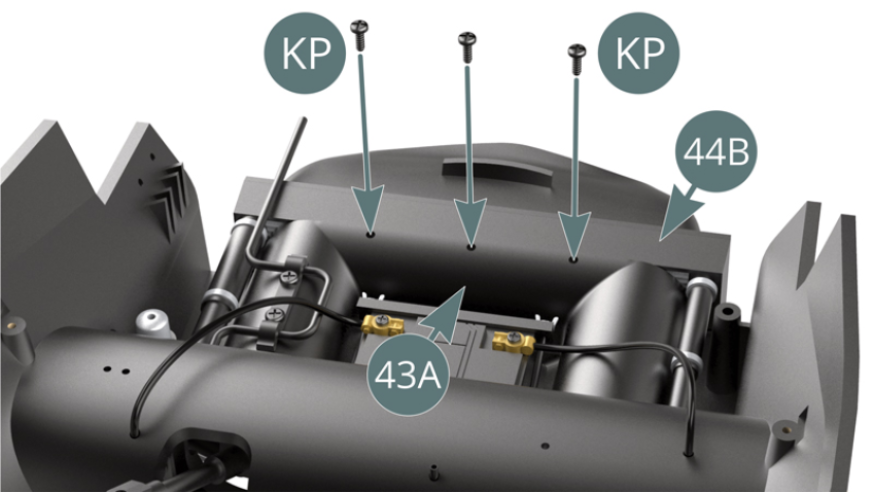
Place the radiator frame (44B) onto the pins of the ventilation duct (43A) and fix these from above with three KP screws (see opposite and below).
Step 4
Assembly of the water radiator seen from above
Assembly of the water radiator seen from below
ASSEMBLY DIAGRAM
GENERAL VIEW