English
 français
 Deutsch
 español
 italiano
 português


Box1
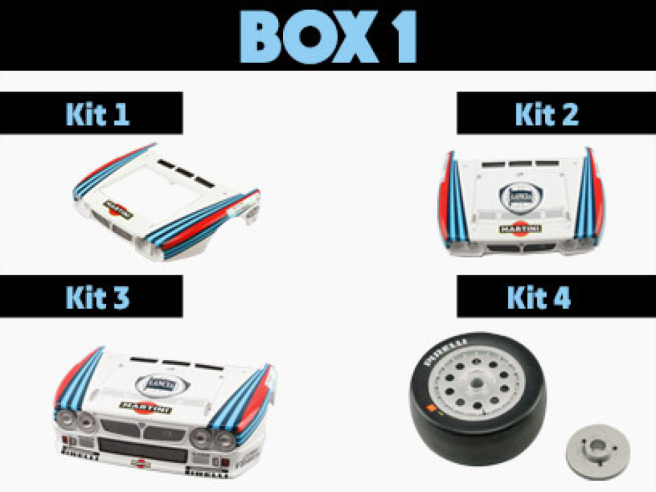
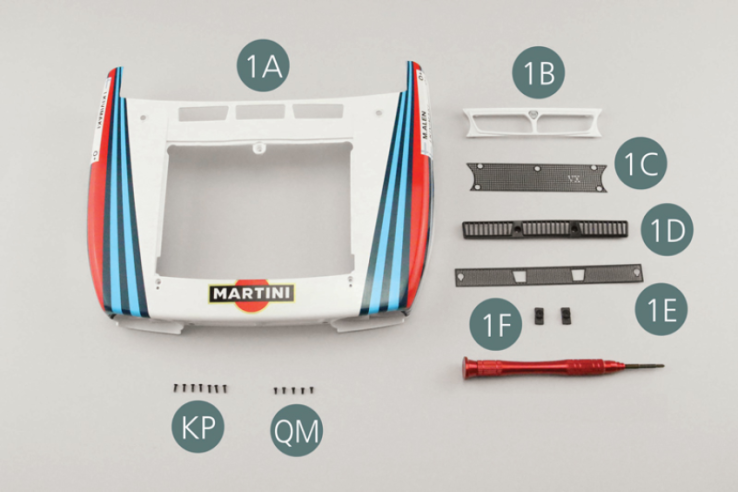
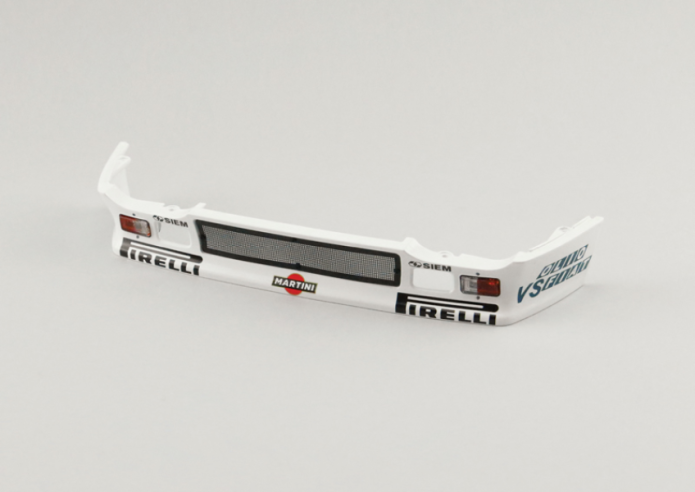
Kit 1 - FRONT BODY ASSEMBLY
Parts of kit
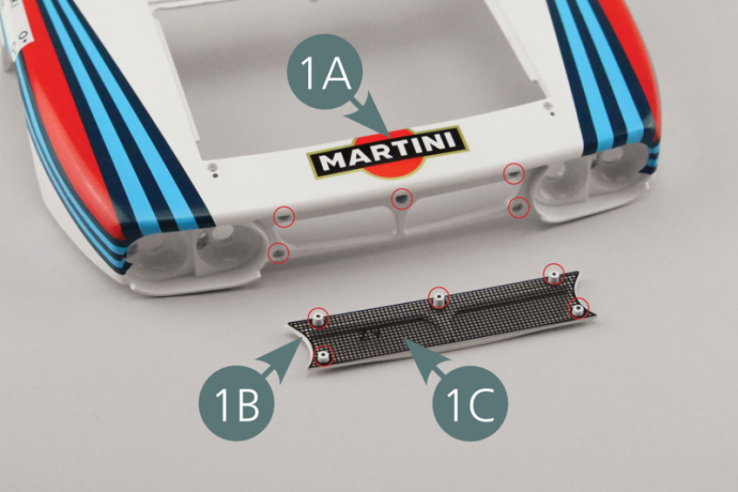
- 1A Front bodywork
- 1B Grille
- 1C Radiator grille
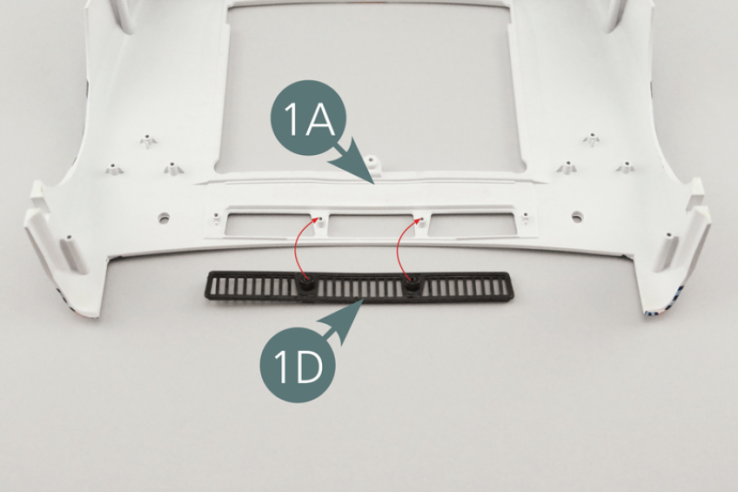
- 1D Air vents
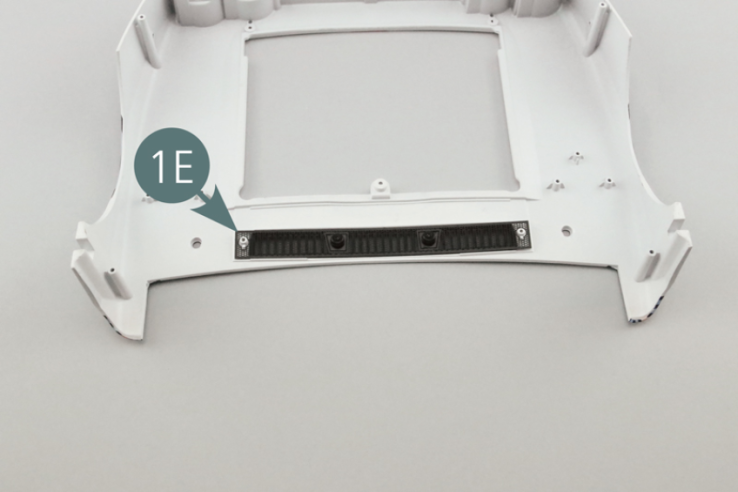
- 1E Radiator grille
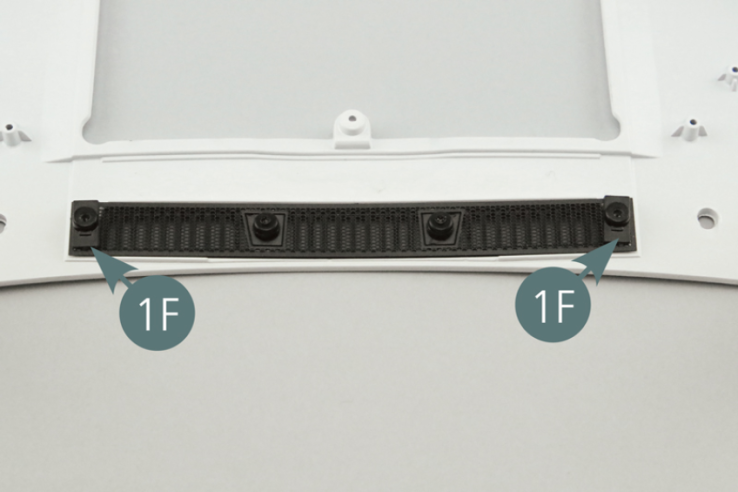
- 1F Mounting lugs (x 2)
- Screwdriver
- Screw KP M 1.4 x 4 x 2.8 mm (x 7)
- Screw QM M 1.4 x 3 mm (x 5)
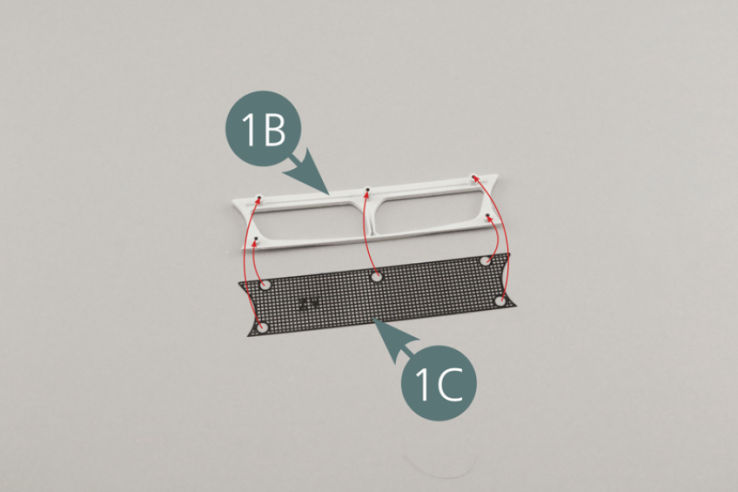
Step 1
Place the radiator grille (1C) on the grille (1B).

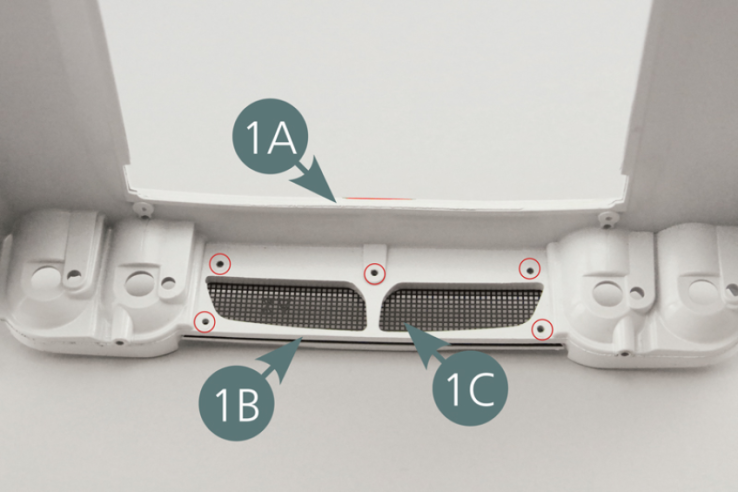
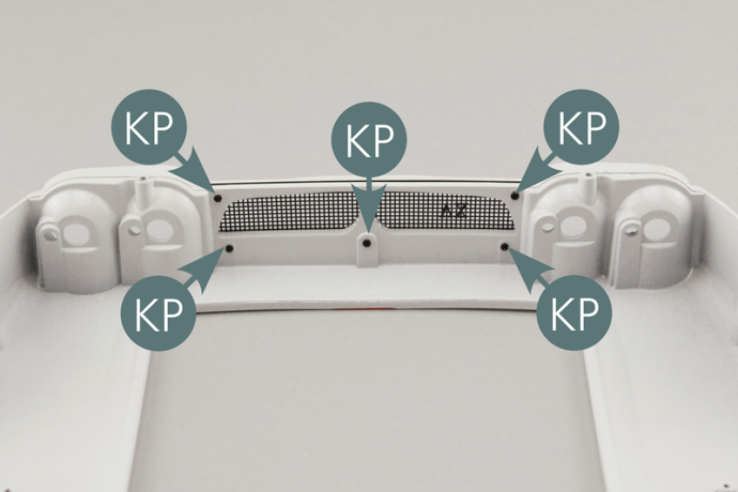
Step 2
Attach the grille (1B) to the front body (1A) using five KP screws.
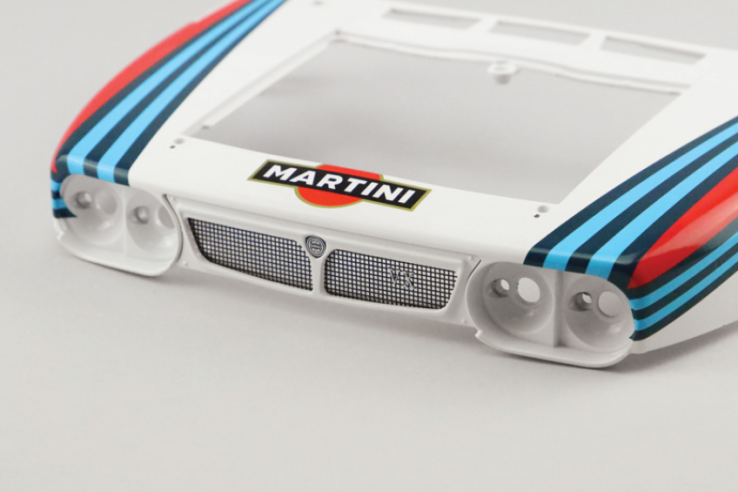
Step 3
Grille (1B) is positioned on the front bodywork (1A).
Step 4
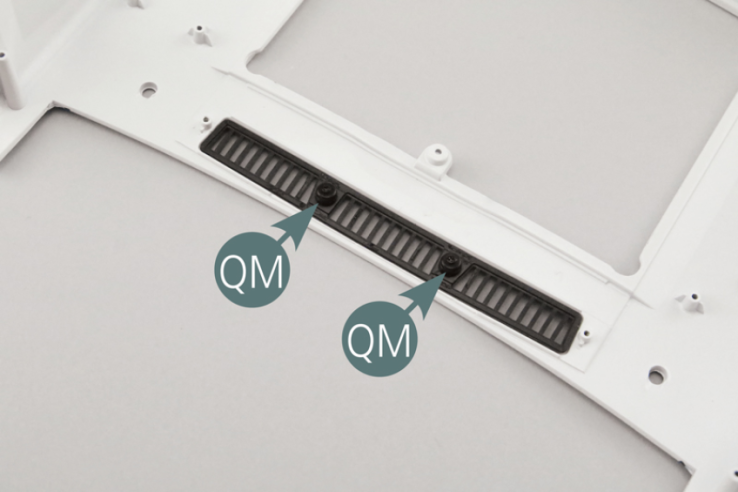
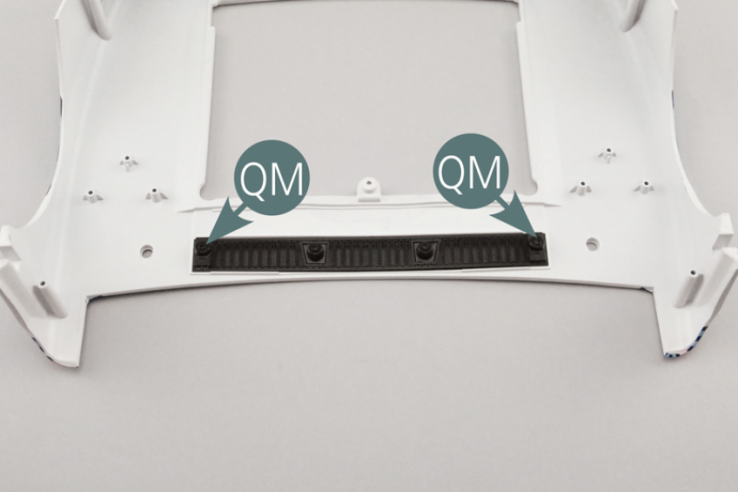
Position the air vents (1D) on the front body (1A) and secure with two QM screws.
Step 5
Position the grille (1E) on the front body (1A) - (above the air vents (1D) - and secure it with two QM screws by means of the two locking lugs (1F) - see illustrations opposite and below.
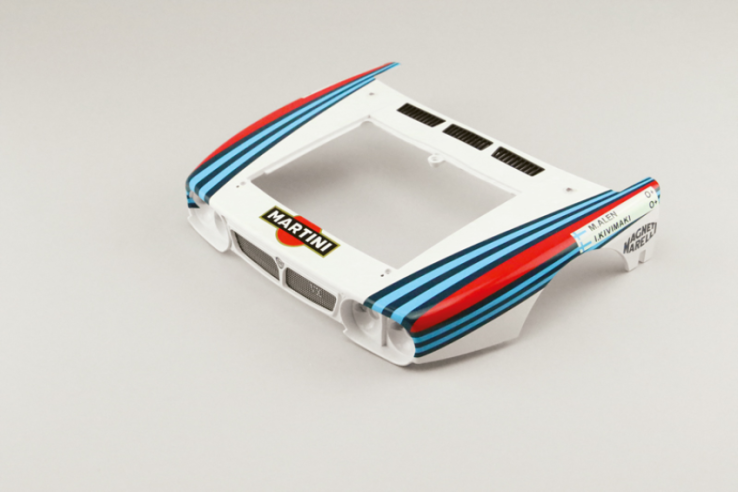
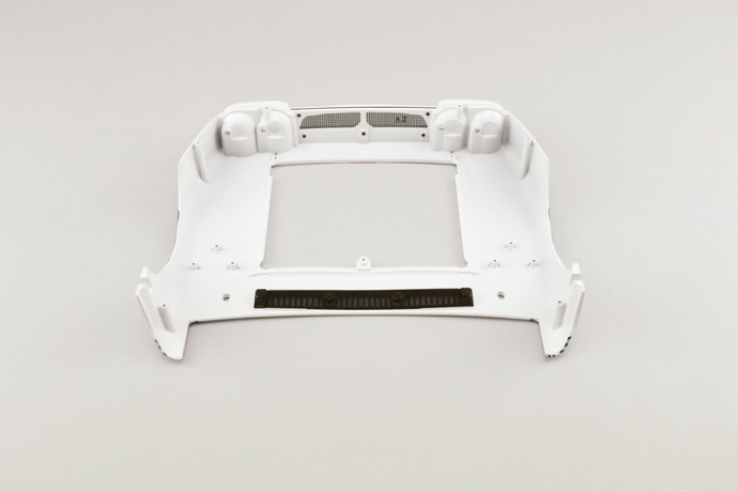
GENERAL VIEW
Kit 2 - FRONT COVER ASSEMBLY AND MOUNTING ON THE FRONT BODY
Parts of kit
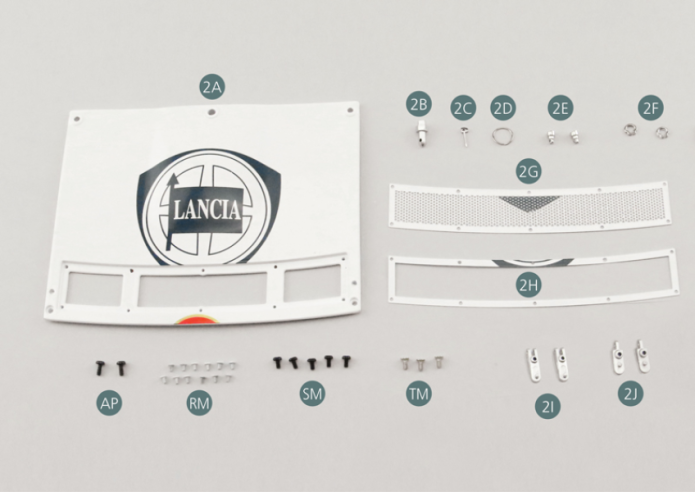
- 2A Front bonnet
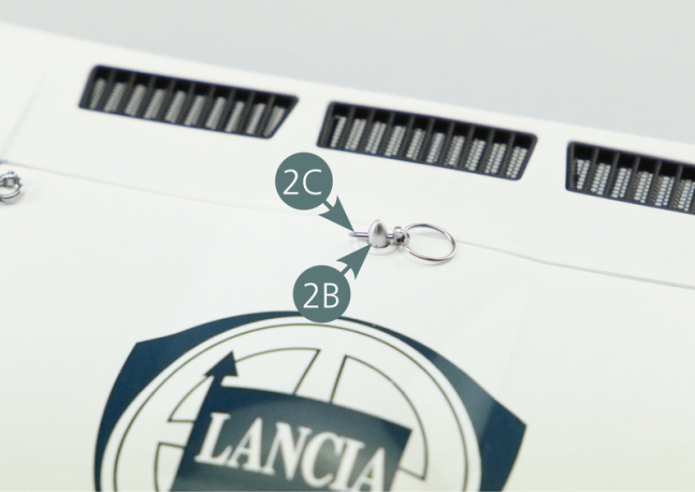
- 2B Bonnet centre latch
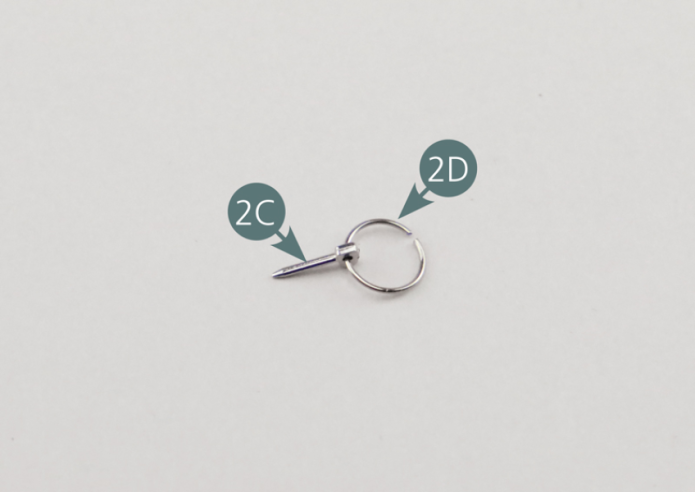
- 2C Locking pin
- 2D Pin ring
- 2E Side cover fastener (x 2)
- 2F Safety ring (x 2)
- 2G Exhaust air grille
- 2H Grille frame
- 2I Hinge (x 2)
- 2J Hinge (x 2)
- Screw AP M 1.7 x 4 mm (x 2)
- Screw RM M 1.2 x 2 mm (x 12, silver)
- Screw SM M 1.7 x 3 mm (x 5)
- Screw TM M 1.7 x 4 mm (x 3, silver)
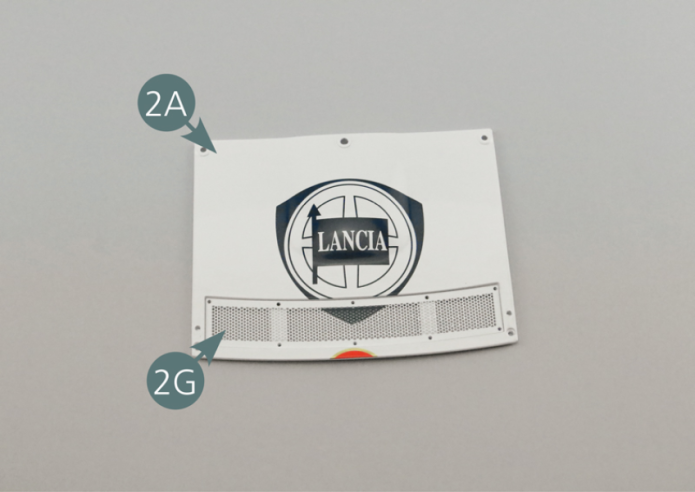
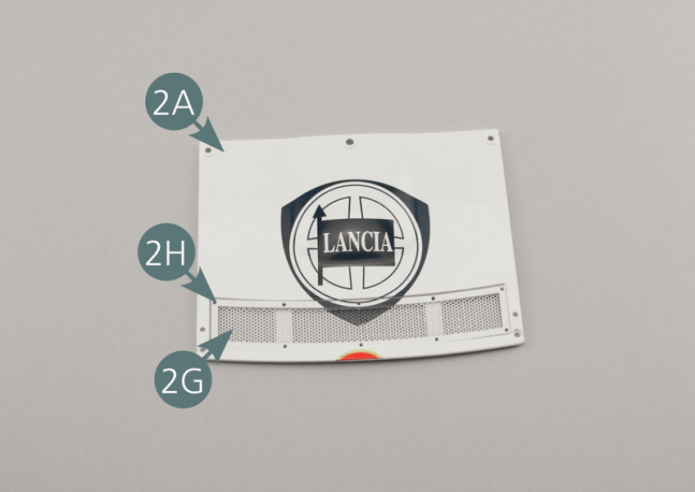
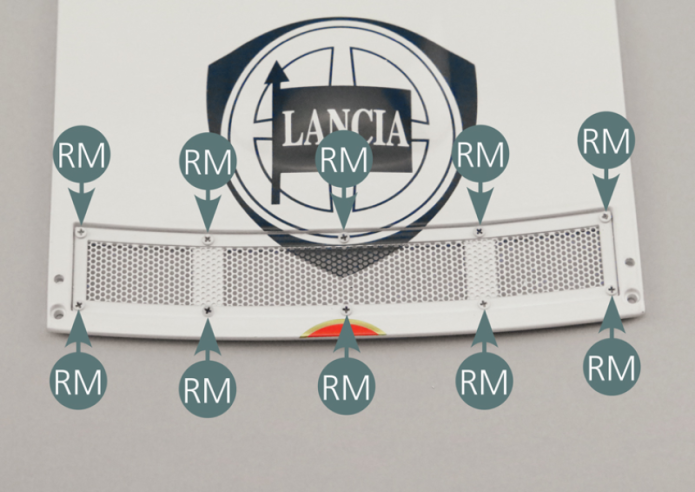
Step 1
Position the exhaust grille (2G) in the slot provided on the bonnet (2A) and cover it with the frame (2H). Fix the frame (2H) and grille (2G) to the front bonnet (2A) with ten RM screws.
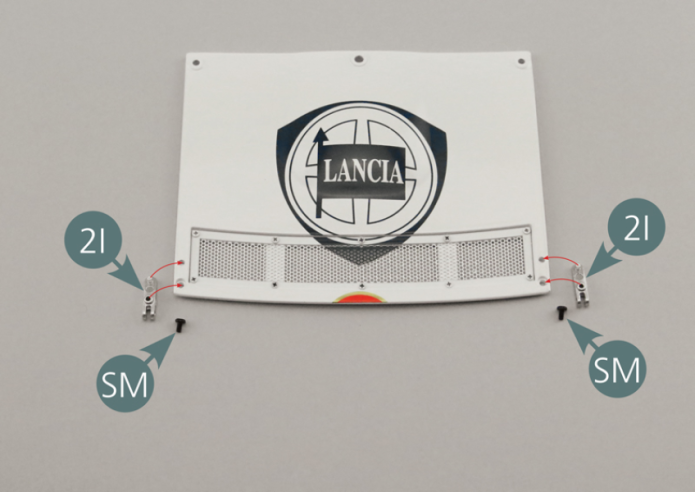
Step 2
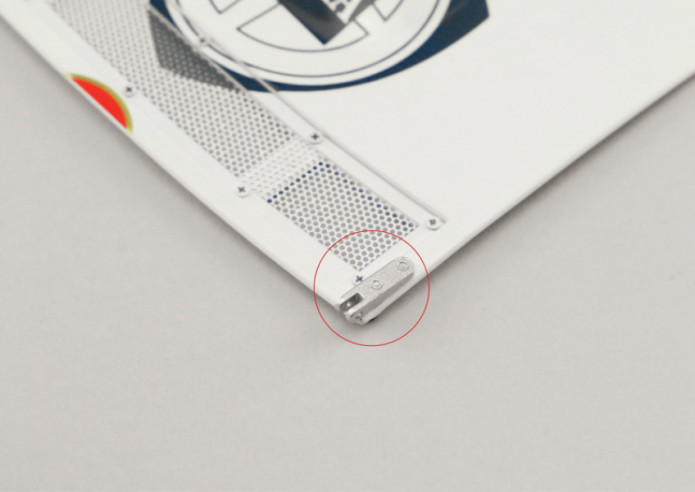
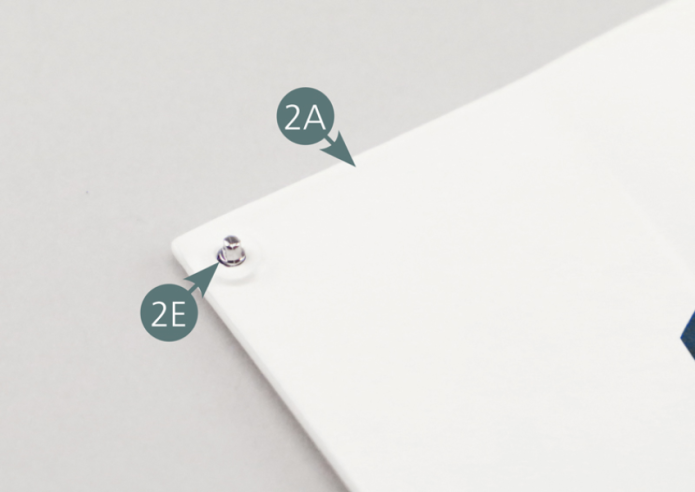
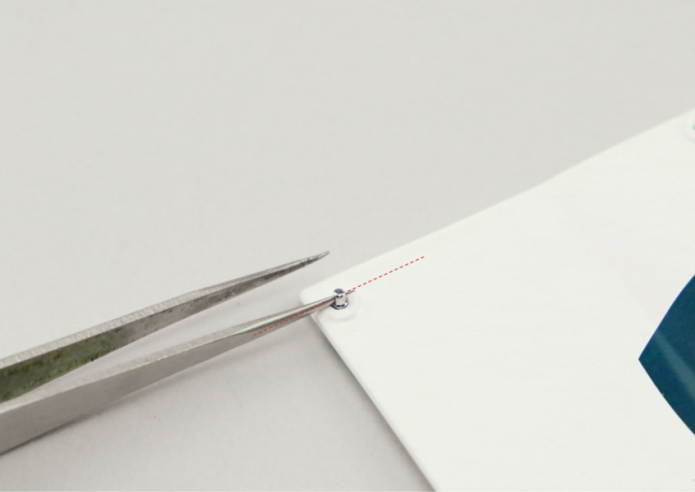
Position the two hinges (2I) on the front bonnet (2A) and secure them with two SM screws. Align the openings of the first side cover fastener (2E) in parallel with the edge of the front bonnet (2A) - red dotted line - and press it into the slot located on the right corner.
Step 3
Align the openings of the second fastener of the side cover (2E) parallel to the edge of the front bonnet (2A) - red dotted line - and press it into the slot in the left corner. Check that the openings of the side cover fasteners (2E) are correctly aligned - red dotted lines.
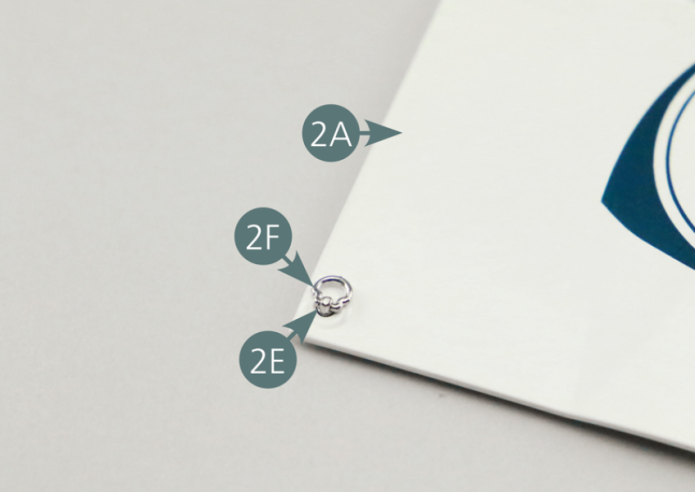
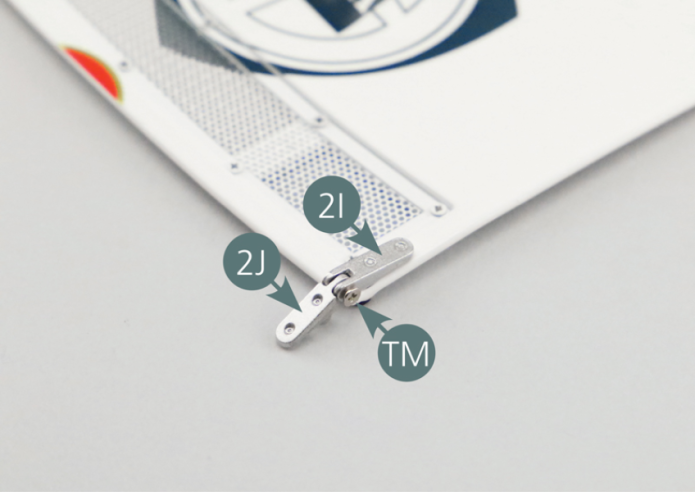
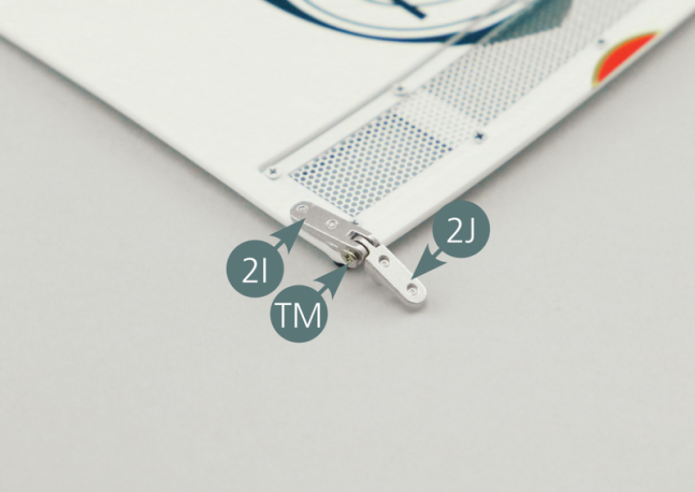
Step 4
Clip the lock rings (2F) onto the fasteners (2E). Position the hinges (2J) into the hinges (2I) and secure with a TM screw.
Step 5
Pre-assembled front bonnet
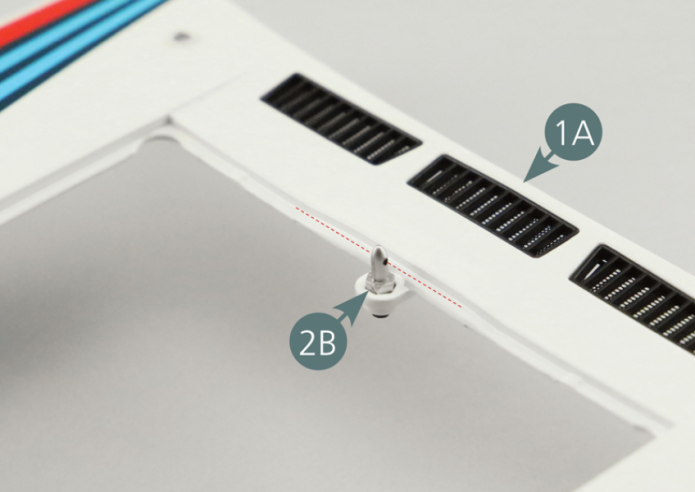
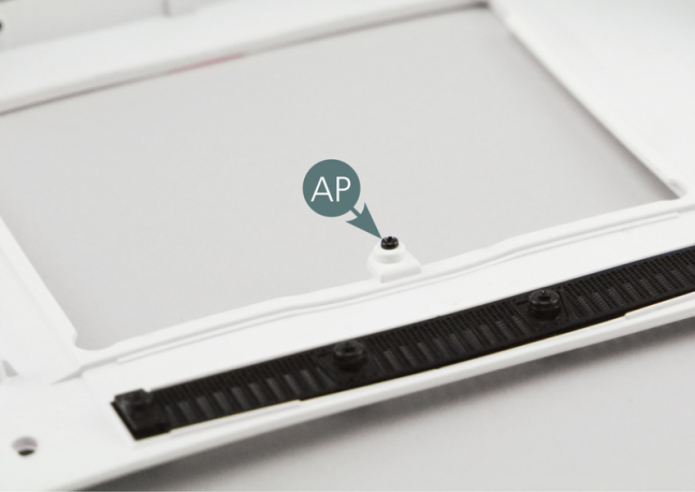
Align the apertures of the central lock (2B) parallel to the edge of the front bodywork (1A) - red dotted lines -, then place it in the intended recess and secure with an AP screw.
Step 6
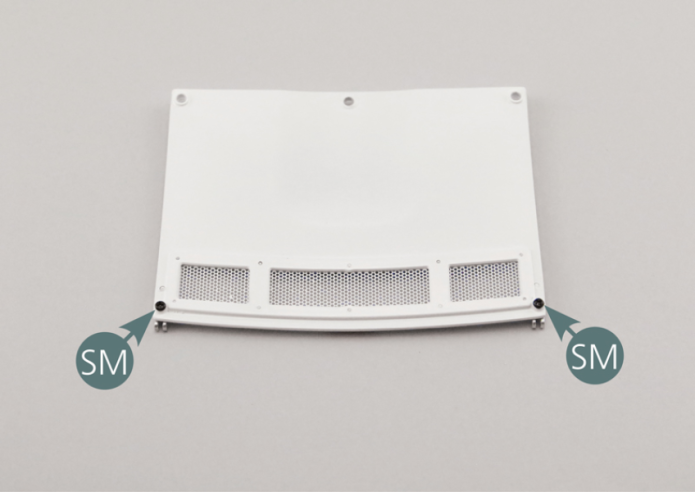
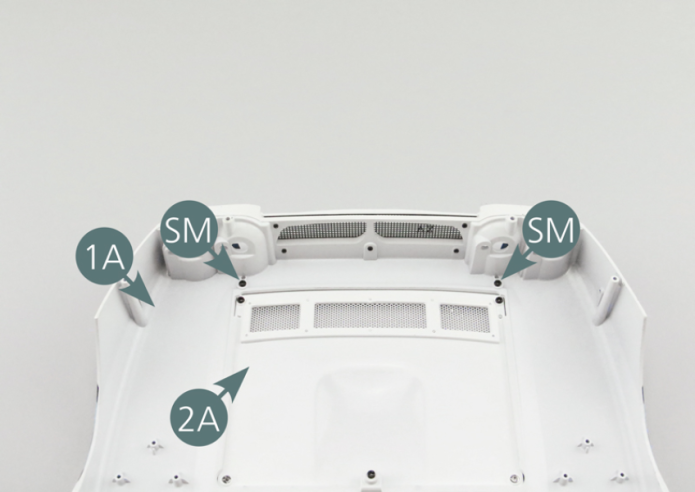
Place the front bonnet (2A) onto the front body (1A) by engaging it with the centre lock (2B) - red arrow. Attach the hinges (2J) to the front body (1A) with two SM screws.
Step 7
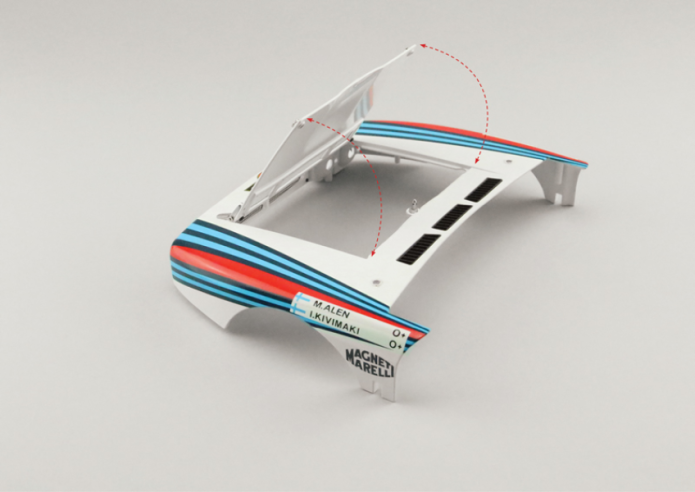
Fit the ring (2D) to the lock pin (2C). Check that the front bonnet (2A) opens and closes properly - blue arrow.
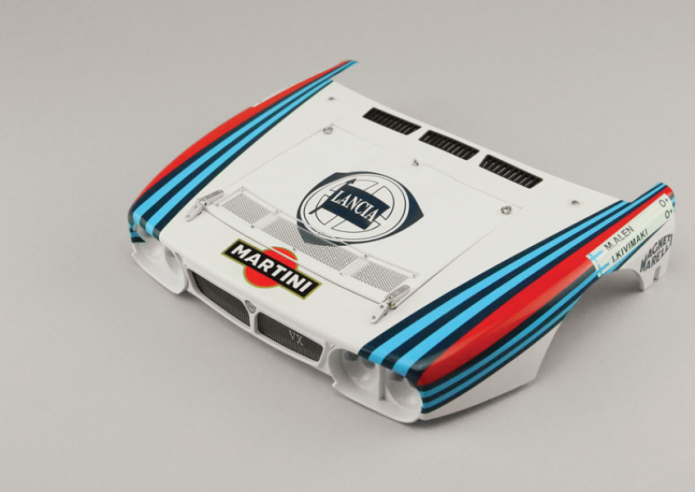
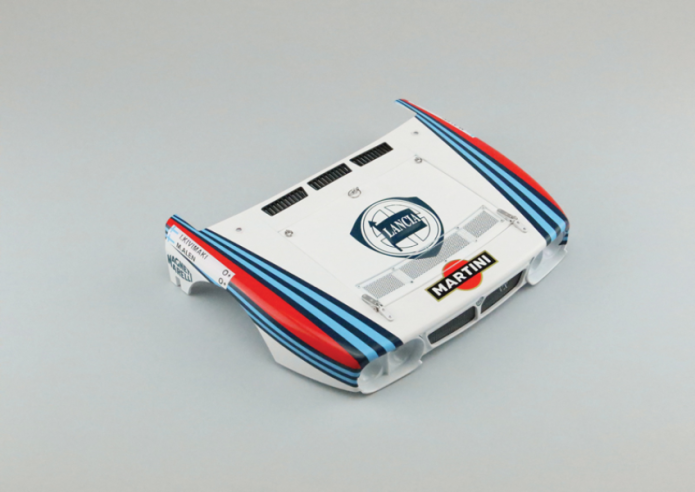
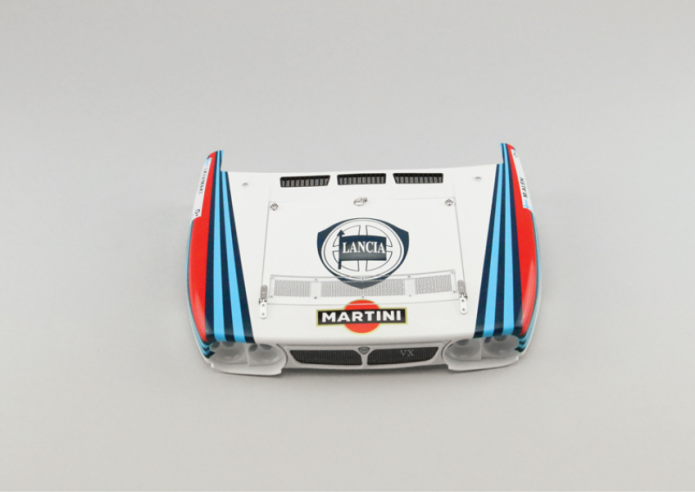
GENERAL VIEW
Kit 3 - FRONT BUMPER ASSEMBLY AND MOUNTING TO FRONT BODY
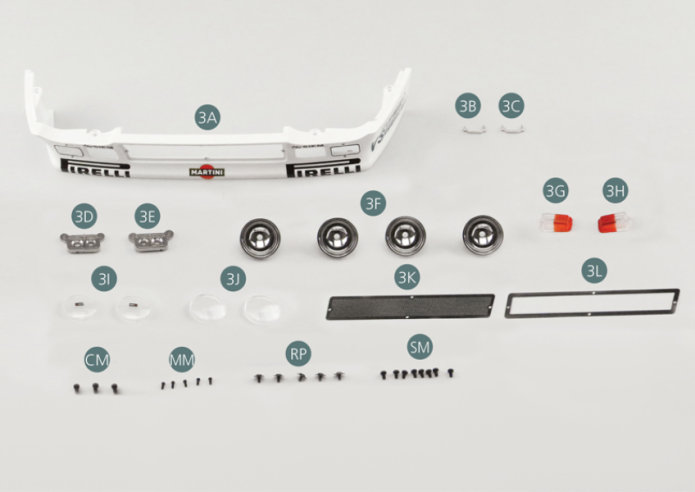
Parts of kit
- 3A Front bumper
- 3B Left bracket
- 3C Right bracket
- 3D Left indicator reflector
- 3E Right indicator reflector
- 3F Headlight reflector (x 4)
- 3G Indicator light left
- 3H Indicator light, right
- 3I Inner headlight lens (x 2)
- 3J Exterior headlight lens (x 2)
- 3K Air intake grille
- 3L Frame
- Screw RP M 1.7 x 3 x 5.5 mm (x5)
- Screw CM M 2.0 x 4 mm (x 3)
- Screw MM M 1.2 x 3 mm (x 5)
- Screw SM M 1.7 x 3 mm (x 8)
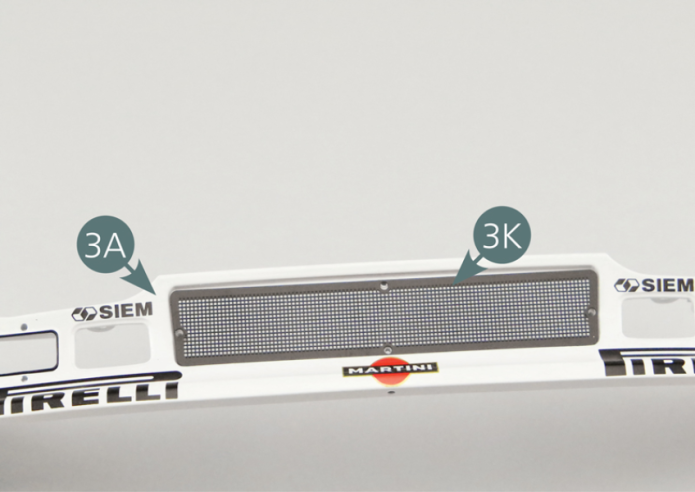
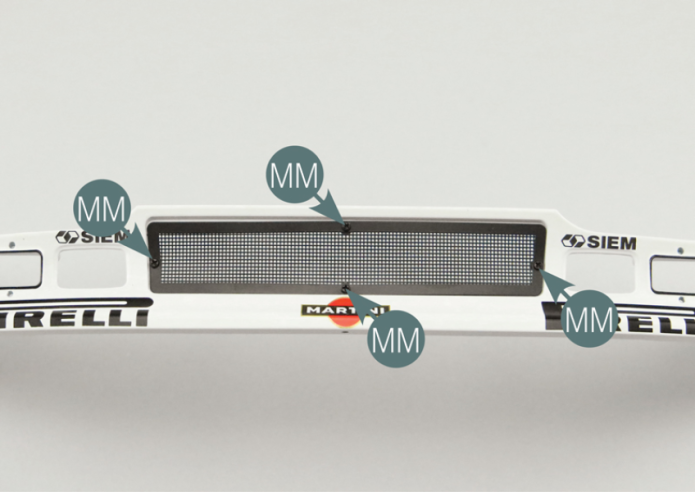
Step 1
Place the air intake grille (3K) on the front bumper (3A), then position the frame (3L) on top and secure it with four MM screws.

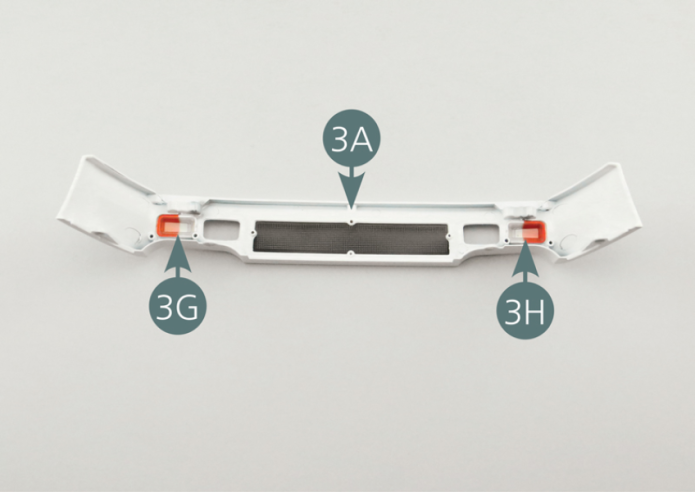
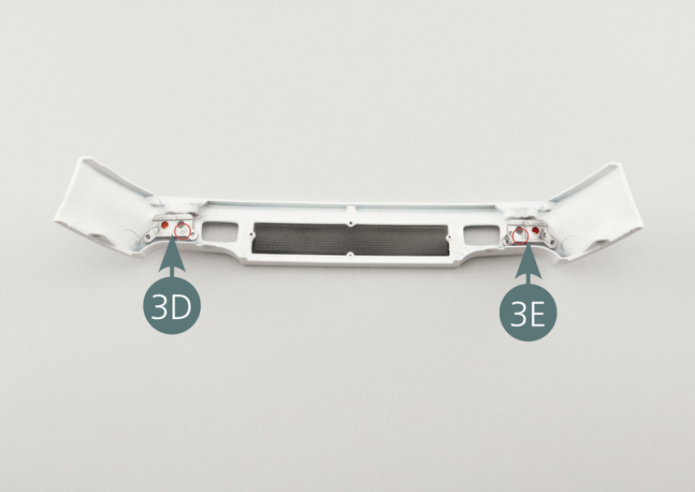
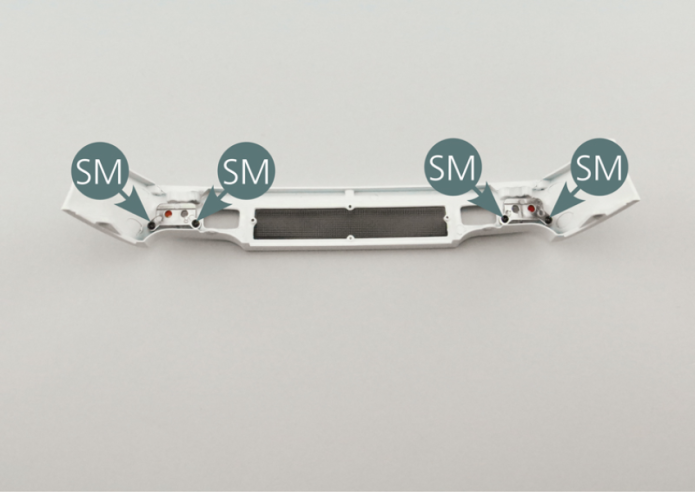
Step 2
Position the right (3H) and left (3G) indicator lights on the front bumper (3A), then position the right (3E) and left (3D) indicator reflectors respectively from above and secure each with two SM screws.
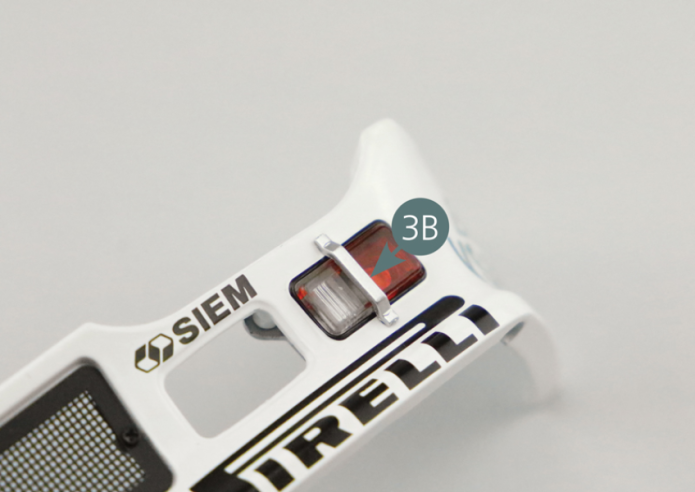
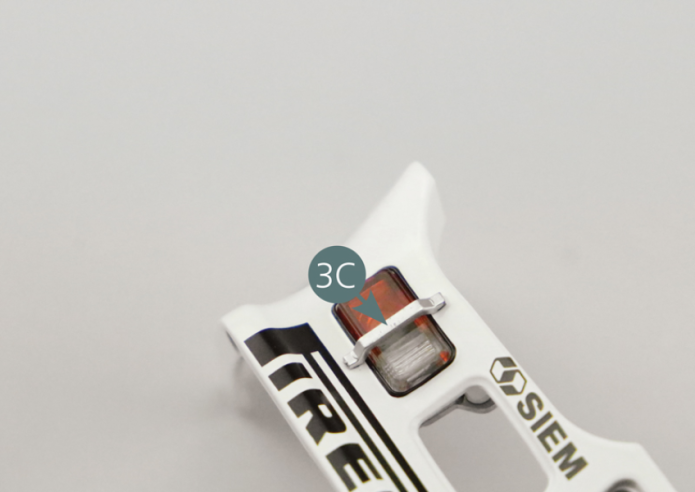
Step 3
Position the right bracket (3C) on the front bumper (3A), above the right indicator light (3H). Check the correct orientation of the bevelled edges (red arrow). Position the left bracket (3B) on the front bumper (3A), above the left indicator light (3G). Check the proper orientation of the bevelled edges (red arrow).
Step 4
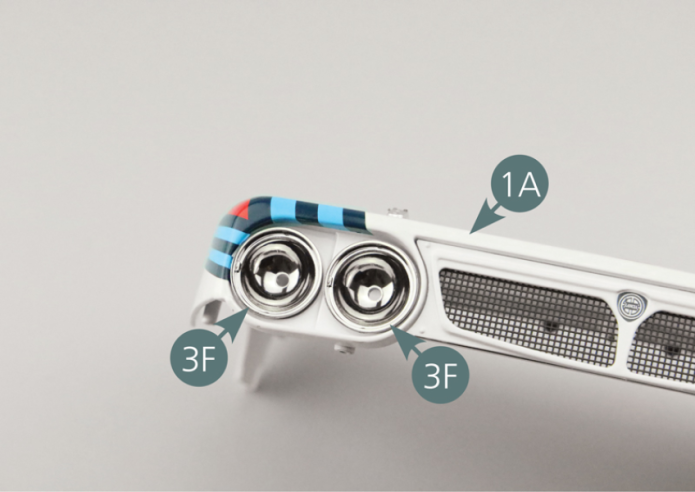
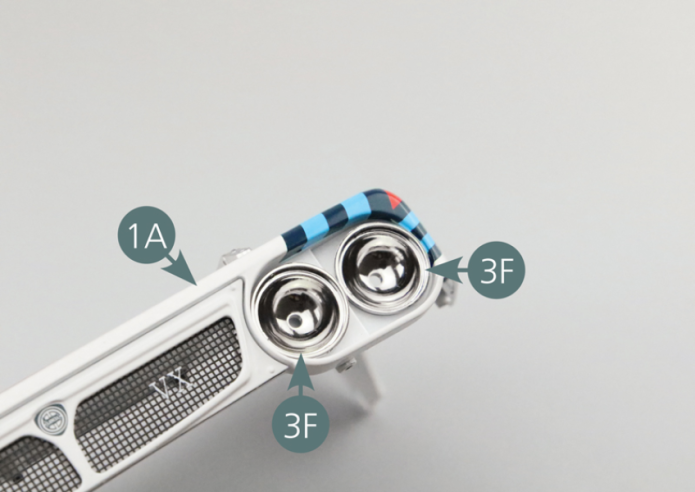
Pre-assembled front bumper
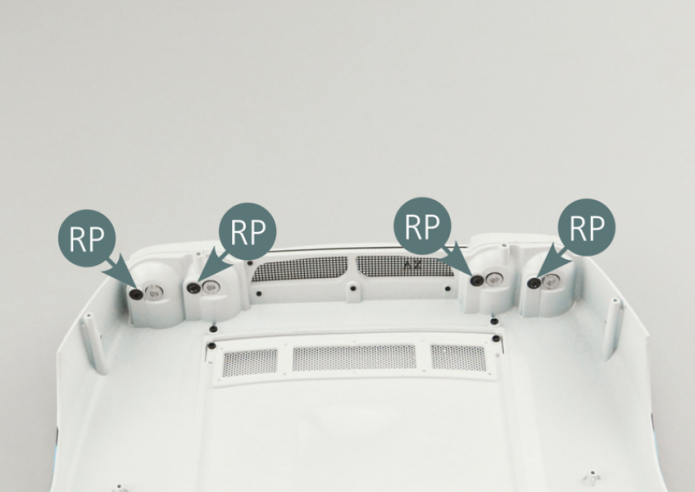
Position the four headlight reflectors (3F) on the grille of the front body (1A) and secure with four RP screws.
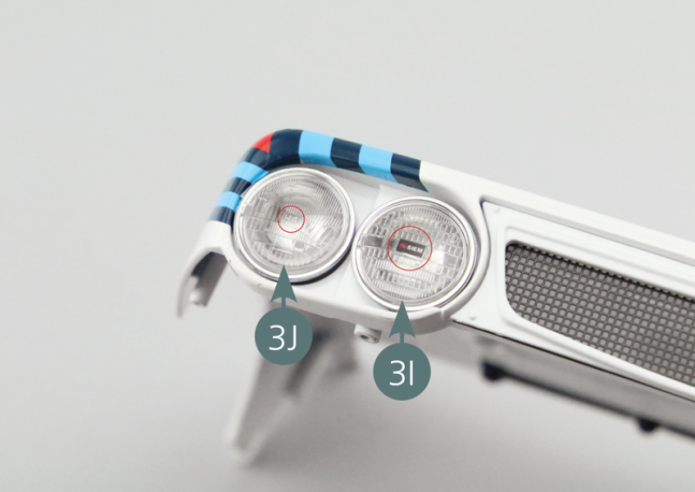
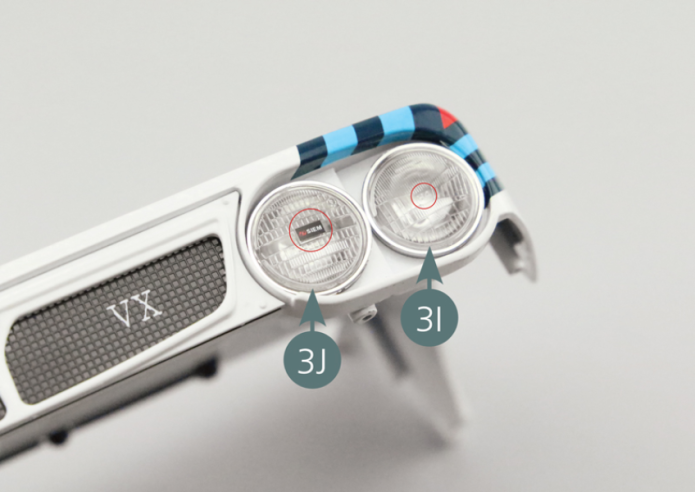
Step 5
Position one outer (3J) and one inner (3I) headlamp lens on the two headlamp reflectors (3F) positioned on the right side of the grille. Place an outer (3J) and inner (3I) headlight lens on the two headlight reflectors (3F) at the left side of the grille.
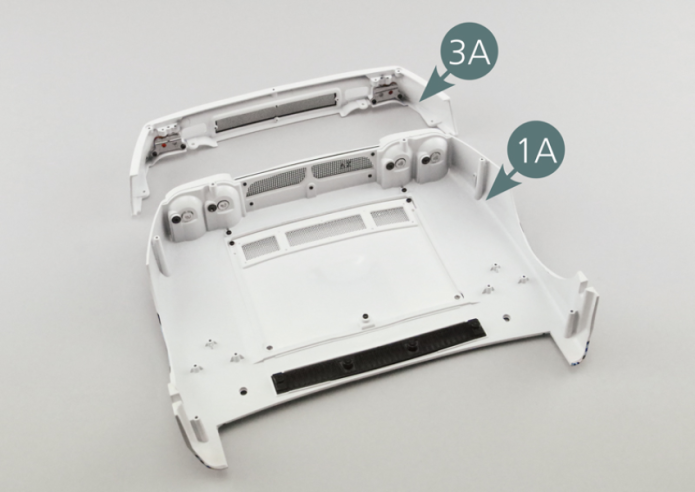
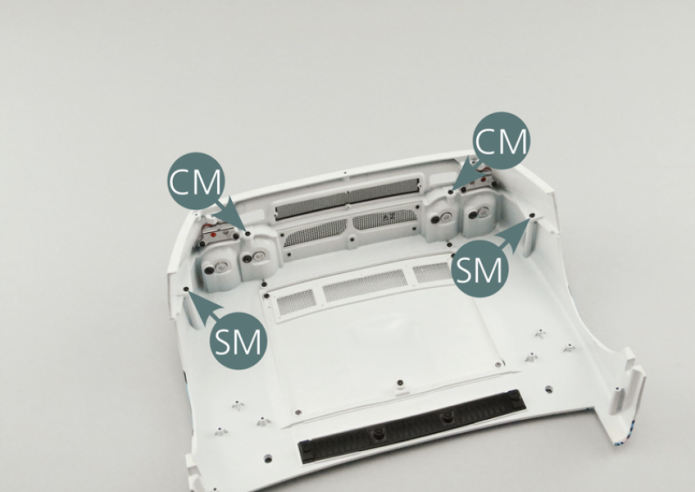
Step 6
Place the front bumper (3A) on the front body (1A) using two SM and two CM screws.
GENERAL VIEW

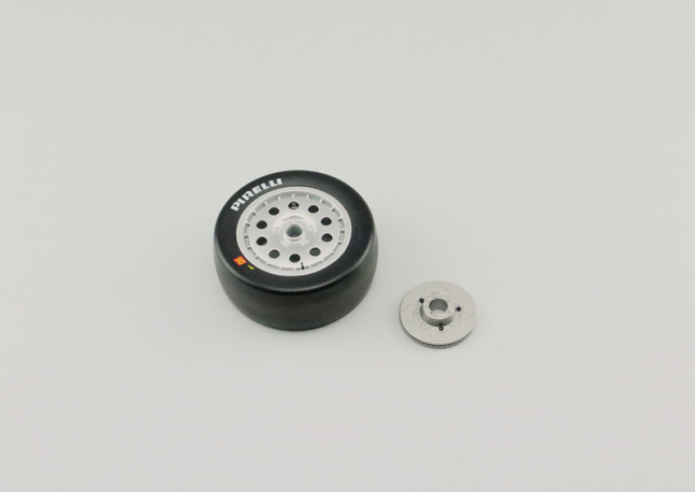
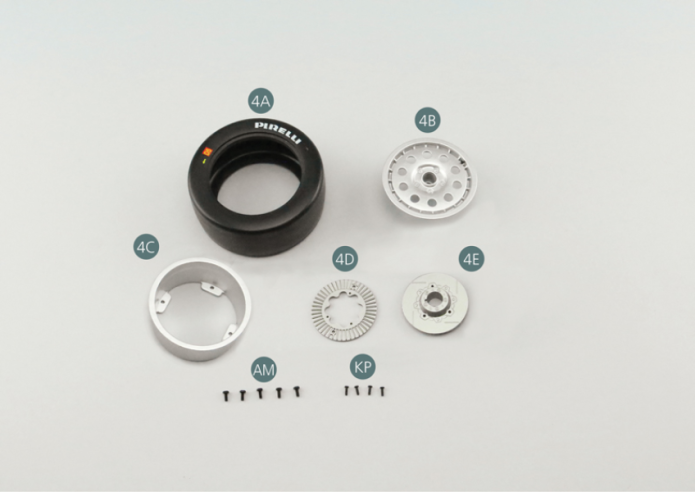
Kit 4 - FRONT WHEEL AND DISC BRAKE ASSEMBLY
Parts of kit
- 4A Tyre
- 4B Outer wheel rim
- 4C Inner wheel rim
- 4D Brake disc
- 4E Brake disc with hub
- Screw KP M 1.4 x 4 mm (x 4)
- Screw AM M 1.4 x 4 mm (x 5)
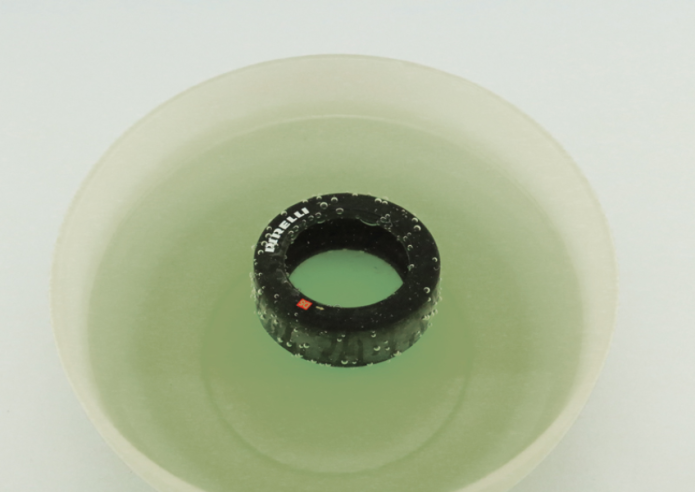
Step 1
Immerse the tyre (4A) in warm water for 30 seconds in order to soften it.
Step 2
Fit the inner wheel rim (4C) into the tyre (4A).
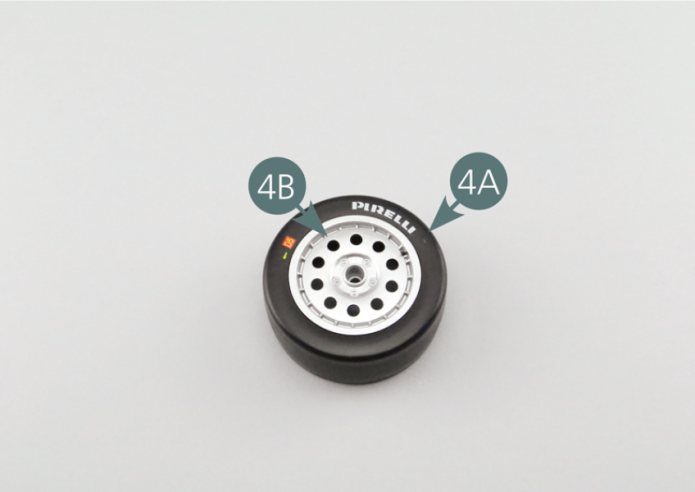
Step 3
Fit the outer wheel rim (4B) into the tyre (4A), aligning it with the inner rim (4C) and secure with four AM screws.
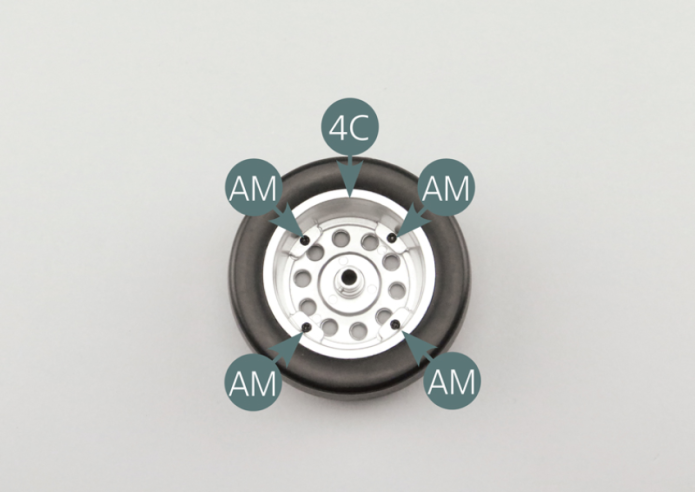
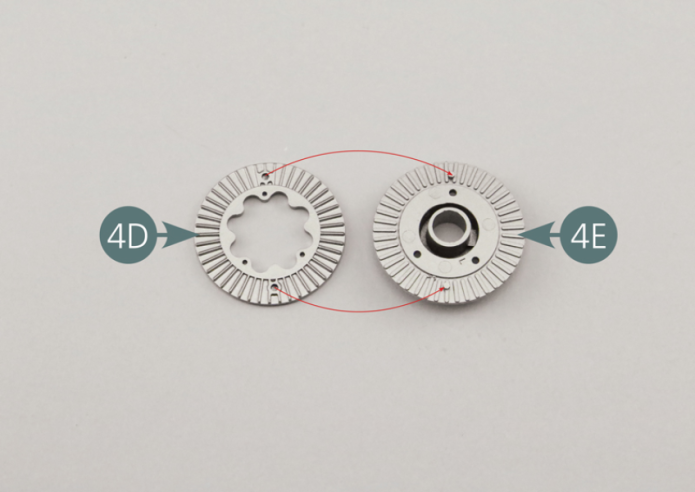
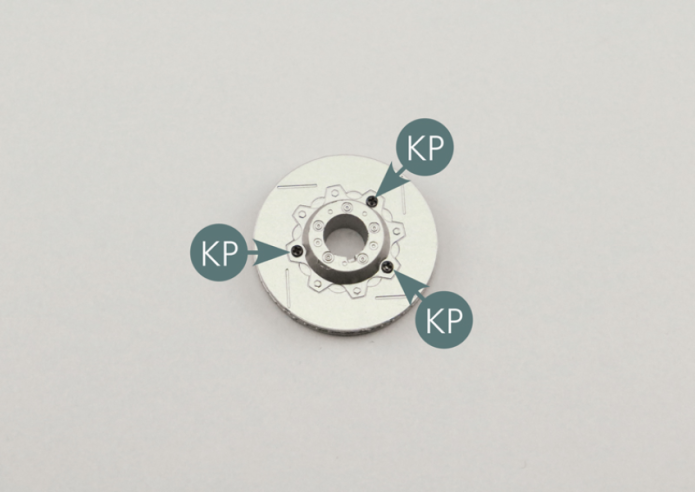
Step 4
Align (red dotted lines) and position the brake disc (4D) on the brake disc hub (4E) and secure with three KP screws.
GENERAL VIEW