English
 français
 Deutsch
 español
 italiano
 português


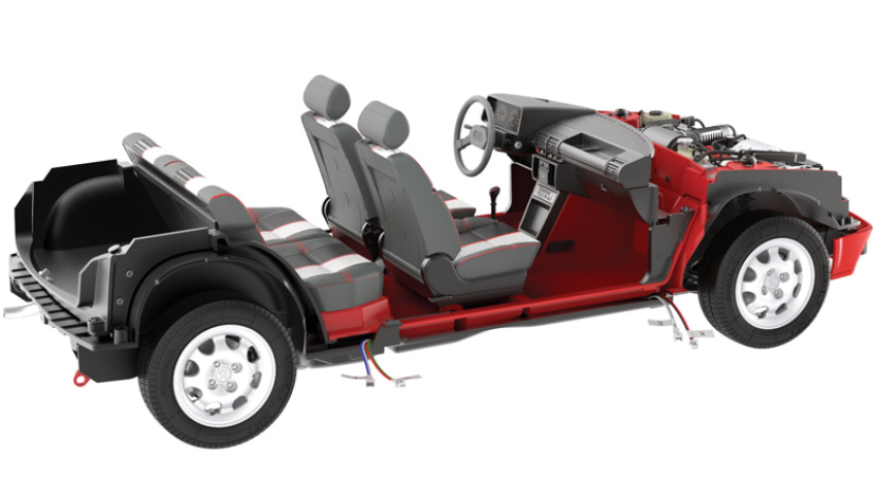
Peugeot 205 GTI 1.9 - Box 17

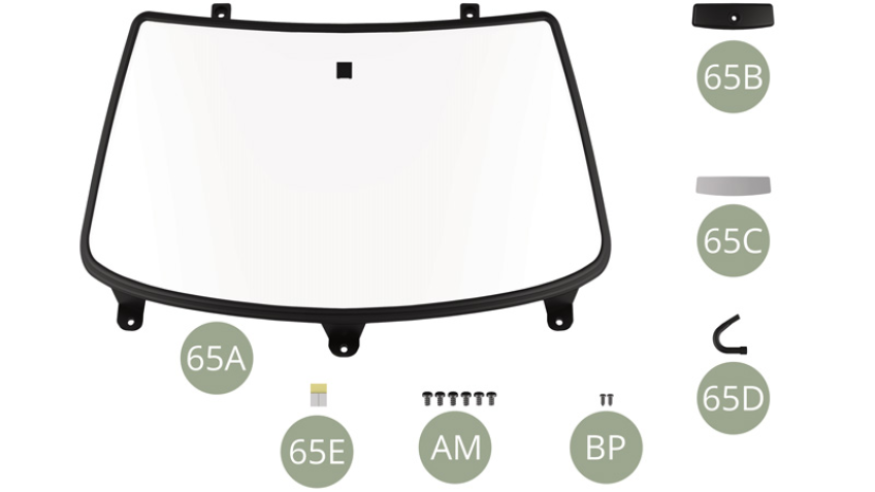
Kit 65
Parts of kit
- 65A Windscreen
- 65B Rear-view mirror housing
- 65C Mirror
- 65D Rear-view mirror arm
- 65E Double side tape ( x2 )
- AM M 1,7 x 3 mm (x 6)
- BP M 1,2 x 3 mm (x 2)
Step 1
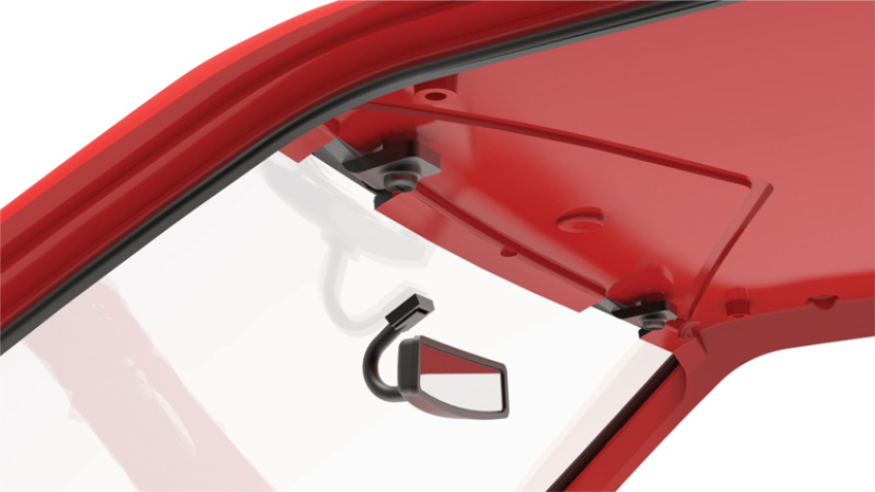
Fit 65B Rear-view mirror housing to 65D Rear-view mirror arm and fix with BP screw.
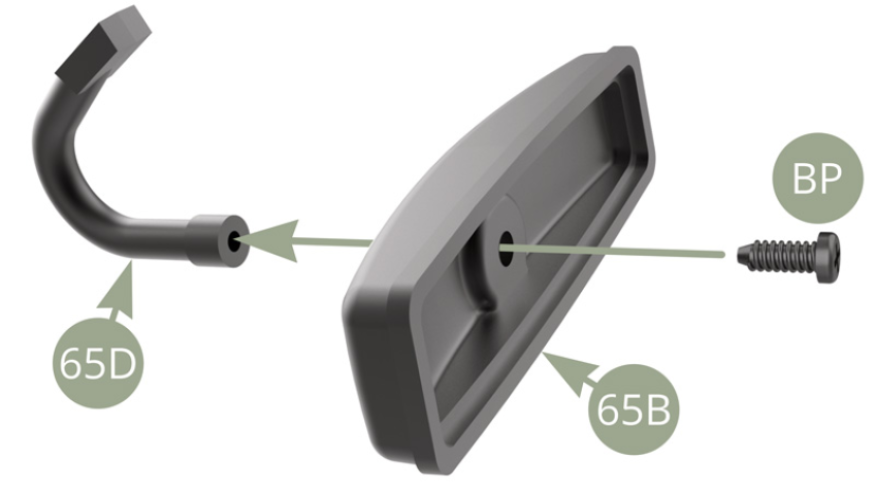
Peel backing paper off 65C Mirror ( blue arrow ) and fit it with its self adhesive back side to 65B Rear-view mirror housing.
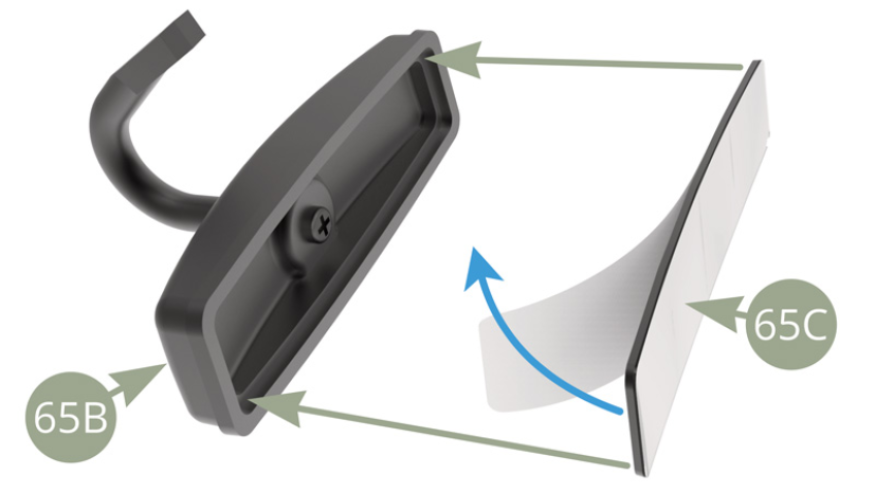
Peel transparent protective film off 65C Mirror (blue arrow).

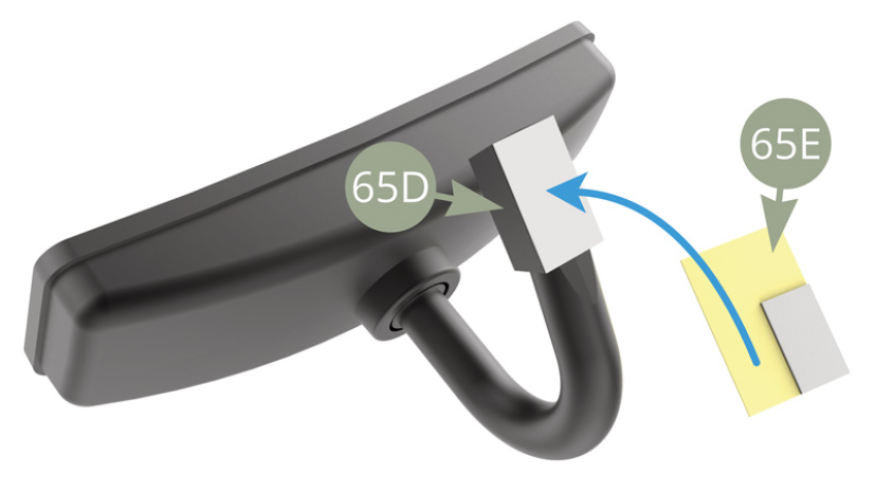
Take one of two 65E Double side tape pieces off yellow backing paper and apply it to upper square flat area of 65D Rear-view mirror arm.
Peel away ( blue arrow ) 65E Double side tape white backing paper leaving sticky transparent tape attached to 65D Rear-view mirror arm ( red arrow ).
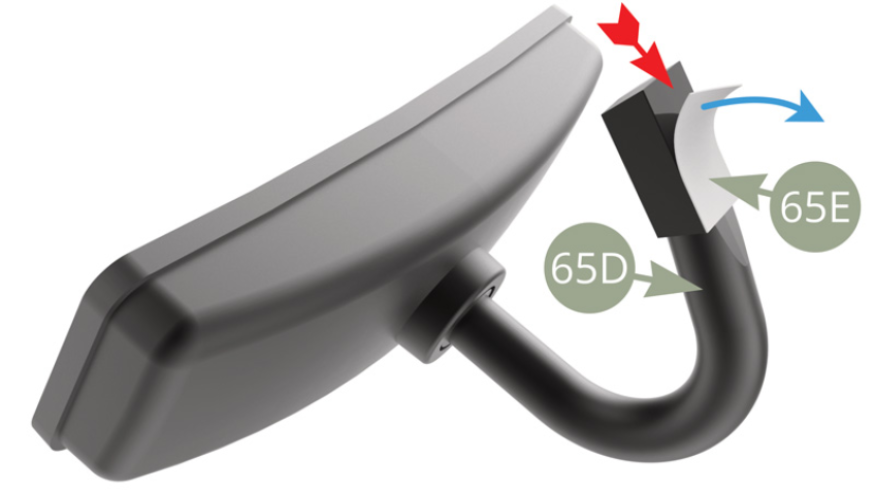
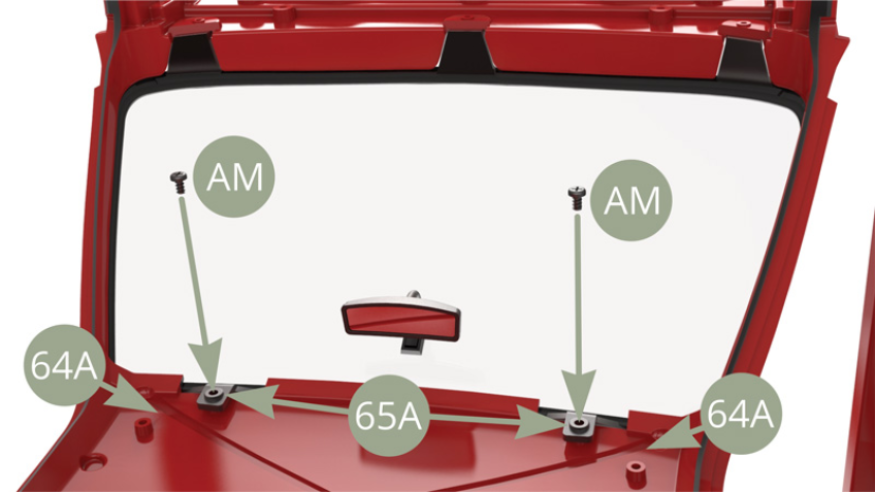
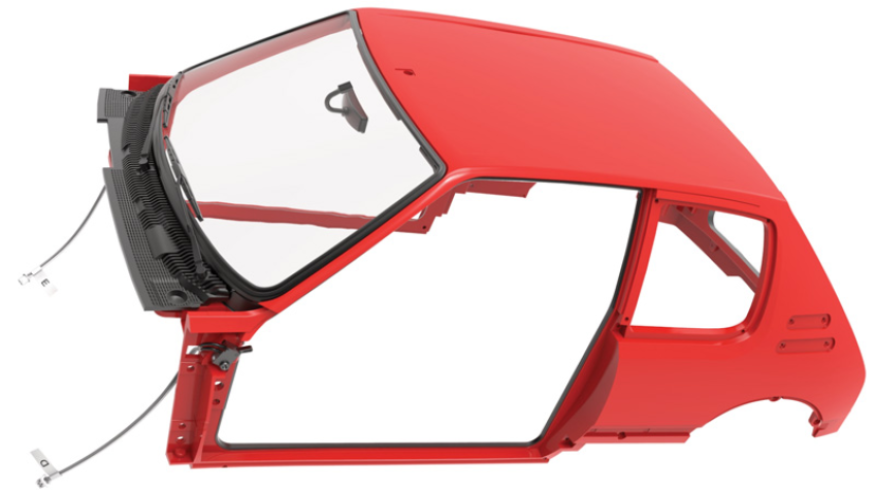
Fit 65D Rear-view mirror arm by its sticky end area to the black niche on 65A Windscreen inner side.

Inner Rear-view mirror is attached to Windscreen.
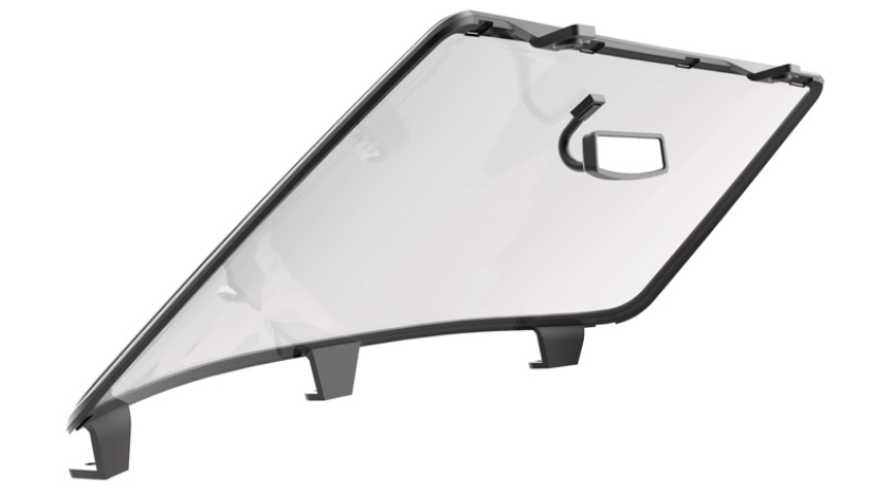
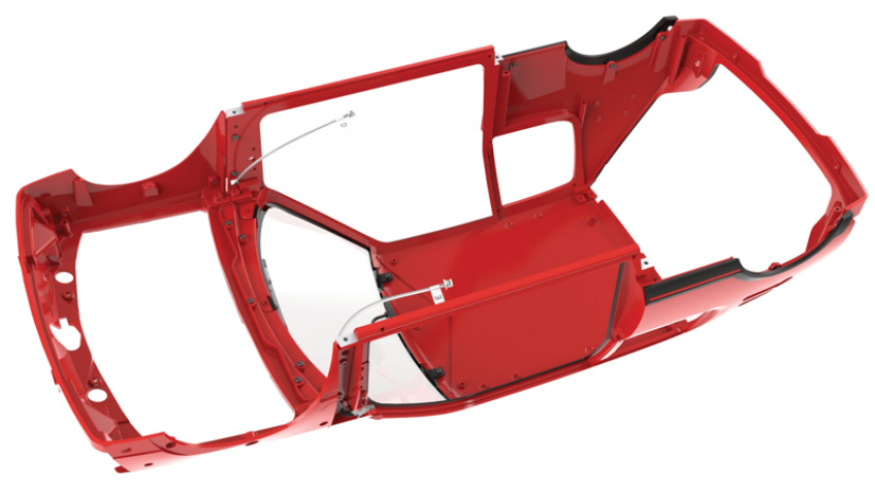
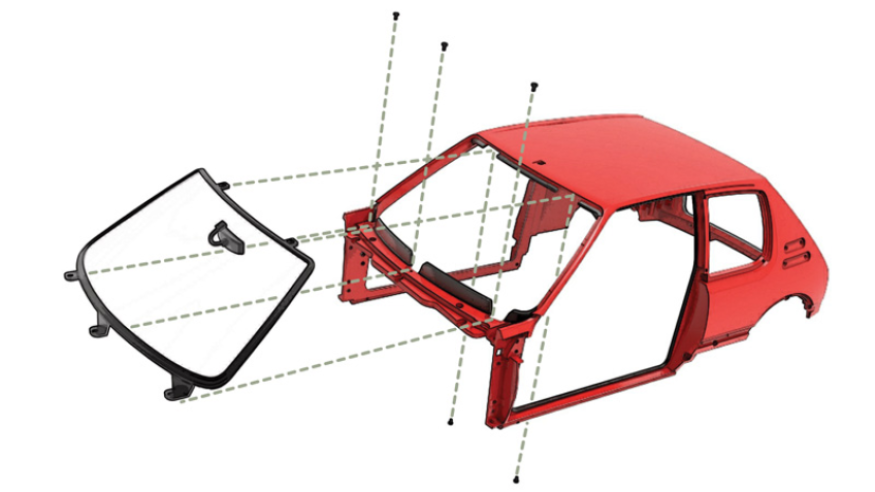
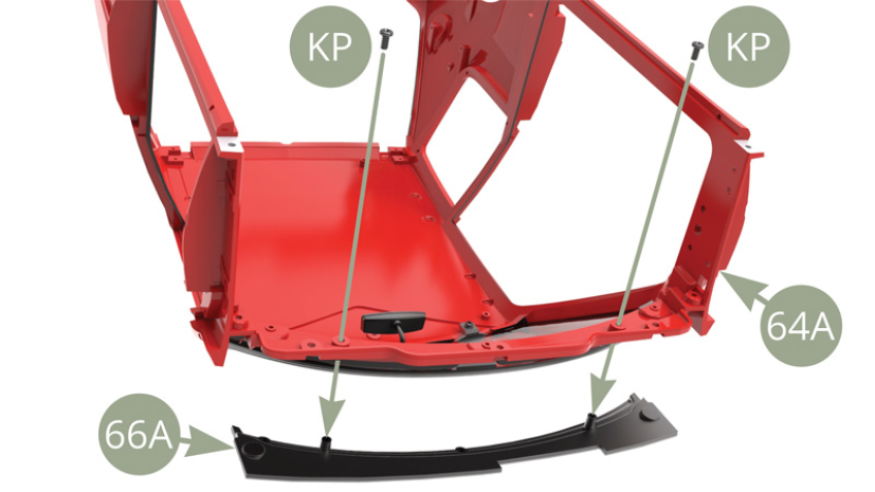
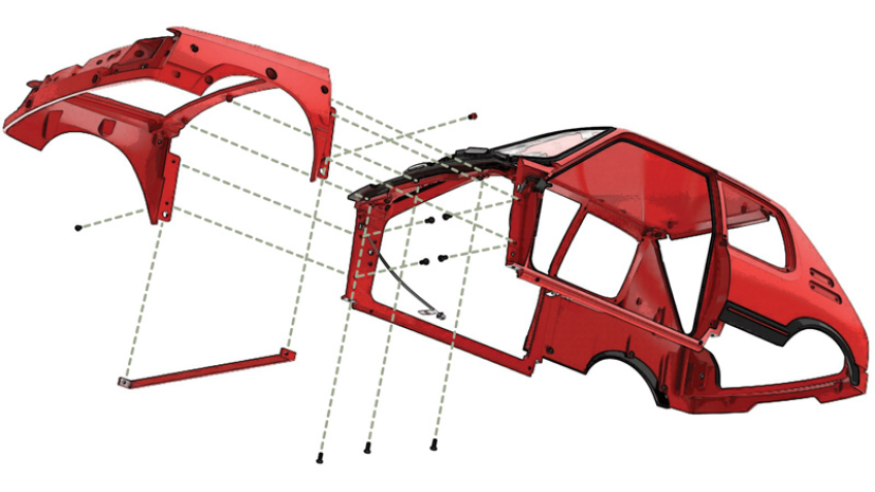
Fit 65A Windscreen with its two upper tabs to 64A Body frame (green arrow) , and then fit lower three tabs of 65A Windscreen with a down swing motion (blue arrow).
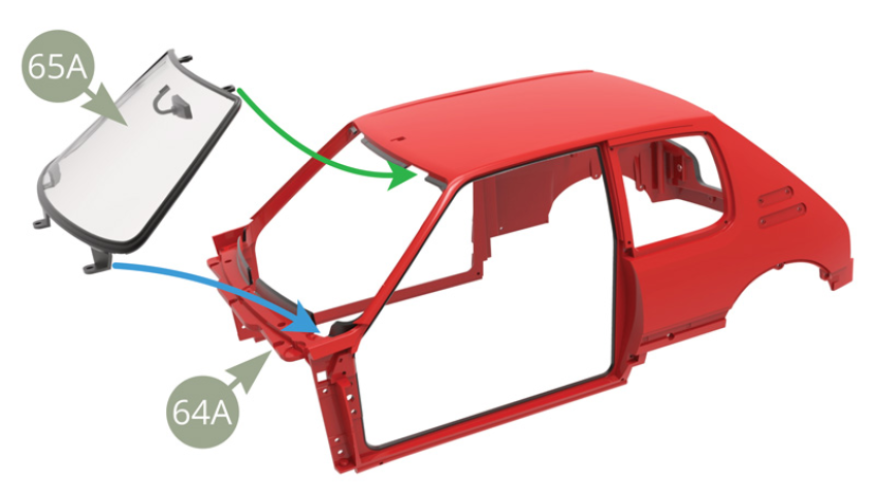
Fix three lower tabs of 65A Windscreen to 64A Body frame with three AM screws.
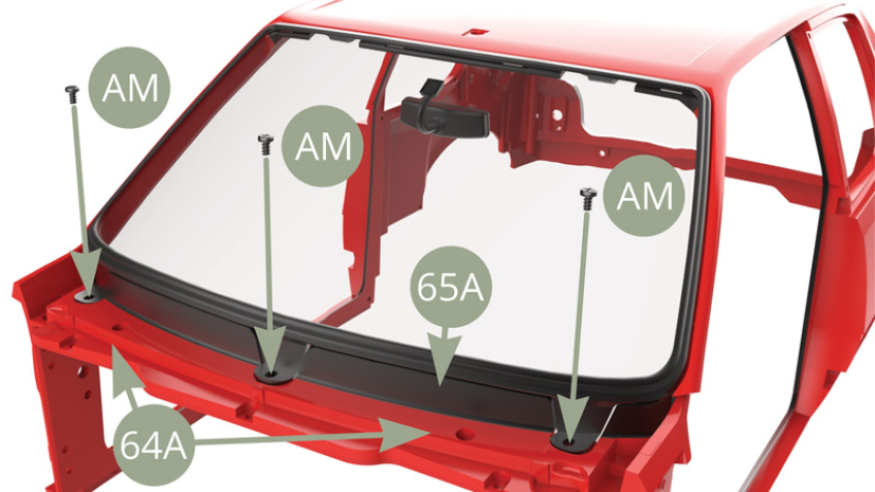
Fix two upper tabs of 65A Windscreen to inner ceiling edge of 64A Body frame with two AM screws.
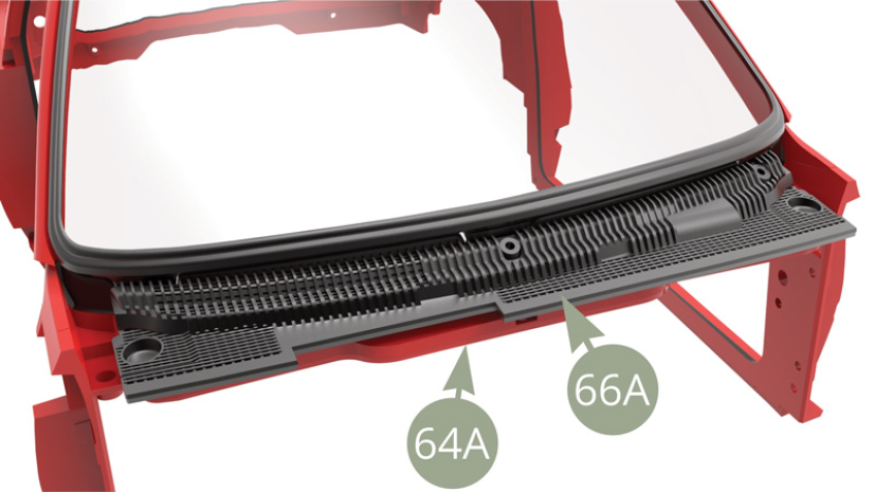
Windscreen with Inner Rear-view mirror is installed to Body frame.
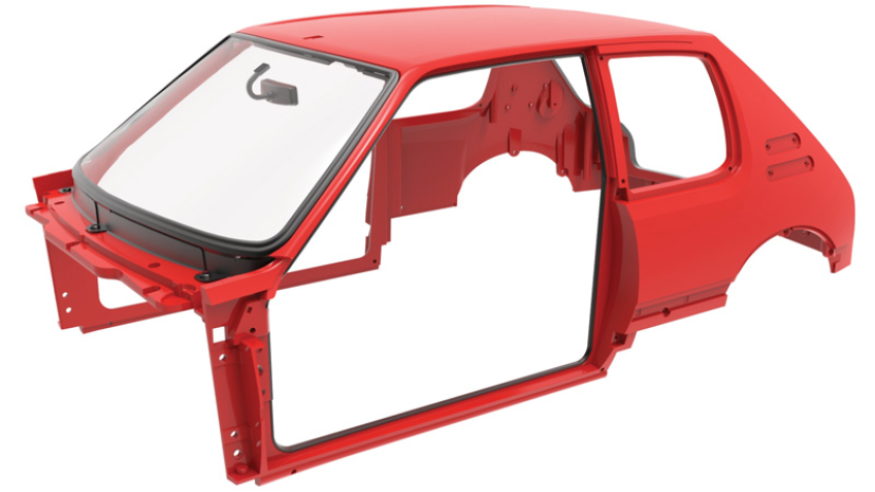
Assembly drawings

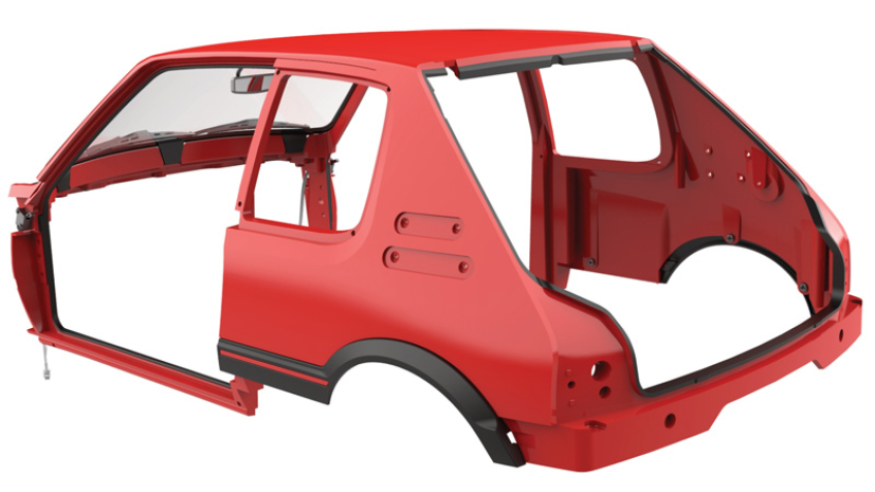
General view
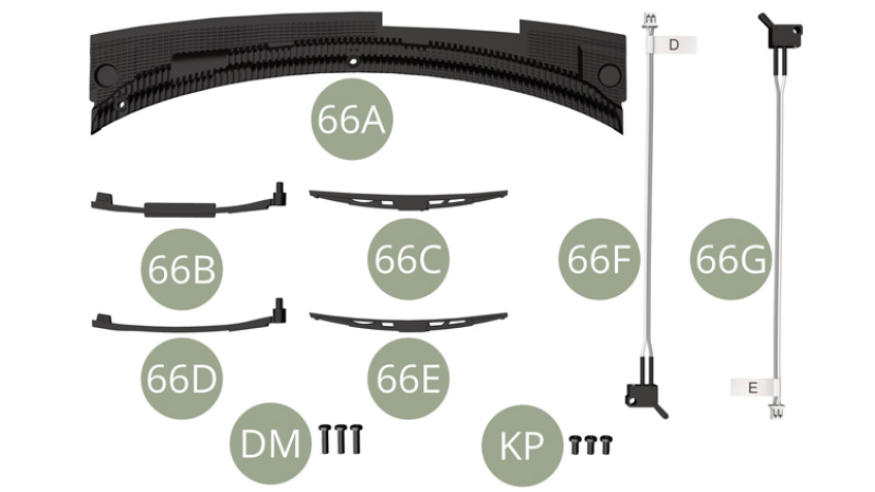
Kit 66
Parts of kit
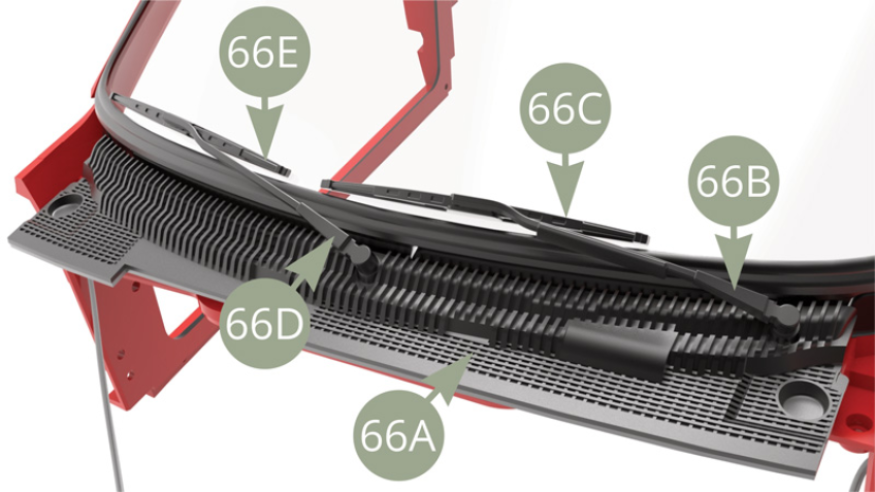
- 66A Air intake grille
- 66B Left Wiper arm ( marked L )
- 66C Left Wiper ( marked L )
- 66D Right Wiper arm ( marked R )
- 66E Right wiper ( marked R )
- 66F Saloon light switch cable D
- 66G Saloon light switch cable E
- DM M 2,0 x 7 mm (x 3)
- KP M 2,0 x 4 mm (x 3)
Step 2
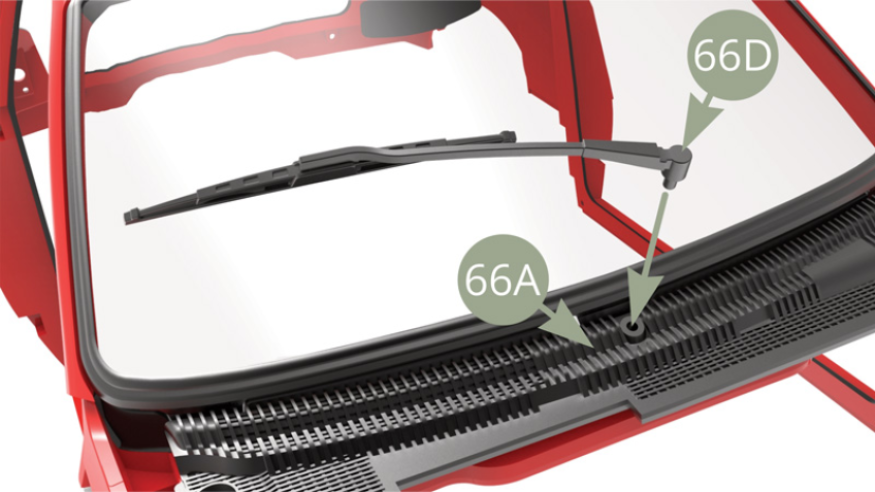
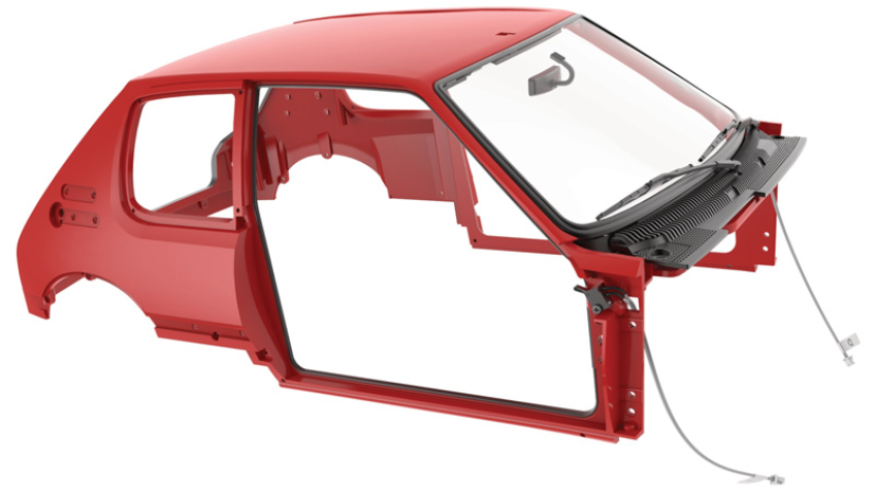
Fit Air intake grille 66A to 64A Body frame and fix with two KP screws ( lower illustrations ).
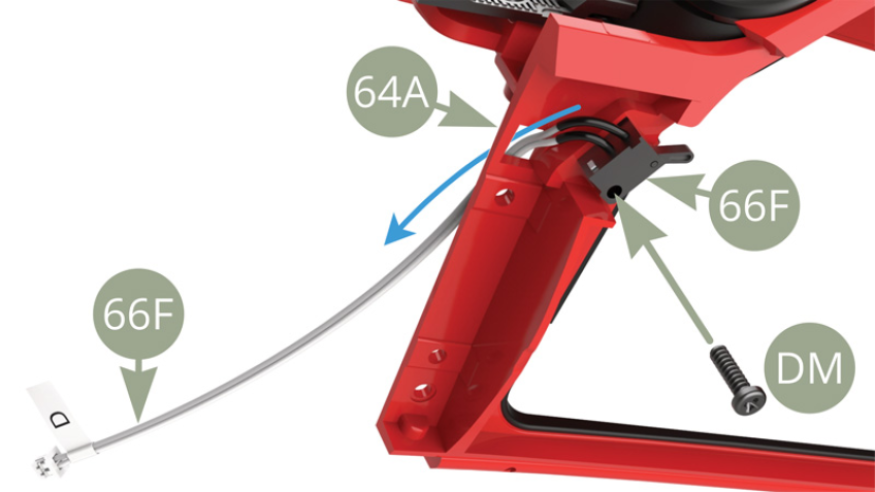
Fit 66F Saloon light switch cable D through square opening on the left side of 64A Body frame ( blue arrow ) and fix the switch with DM screw.
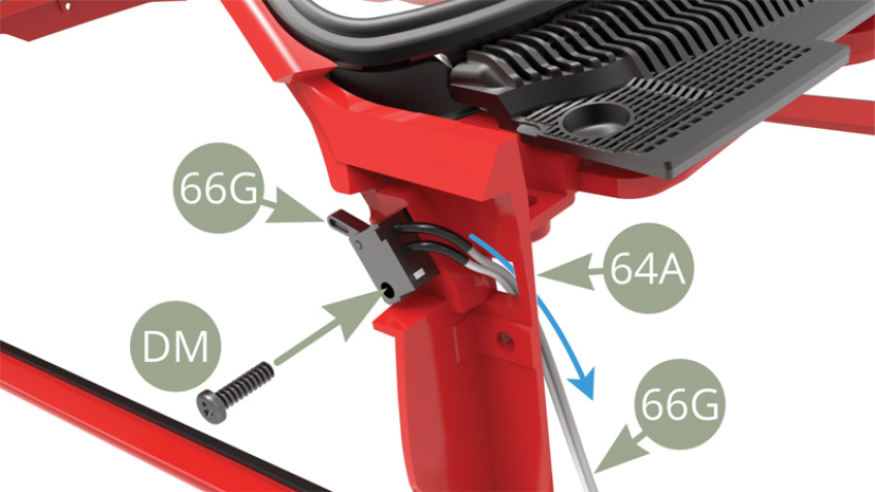
Fit 66G Saloon light switch cable E through square opening on the right side of 64A Body frame ( blue arrow ) and fix the switch with DM screw.
Fit 66D Right Wiper arm ( note marking R ) to 66E Right Wiper ( note marking R inside connection slot ).
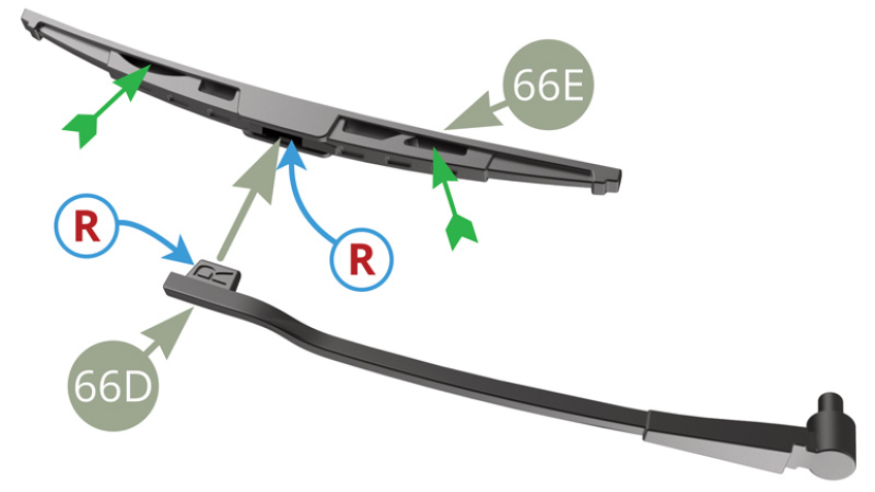
Fit 66D Right Wiper arm to 66A Air intake grille socket.
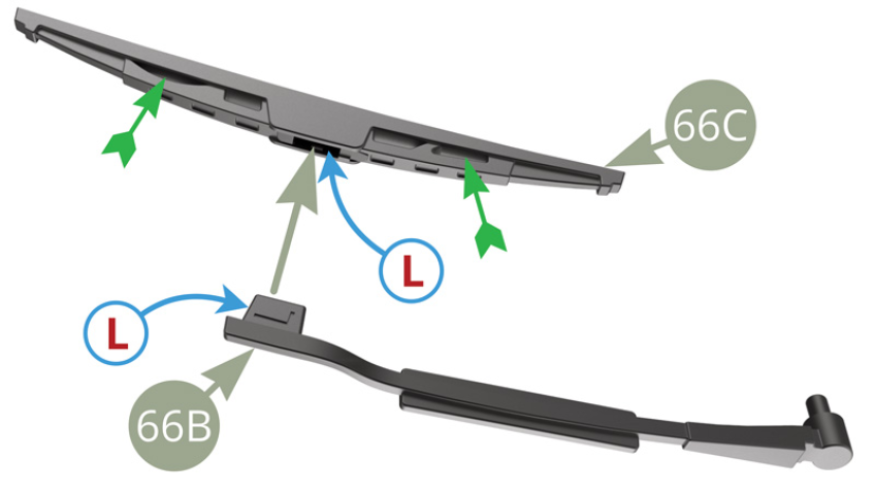
Fit 66B Left Wiper arm ( note marking L ) to 66C Left Wiper ( note marking THIS SHOULD BE L inside connection slot ).
Fit 66D Right Wiper arm to 66A Air intake grille socket.
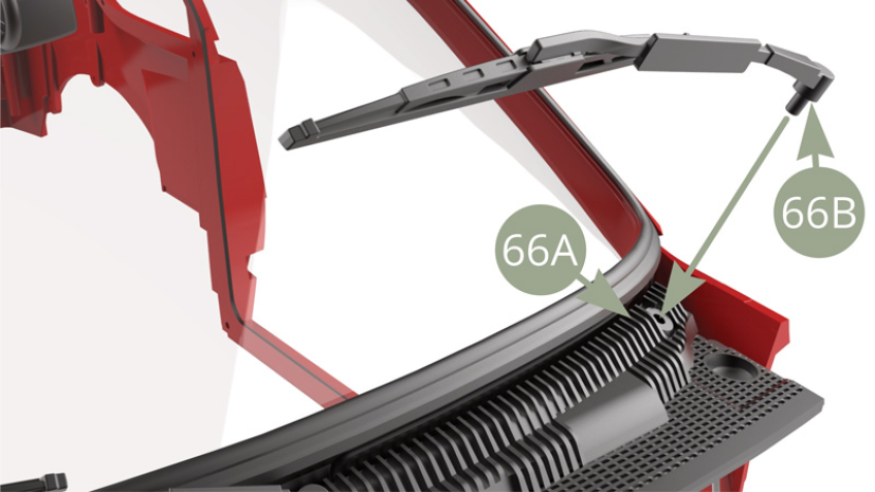
66D+66E Right and 66B+66C Left Windscreen Wipers are installed on 66A Air intake grille.
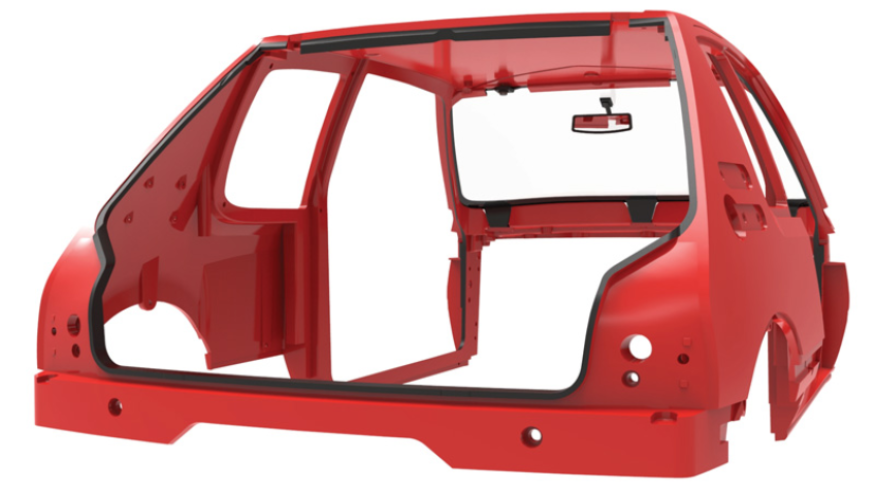
Assembly drawings
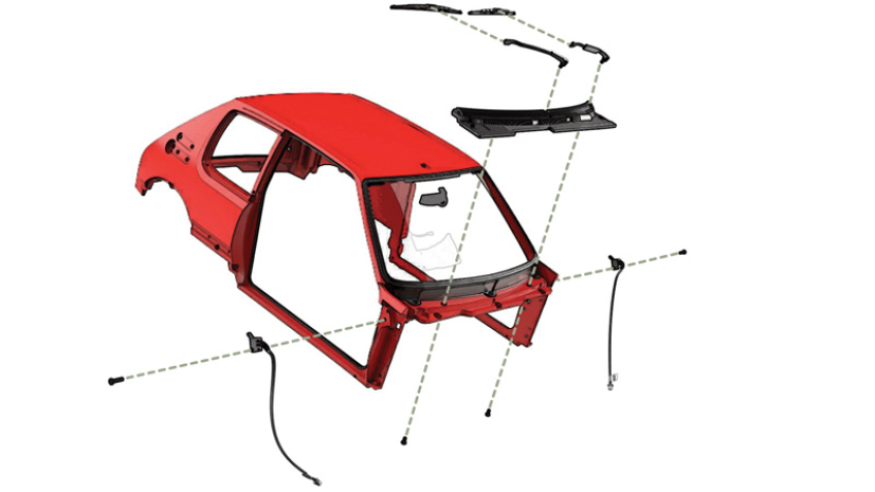
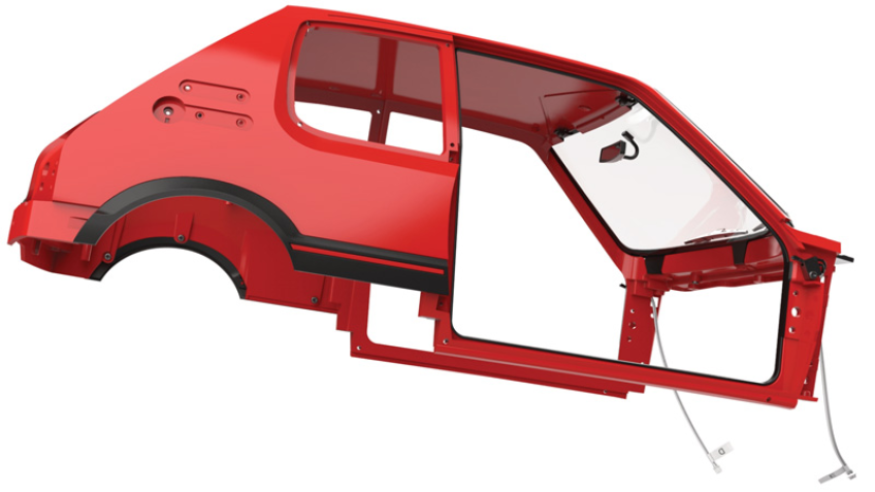
General view
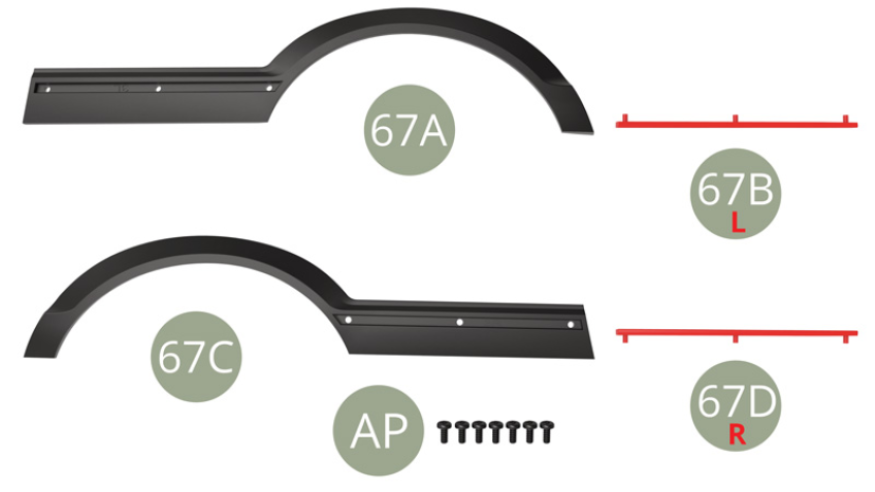
Kit 67
Parts of kit
- 67A Left rear wheel arc cover
- 67B Left trimming
- 67C Right rear wheel arc cover
- 67D Right trimming
- AP M 1,7 x 4 mm (x 7)
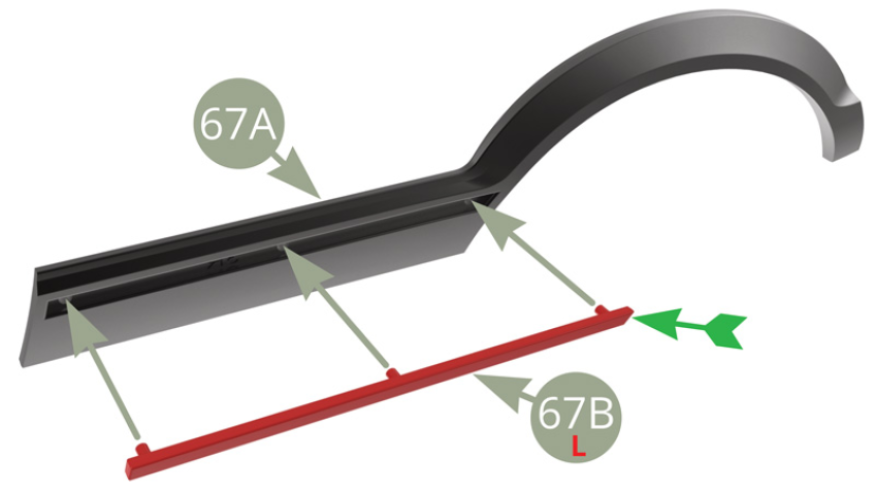
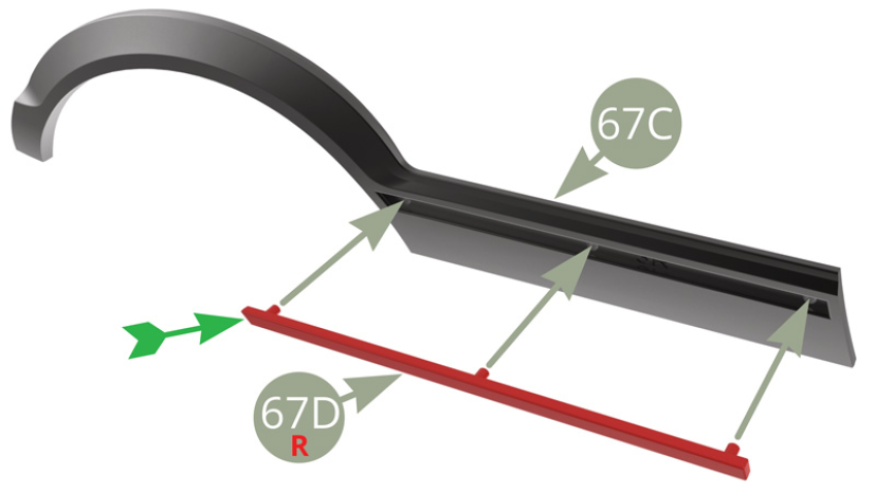
Step 3
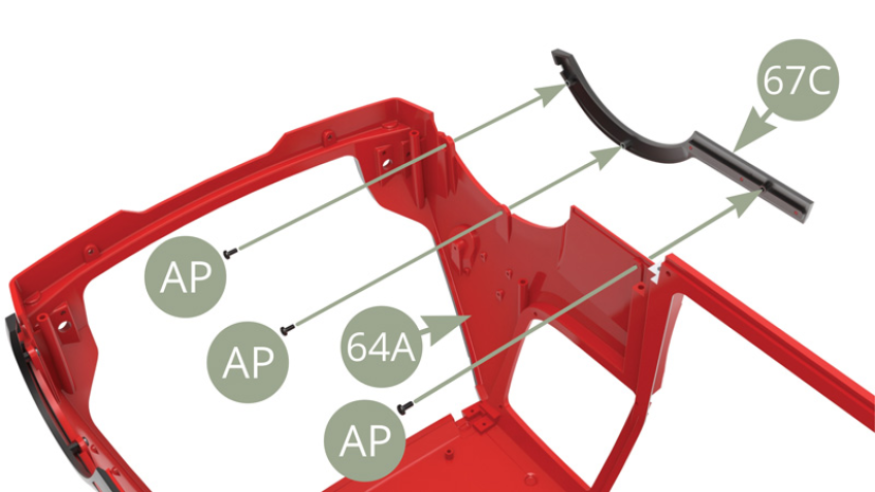
Fit 67B Left trimming ( note L marking on its back side and right slanted edge, green arrow , orientation ) to 67A Left rear wheel arc cover.
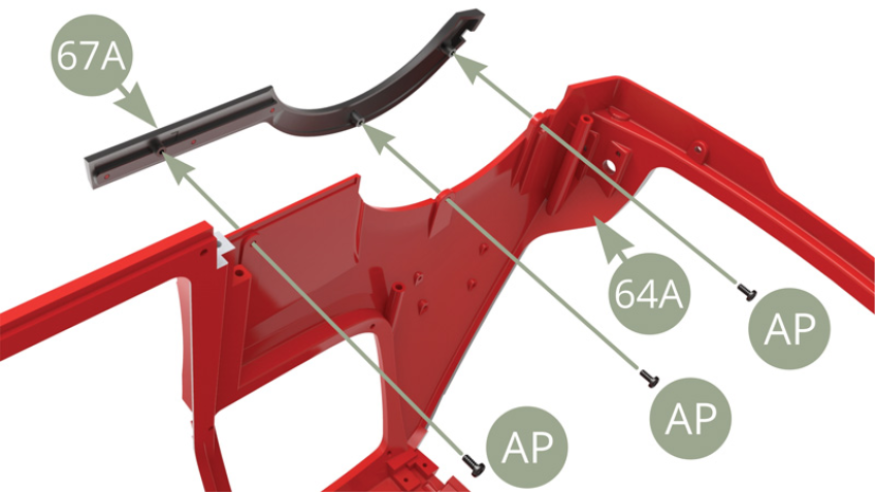
Fit 67A Left rear wheel arc cover to 64A Body frame and fix with three AP screws.
Fit 67D Right trimming ( note R marking on its back side and left slanted edge , green arrow , orientation ) to 67C Right rear wheel arc cover.
Fit 67C Right rear wheel arc cover to 64A Body frame and fix with three AP screws.
Assembly drawings
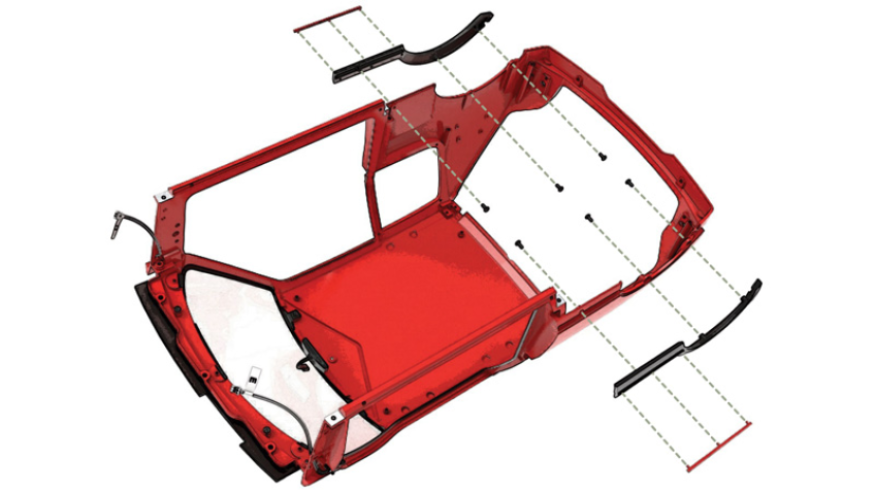
General view
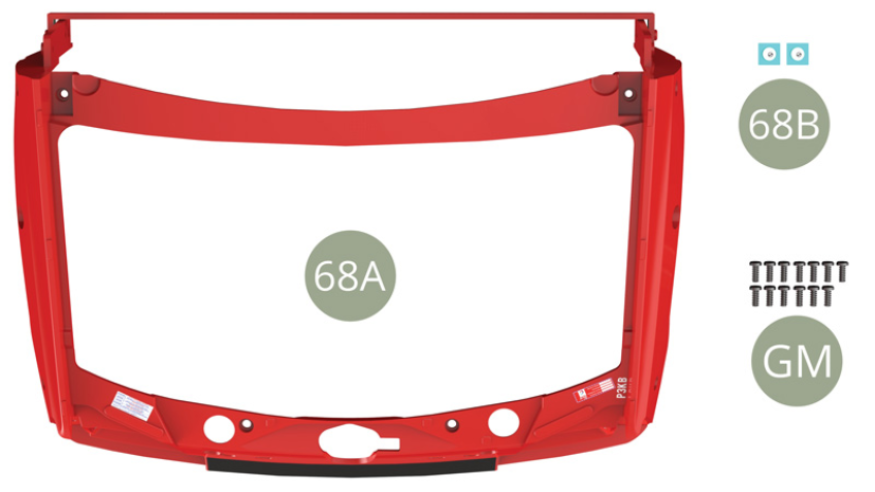
Kit 68
Parts of kit
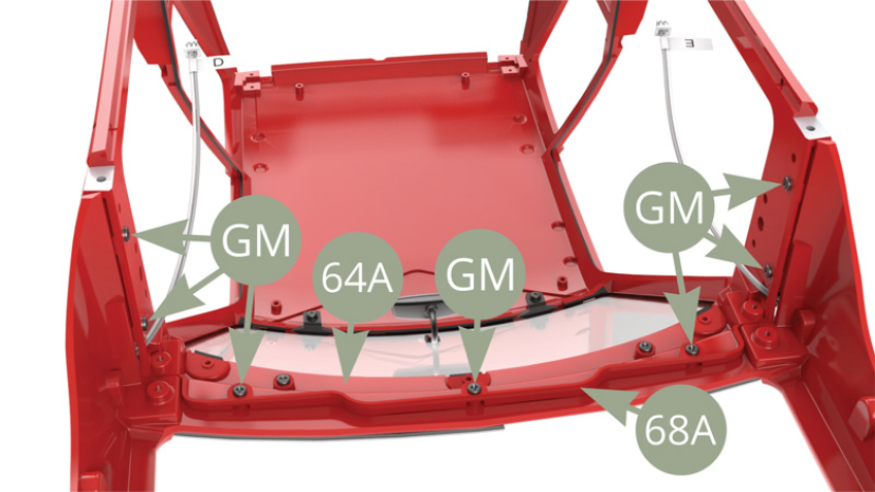
- 68A Front subframe
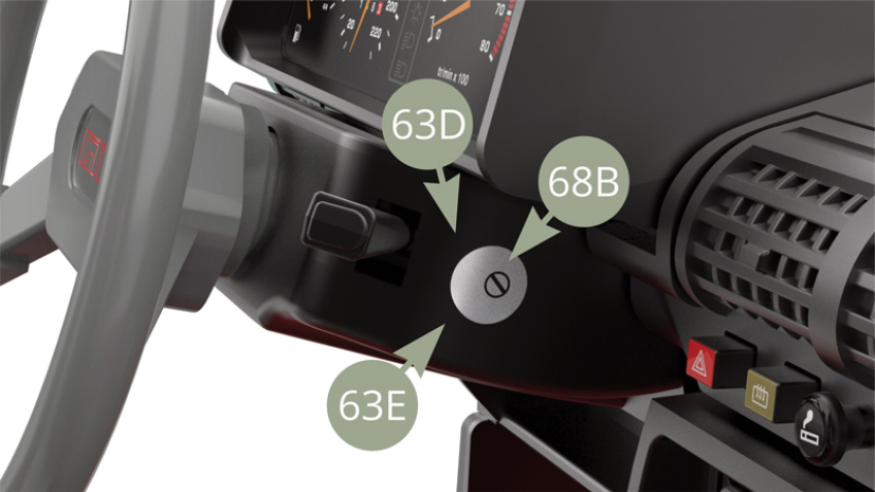
- 68B Ignition key lock decal ( x2 )
- GM M 2,0 x 5 mm (x 13)
Step 4
Remove distance keeping plank by undoing two side screws.
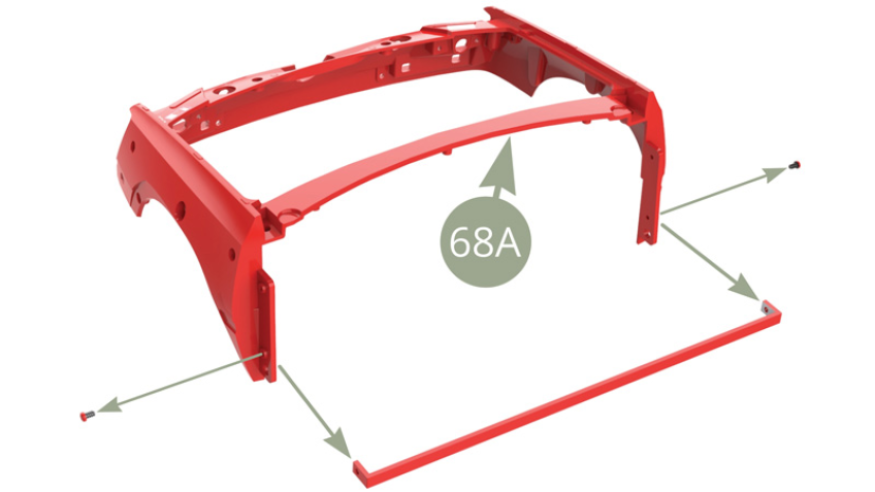
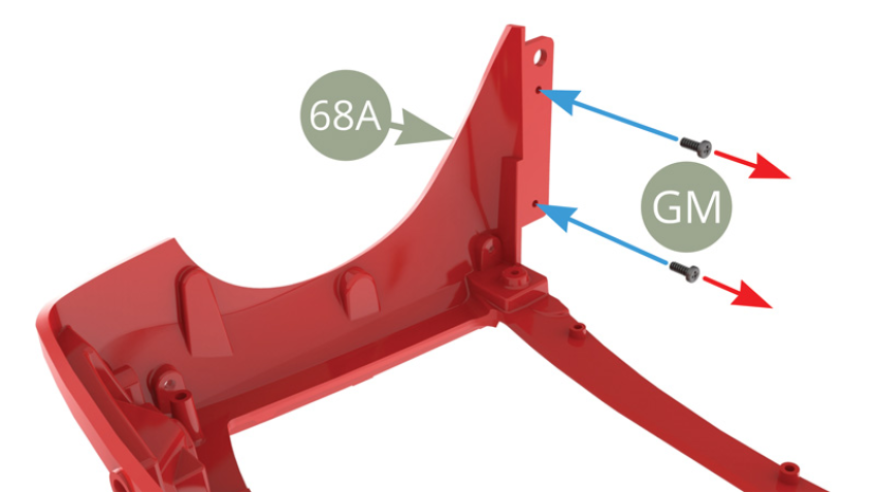
To facilitate further assembly cut the threads by taking four GM screws and screw them in ( blue arrows ) 68A Front subframe right ( upper image ) and left ( lower image ) side flanges , and then unscrew completely ( red arrows ).

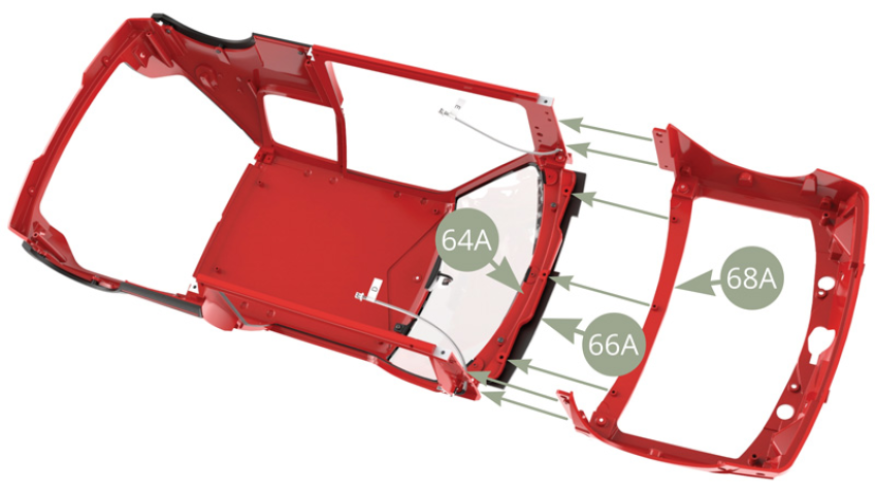
Fit 68A Front subframe to 64A Body frame , partially under front edge of 66A Air intake grille , and fix with seven GM screws ( lower illustrations ).
Put 68B Ignition key lock decal in water for 15 seconds slide the Key Lock off and apply using tweezers to 63D Upper and 63E Lower steering column housing ( lower illustrations ).

Assembly drawings
General view