English
 français
 Deutsch
 español
 italiano
 português


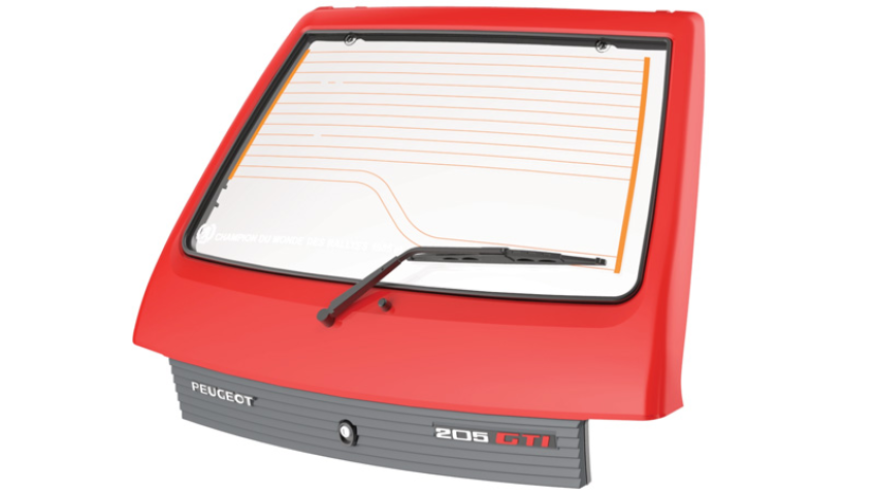
Peugeot 205 GTI 1.9 - Box 20

Kit 77
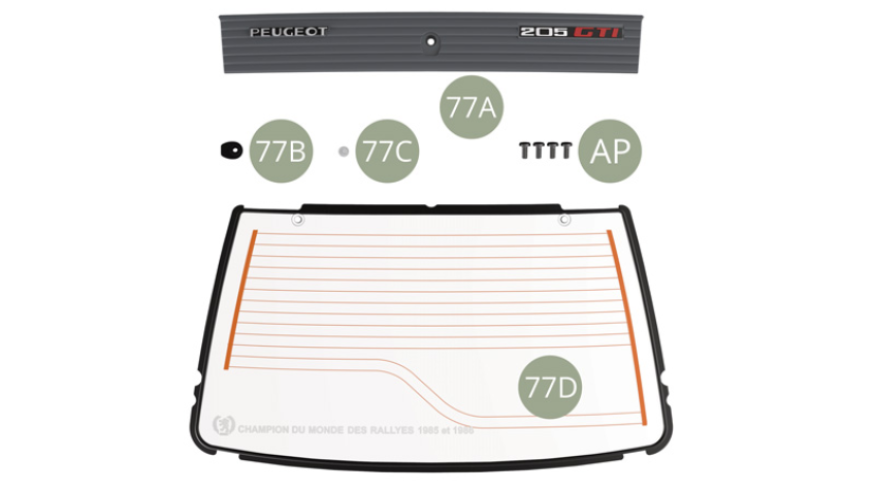
Parts of kit
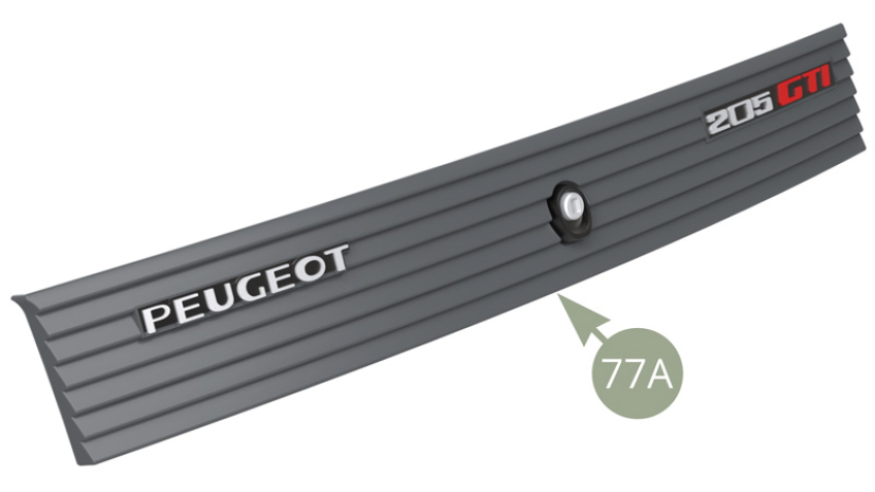
- 77A Tailgate deco panel
- 77B Tailgate lock
- 77C Lock button
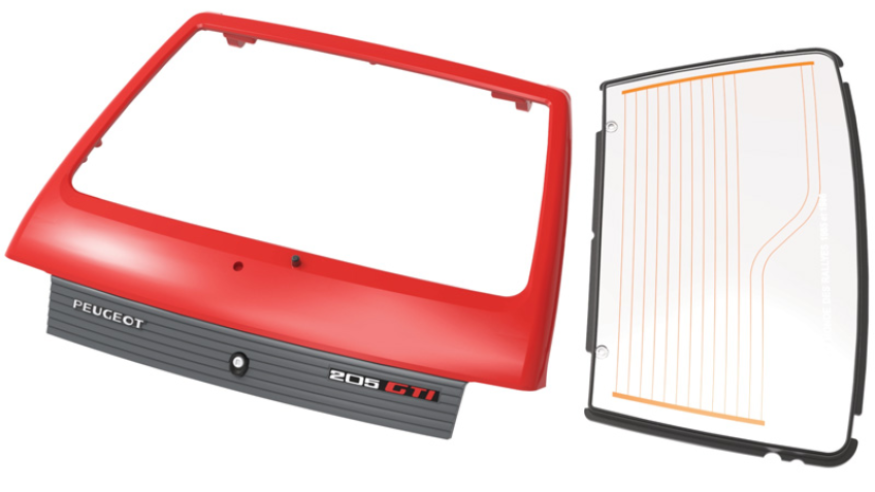
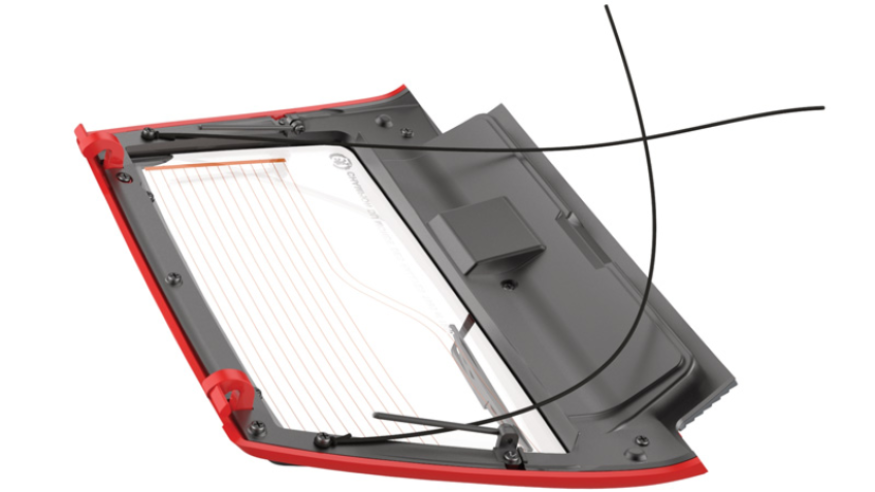
- 77D Tailgate glass with heater
- AP M 1,7 x 4 mm (x 4)
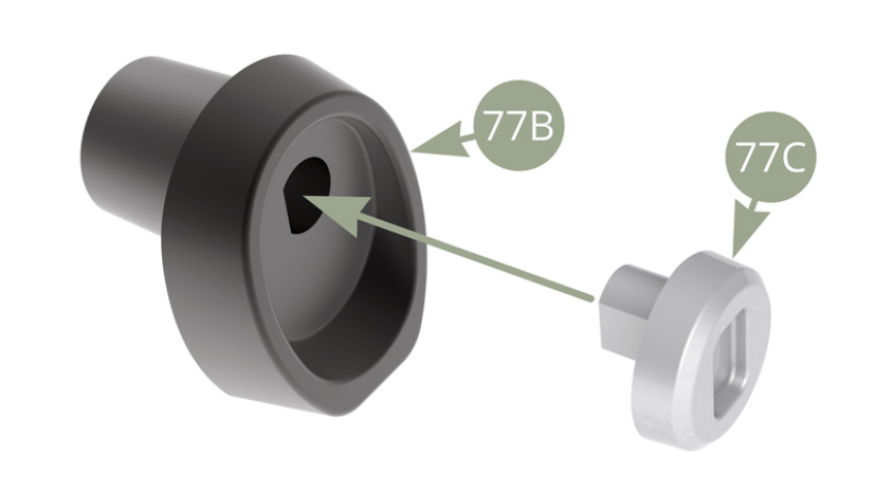
Step 1
Fit 77C Lock button to 77B Tailgate lock
Fit 77B Tailgate lock to 77A Tailgate deco panel and fix with AP screw.

Preassembled 77A Tailgate deco panel.
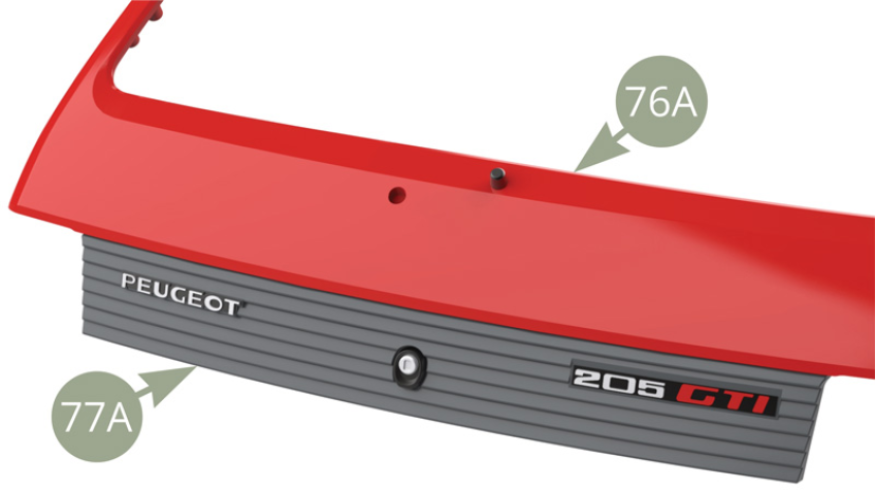
Fit 77A Tailgate deco panel to 76A Tailgate frame and fix with two AP screws.
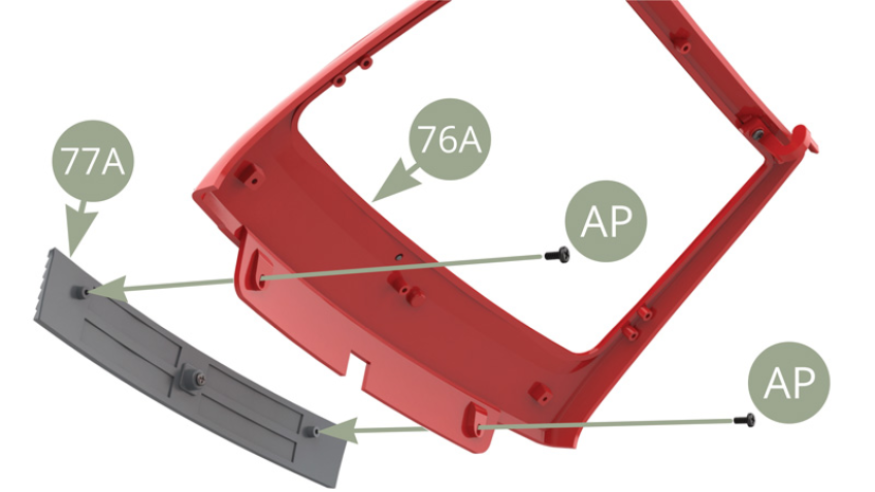
77A Tailgate panel is attached to 76A Tailgate.
Assembly drawings
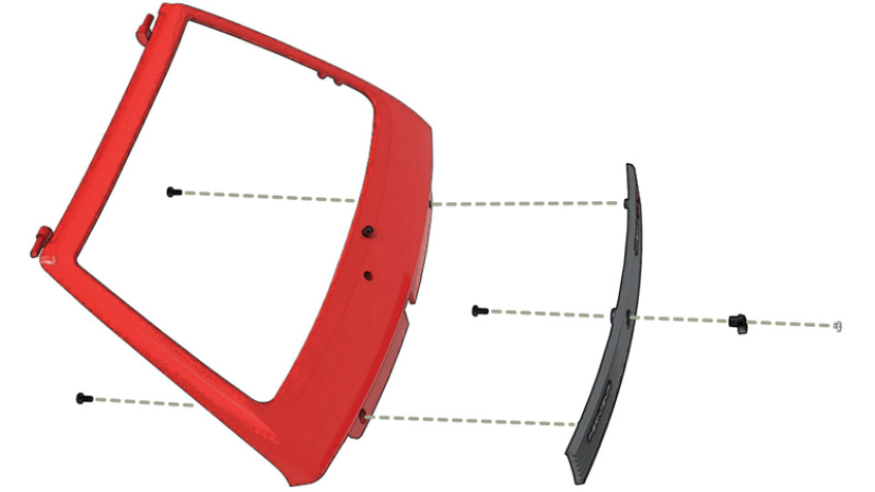
General view
Kit 78
Parts of kit
- 78A Tailgate inner panel
- 78B Rear wiper arm
- 78C Rear wiper blade
- AM M 1,7 x 3 mm (x 8)

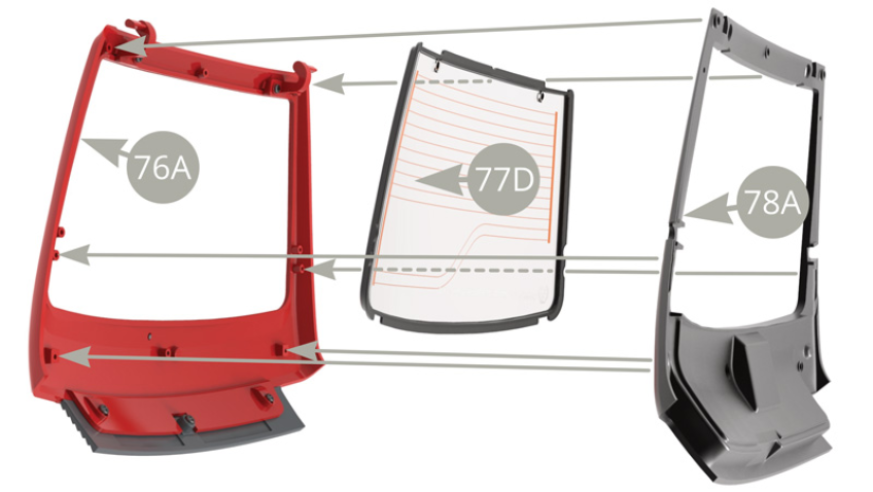
Step 2
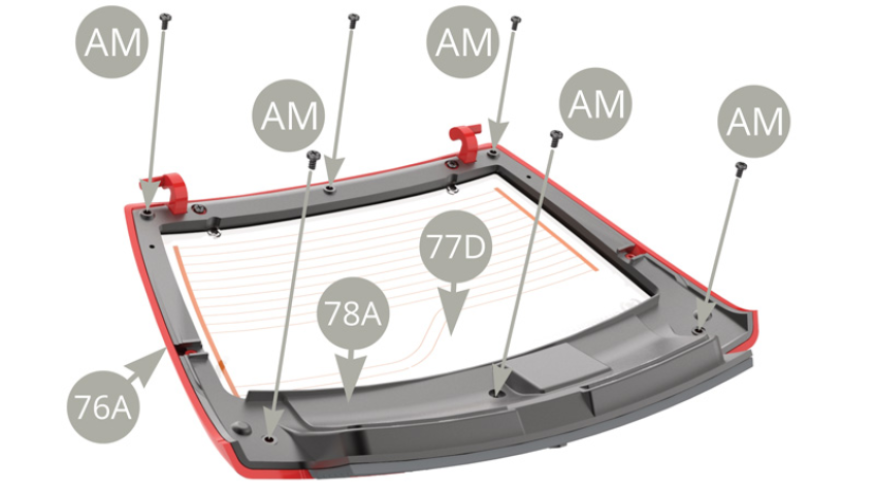
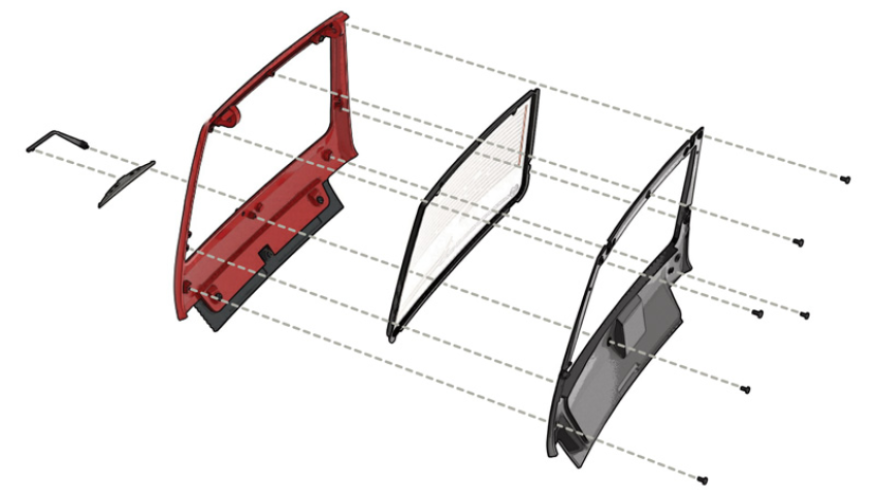
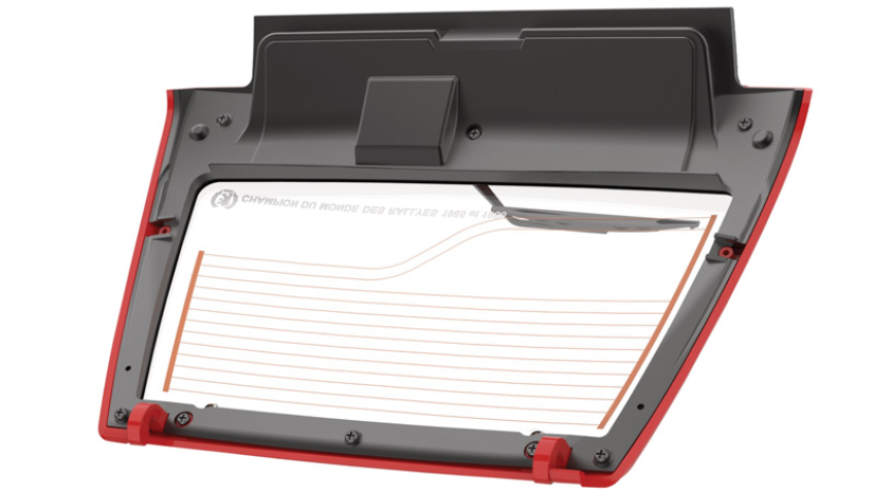
Fit 78A Tailgate inner panel to 76A Tailgate frame with 77D Tailgate glass in between.
Fix 78A Tailgate inner panel to 76A Tailgate with eight AM screws.
Fit 78C Rear wiper blade to 78B Rear wiper arm.
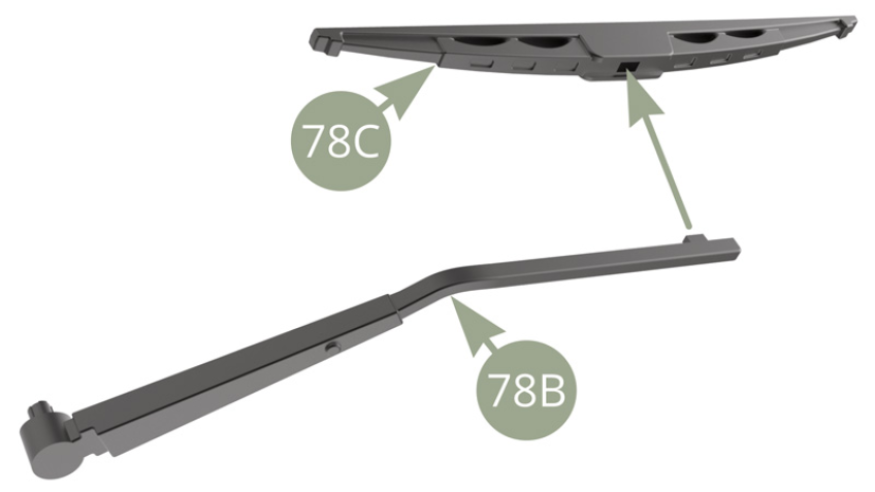
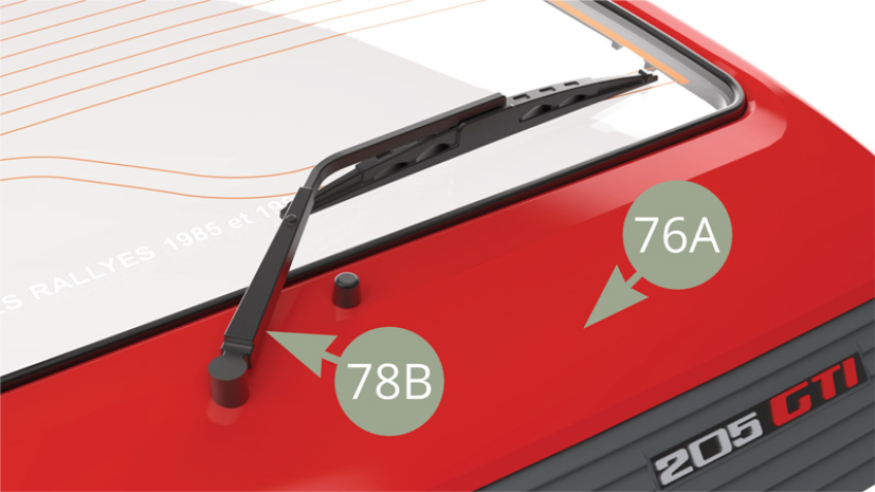
Fit 78B Rear wiper arm to 76A Tailgate.
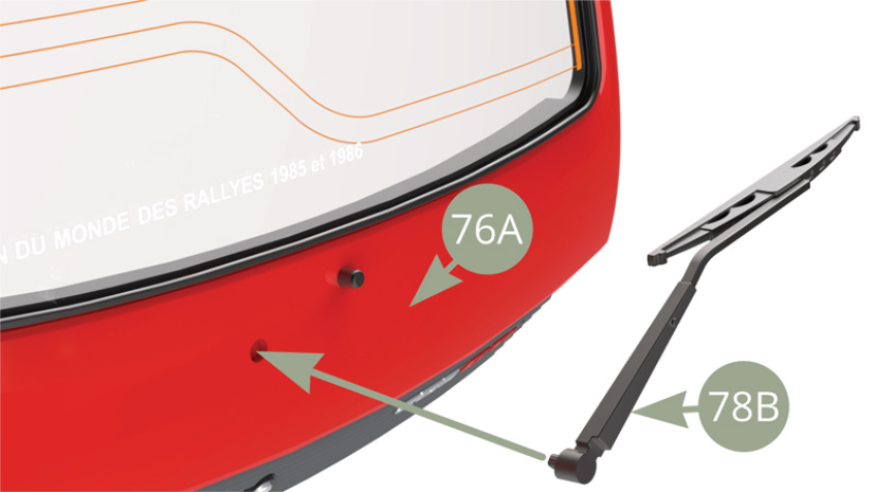
78B Rear wiper arm is attached to 76A Tailgate.
Assembly drawings
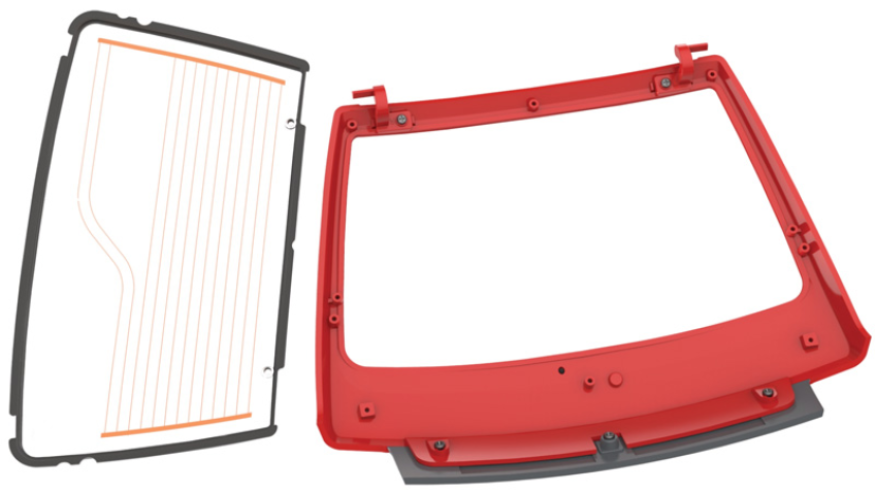
General view
Kit 79
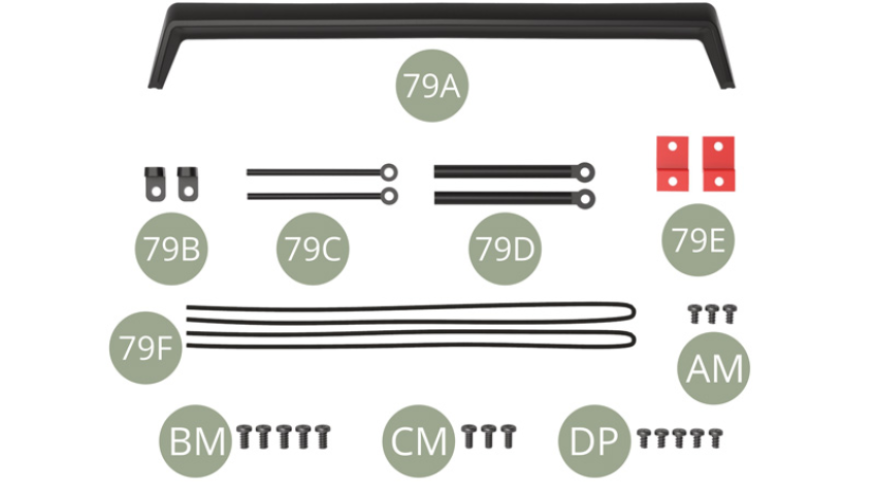
Parts of kit
- 79A Tailgate spoiler
- 79B Bracket ( x2 )
- 79C Tailgate strut piston ( x2 )
- 79D Tailgate strut cylinder ( x2 )
- 79E Tailgate hinge clamp ( x2 )
- 79F Rear shelf support rope ( x2 )
- AM M 1,7 x 3 mm (x 3)
- BM M 2,0 x 4 mm (x 5)
- CM M 1,7 x 4 mm (x 3)
- DP M 1,7 x 3 mm (x 5)
Step 3
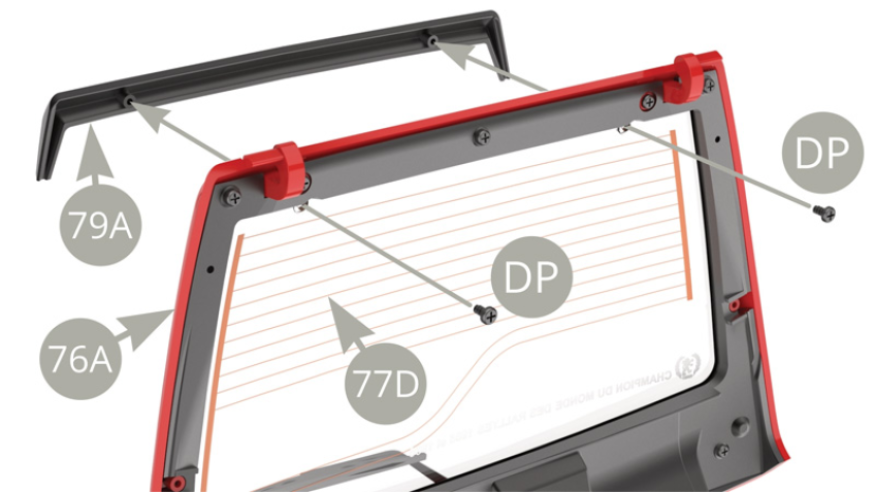
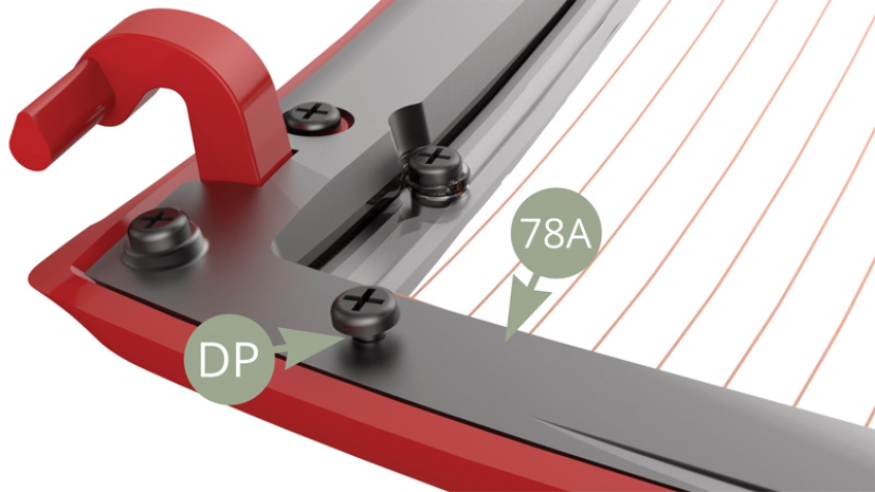
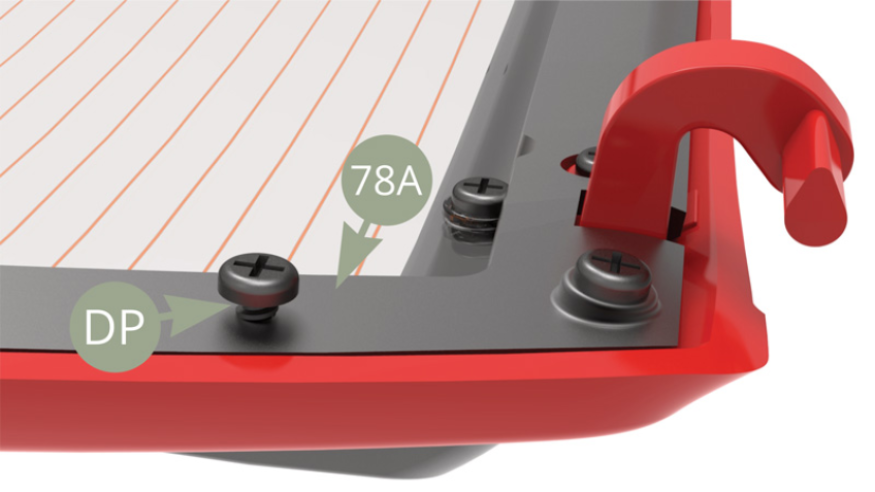
Fit 79A Tailgate spoiler to 76A Tailgate and fix it to 77D Tailgate glass with two DP screws.
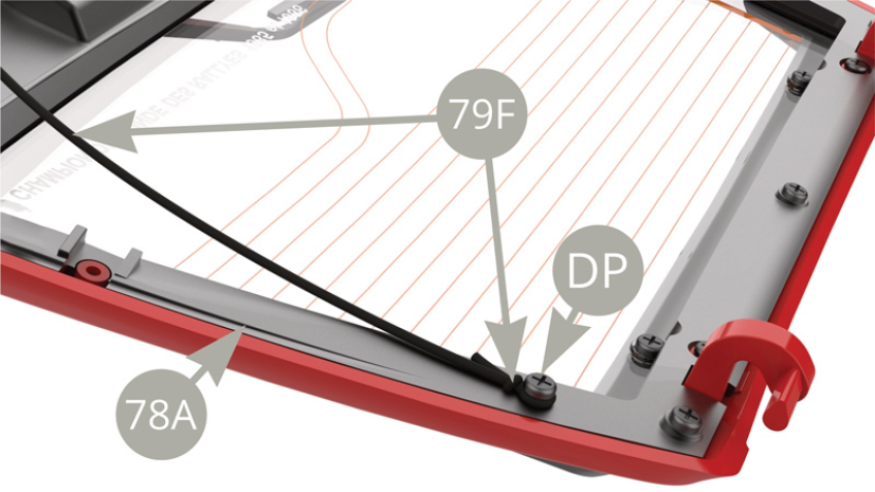
Fit DP screw to upper right corner of 78A Tailgate inner panel , leaving space under screw head to loop over and tie to knot first 79F Rear shelf support rope ( lower illustrations )
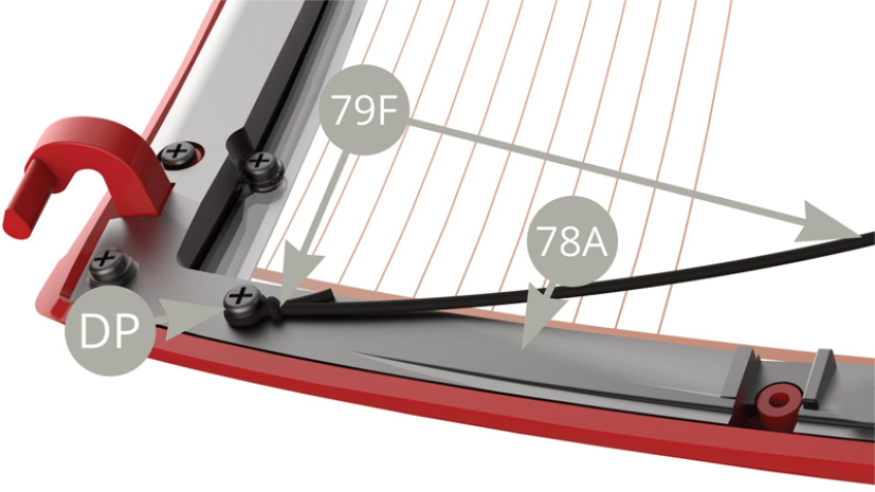
Fit DP screw to upper left corner of 78A Tailgate inner panel , leaving space under screw head to loop over and tie to knot second 79F Rear shelf support rope (lower illustrations )
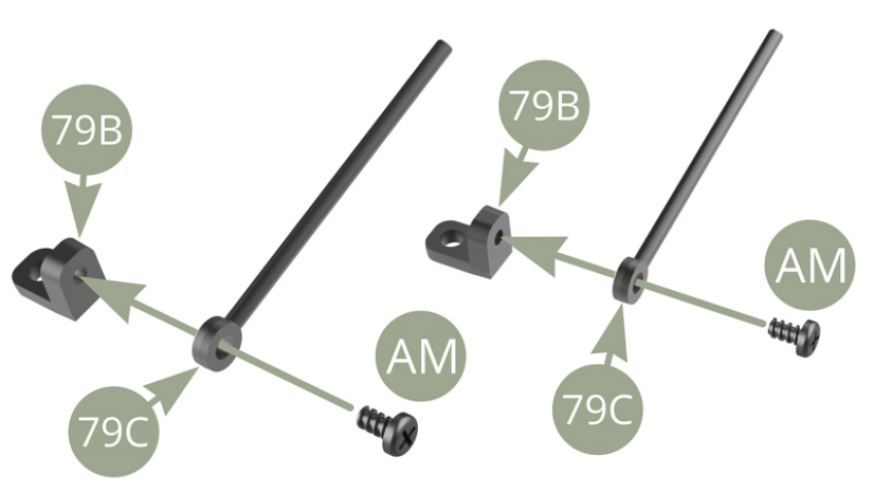
Make two assemblies of 79C Tailgate strut piston fitted to shorter tab of 79B Bracket and fixed with AM screw.
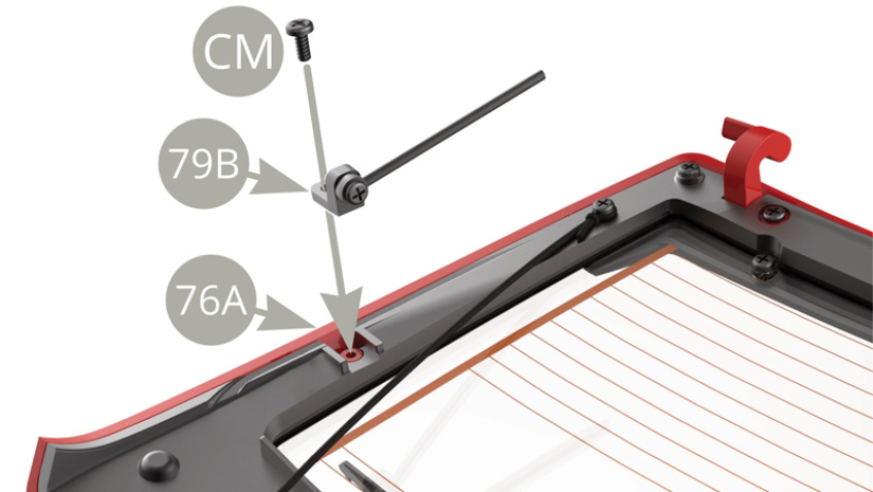
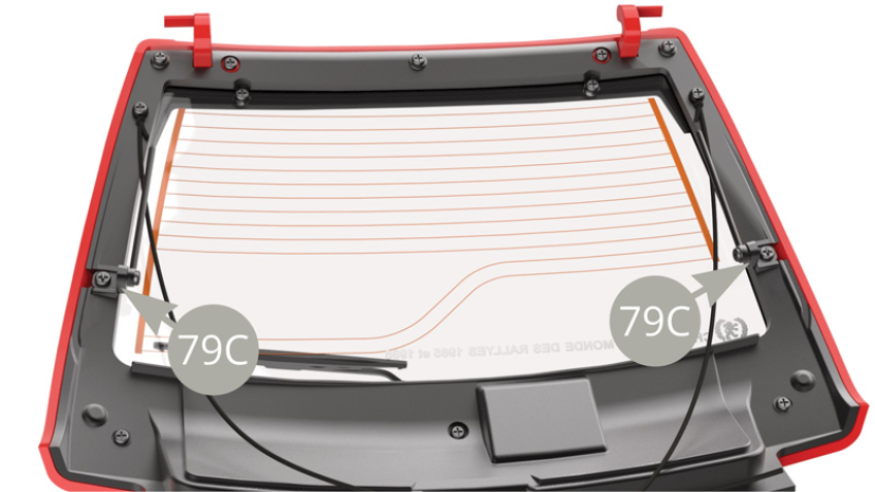
Fit 79B Bracket by its longer tab to 76A Tailgate frame right side and fix with CM screw.
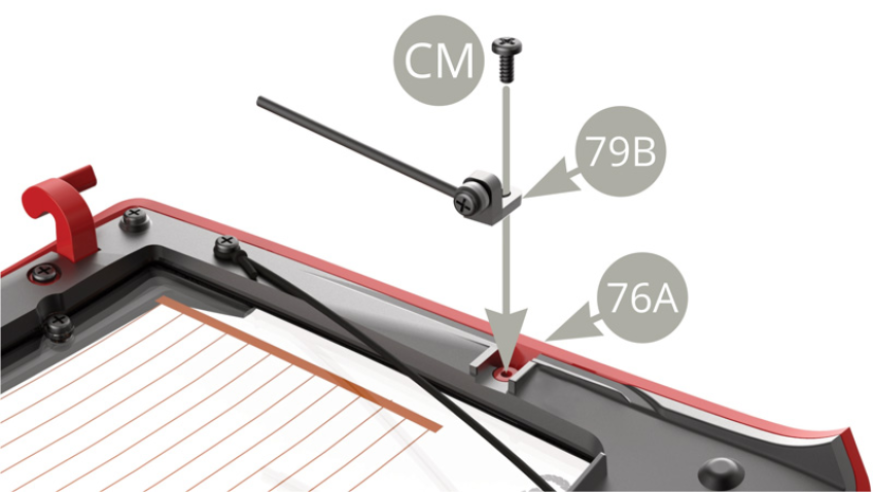
Fit 79B Bracket by its longer tab to 76A Tailgate frame left side and fix with CM screw.
Preassembled Tailgate.
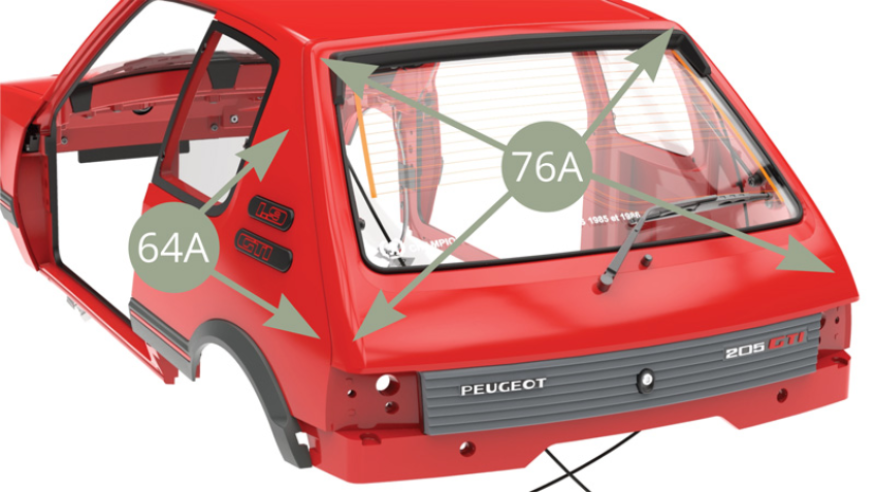
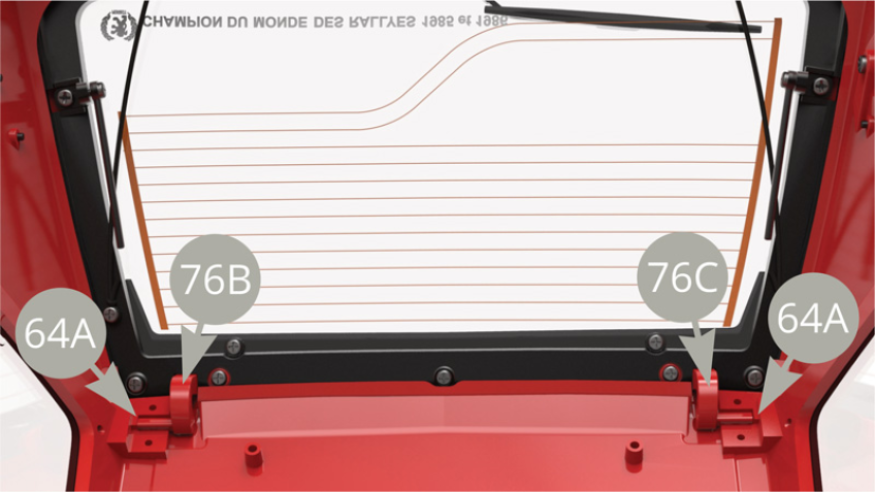
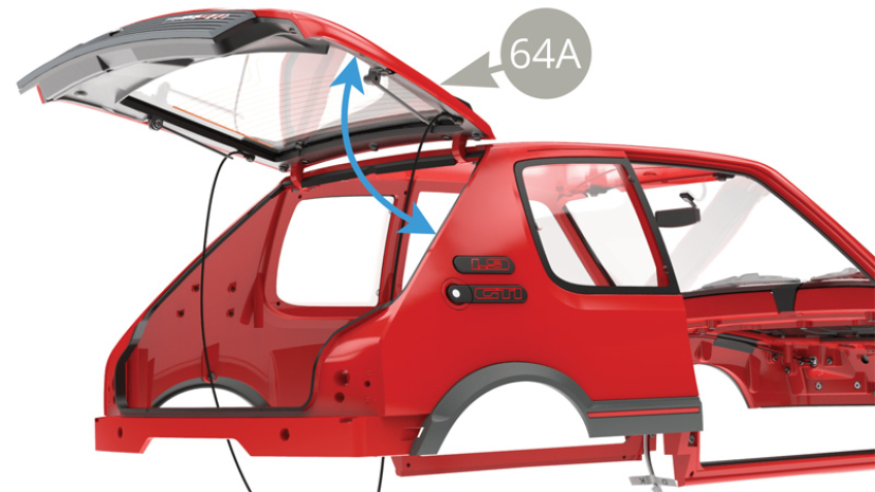
Fit 76A Tailgate to 64A Body frame rear opening , fitting 76B Left and 76C Right tailgate hinge axles into respective grooves in 64A Body frame inner ceiling edge ( lower illustrations ).
Fit 79E Tailgate hinge clamps over 76B Left and 76C Right tailgate hinge axles and fix them with four BM screws ( don’t tighten too much BM screws at this moment ). With closed Tailgate , tighten two AM screws
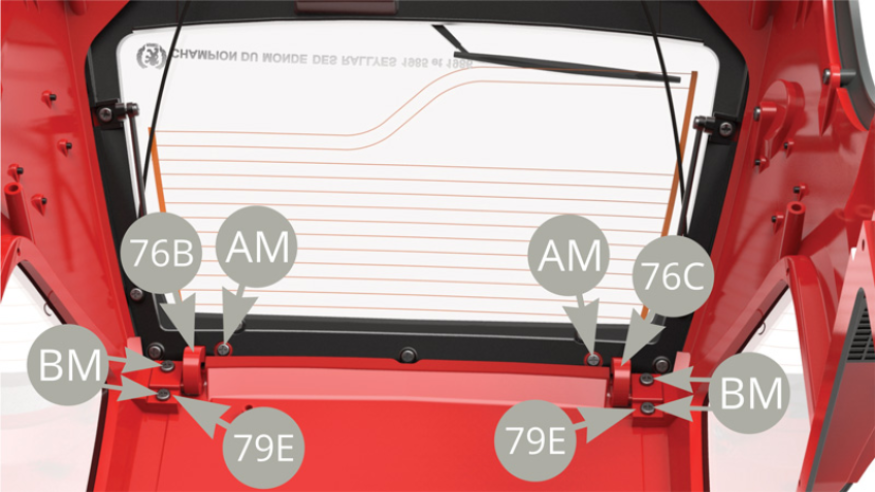
Check opening and closing of 64A Tailgate . Adjust tension of four BM screws ( previous illustration ) if needed for smooth work of hinges.
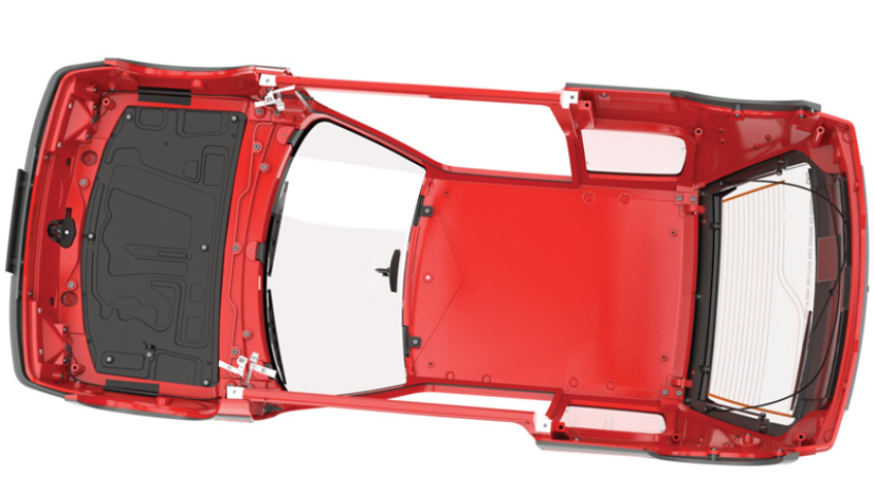
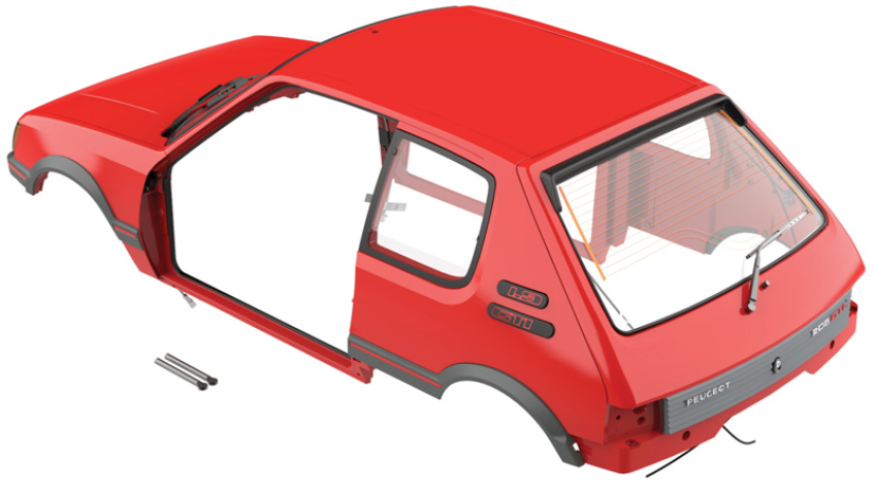
Assembly drawings

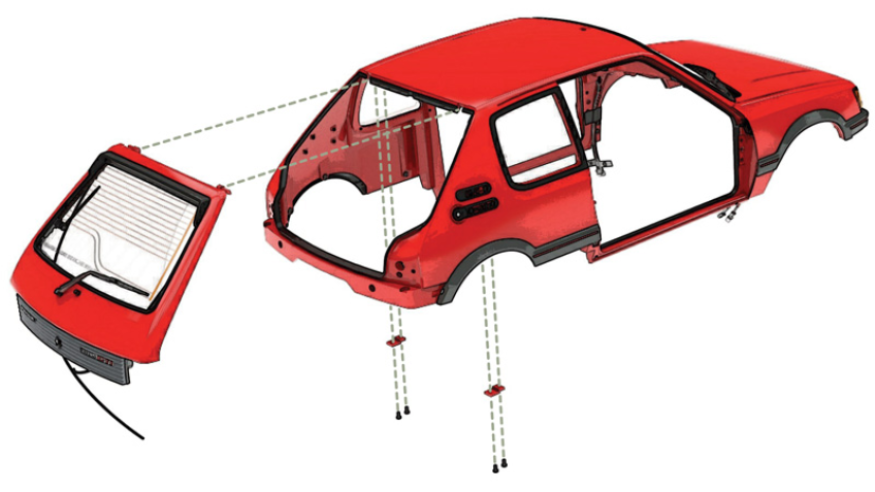
General view
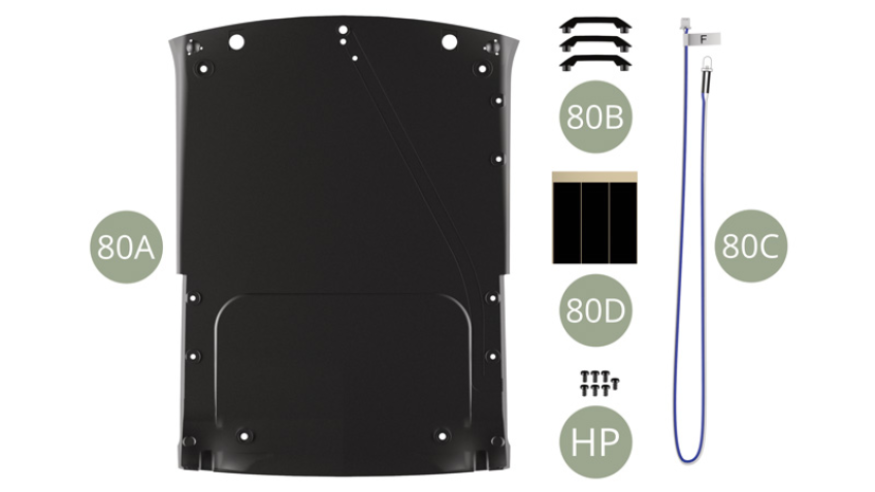
Kit 80
Parts of kit
- 80A Ceiling panel
- 80B Assist handle ( x3 )
- 80C Interior lamp cable F
- 80D Tape ( x3 )
- HP M 1,5 x 3 mm (x 7)
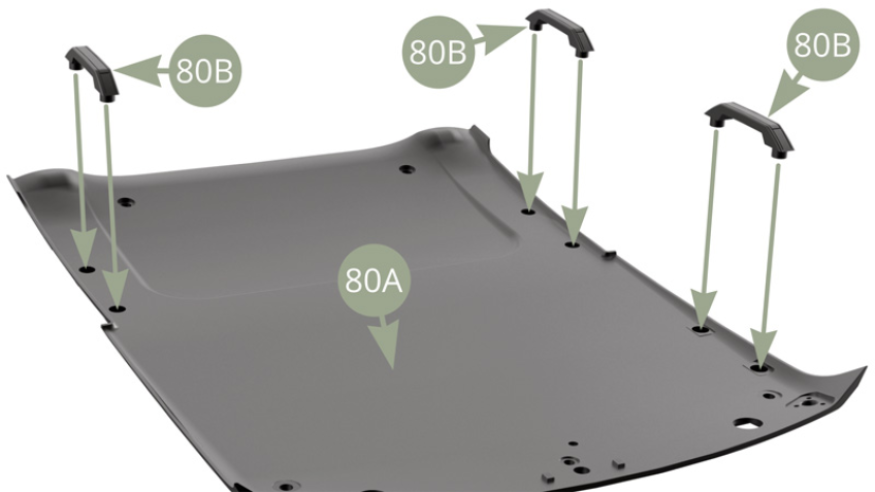
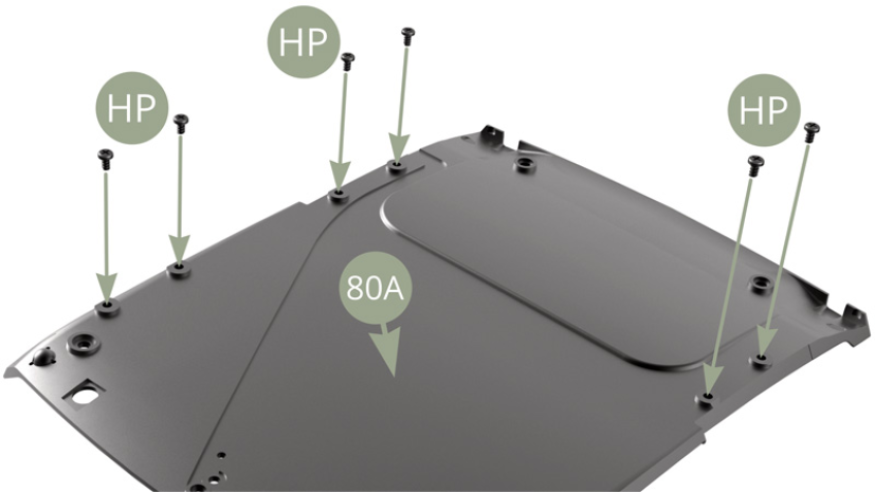
Step 4
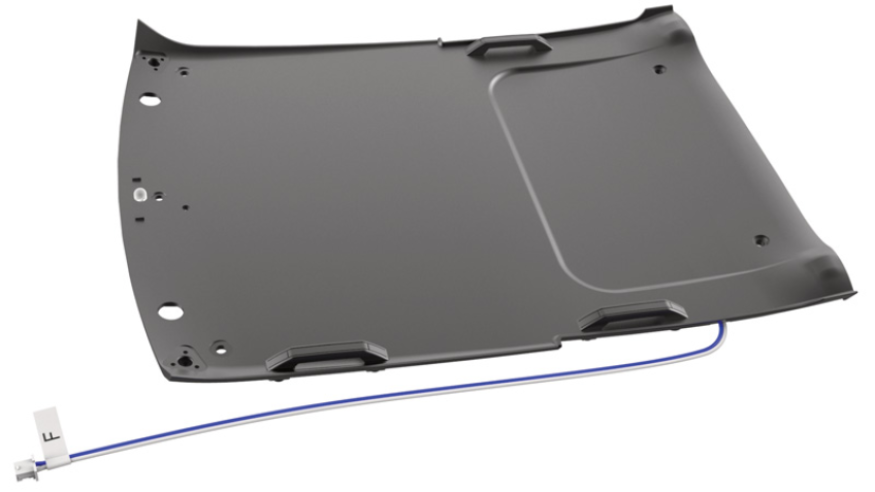
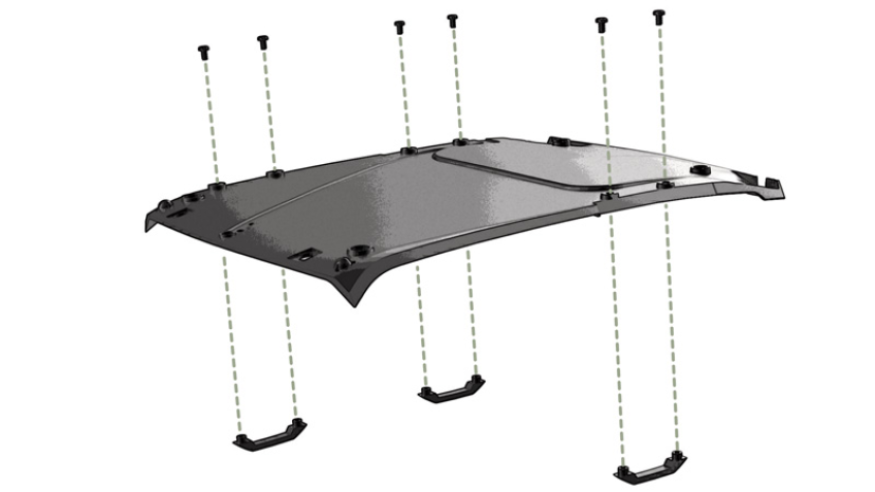
One by one , fit three 80B Assist handles to 80A Ceiling lining and fix each one with two HP screws ( lower illustrations )
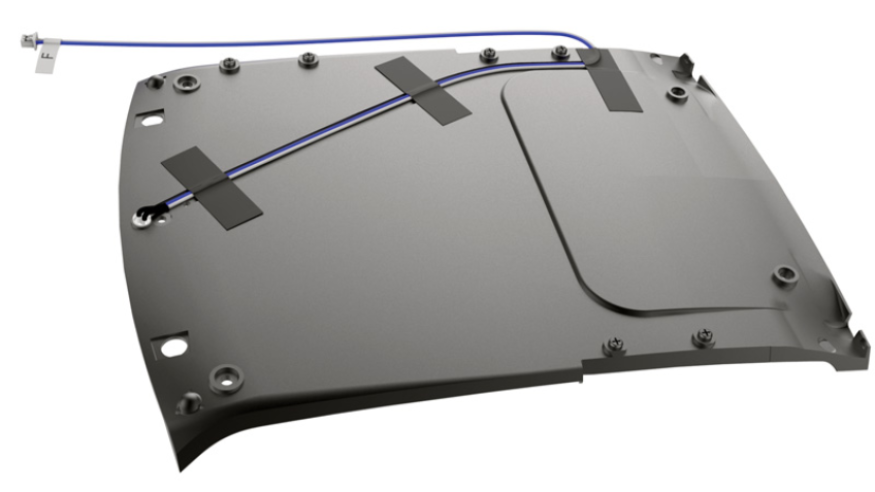
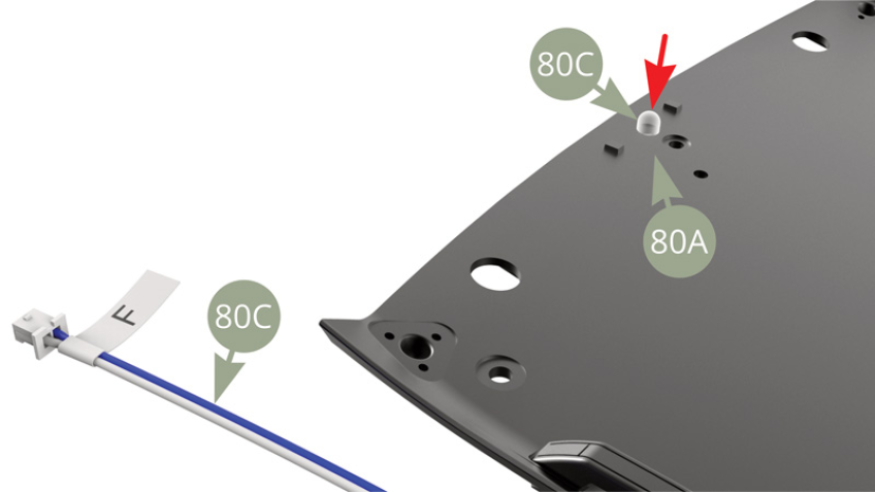
Fit 80C Interior lamp LED into 80A Ceiling lining socket ( red arrow ) , check it showing on the opposite side ( lower illustrations )
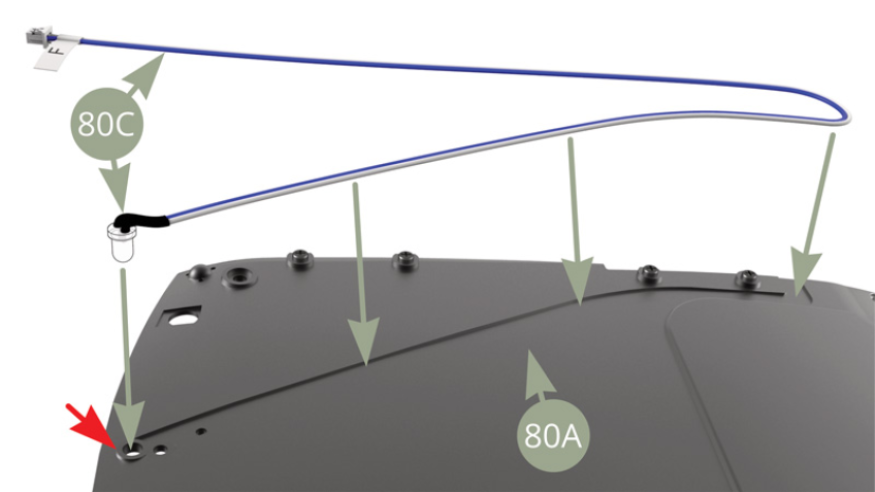
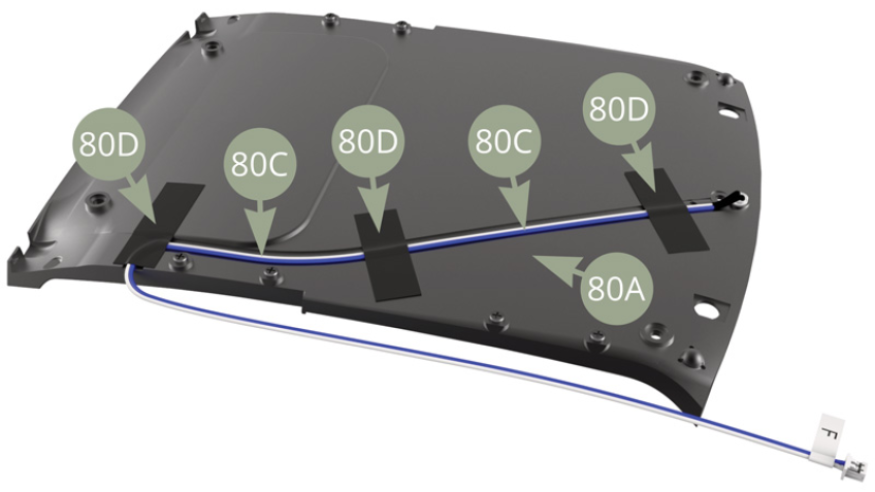
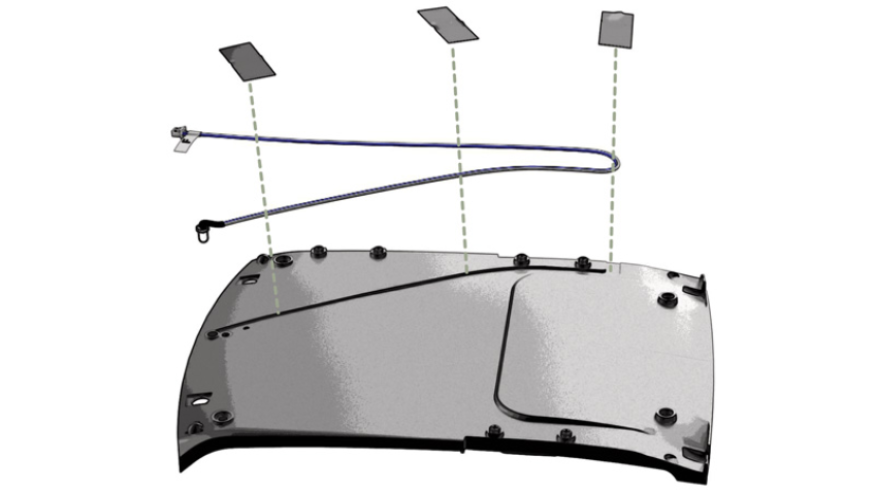
Lead 80C Interior lamp cable F along the groove on 80A Ceiling lining and fix with three 80D tape pieces.
Assembly drawings
General view