English
 français
 Deutsch
 español
 italiano
 português


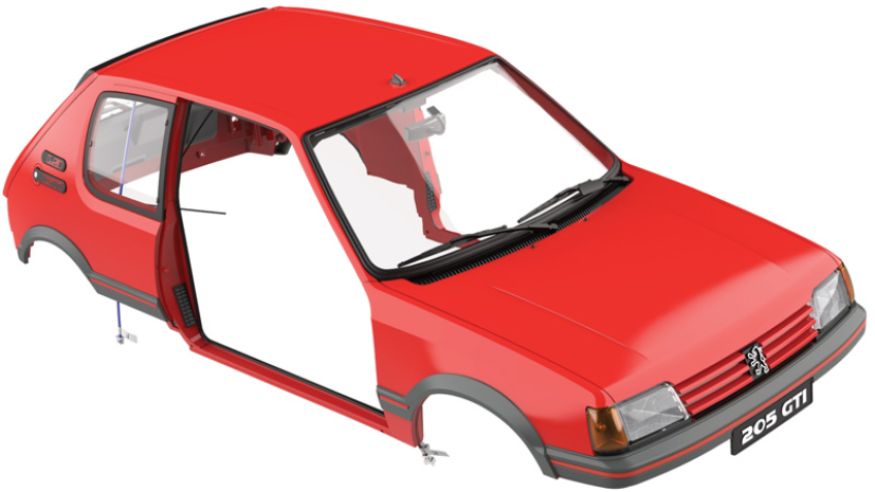
Peugeot 205 GTI 1.9 - Box 21
Kit 81
Parts of kit
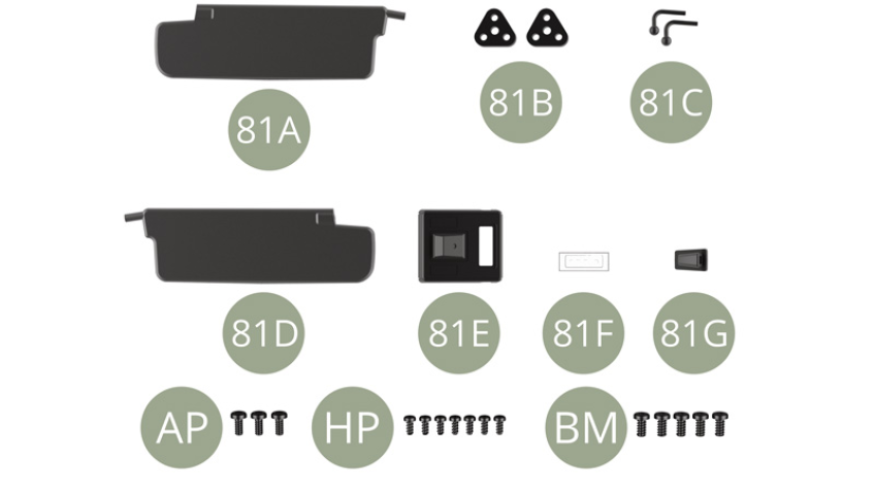
- 81A Left sun visor
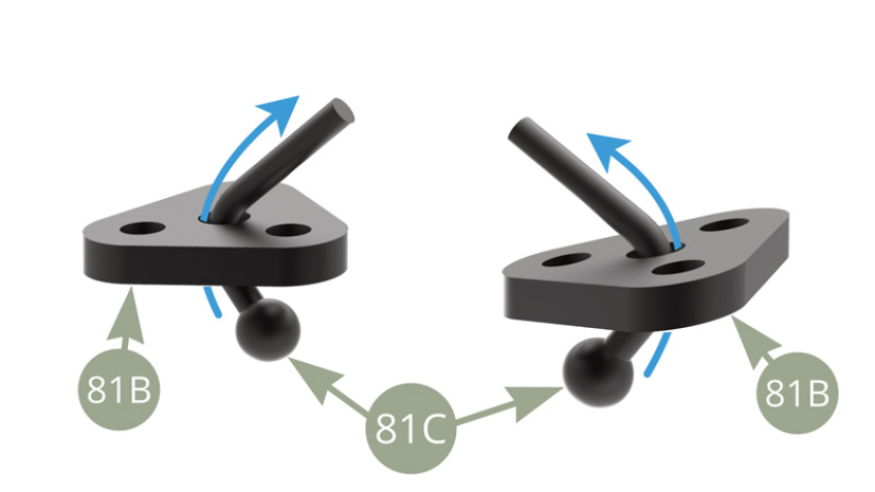
- 81B Tie down plate ( x2 )
- 81C Pivot axle ( x2 )
- 81D Right sun visor
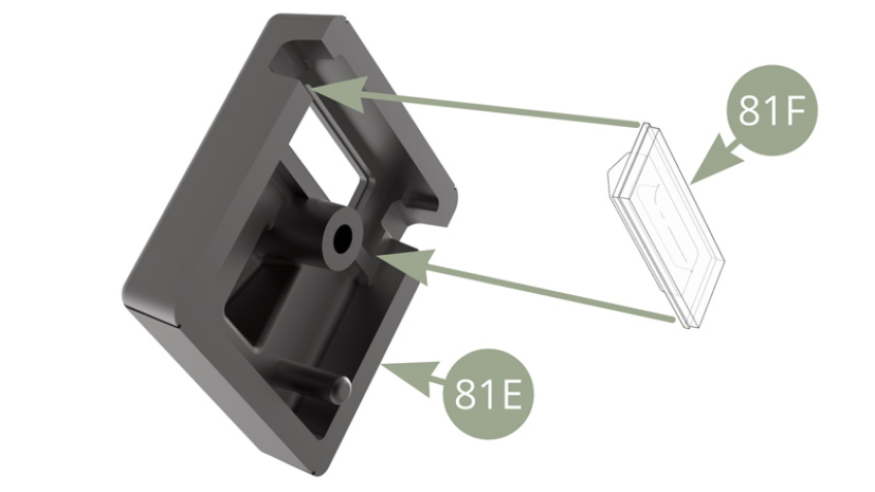
- 81E Lamp housing
- 81F Interior lamp
- 81G Antenna base
- AP M 1,7 x 4 mm (x 3)
- HP M 1,5 x 3 mm (x 7)
- BM M 2,0 x 4 mm (x 5)
Step 1
Fit 81C Pivot axles through center hole in 81B Tie down plates ( blue arrows ).
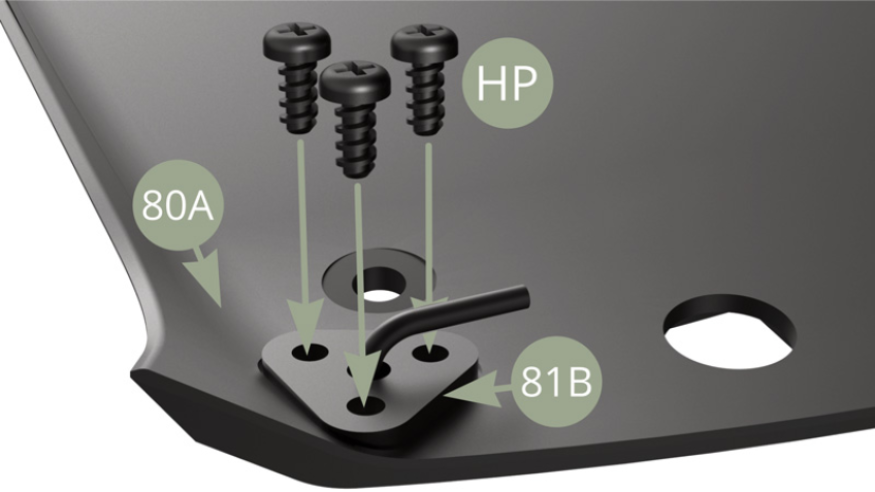
Fix first 81B Tie down plate to 80A Ceiling panel left front corner with three HP screws.
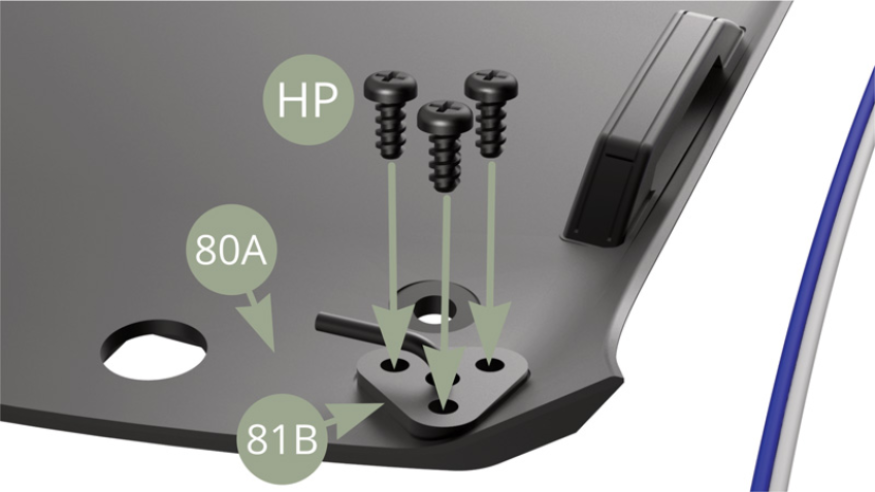
Fix second 81B Tie down plate to 80A Ceiling panel right front corner with three HP screws.
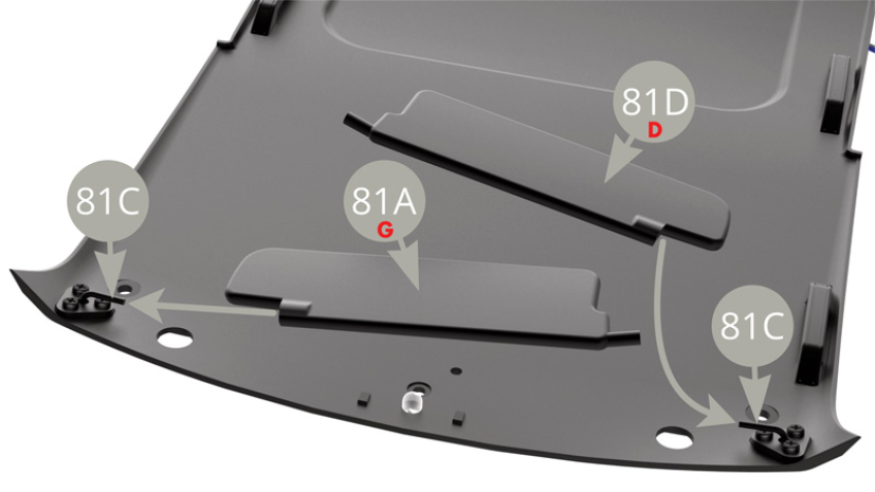
Fit 81A Left and 81D Right sun visors to left and right 81C Pivot axles respectively.
Fit 81F Interior lamp into 81E Lamp housing.
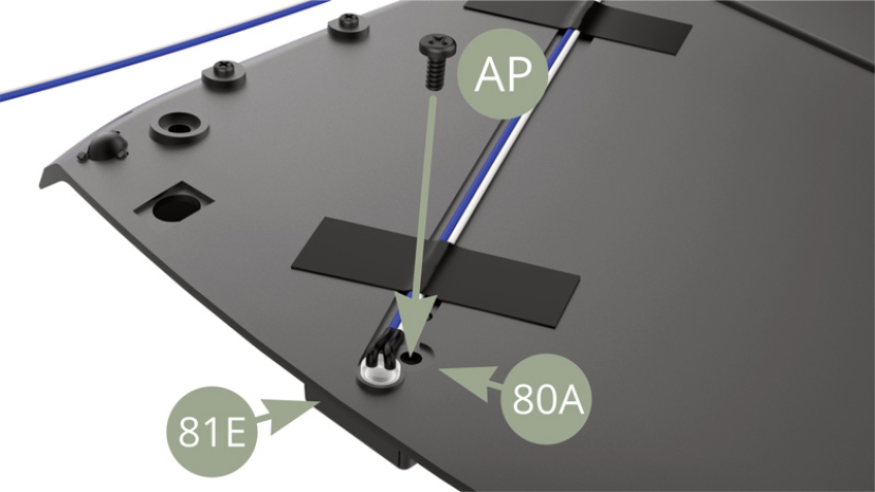
Fit 81E Lamp housing to 80A Ceiling panel , engaging also 81D Right and 81A Left Sun visors’ pivot pins .

Fix 81E Lamp housing to 80A Ceiling panel with AP screw.
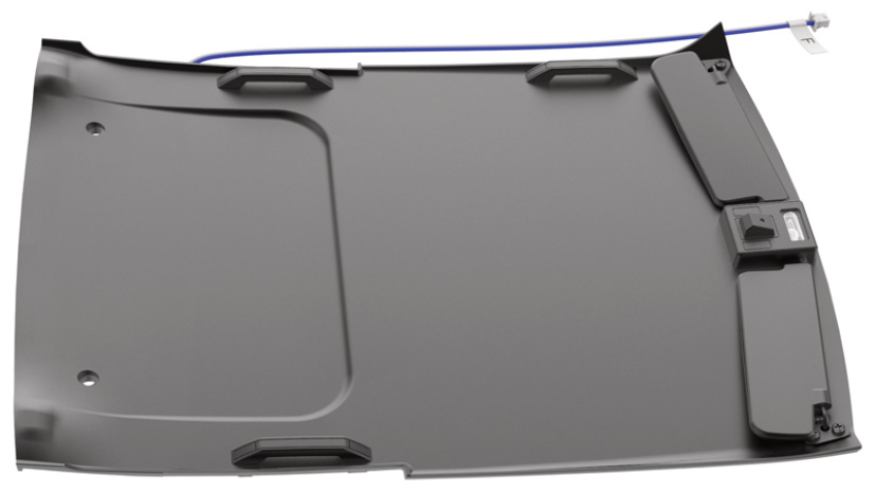
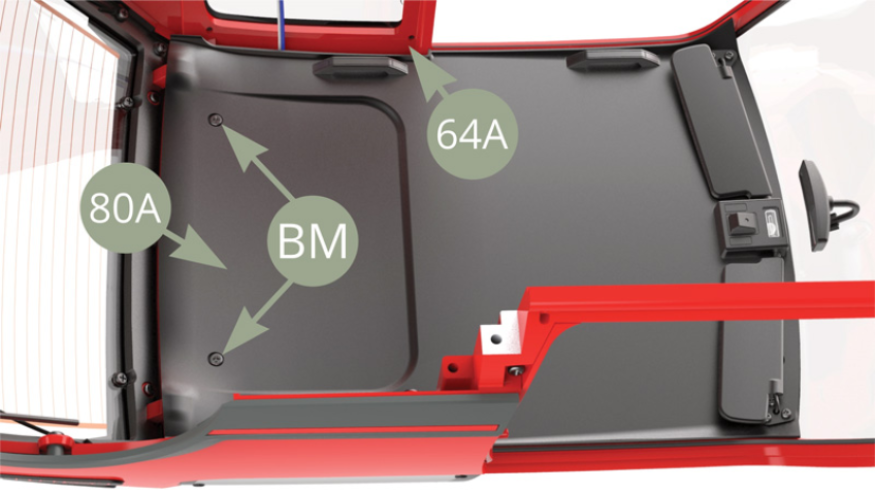
Fully preassembled Ceiling panel.
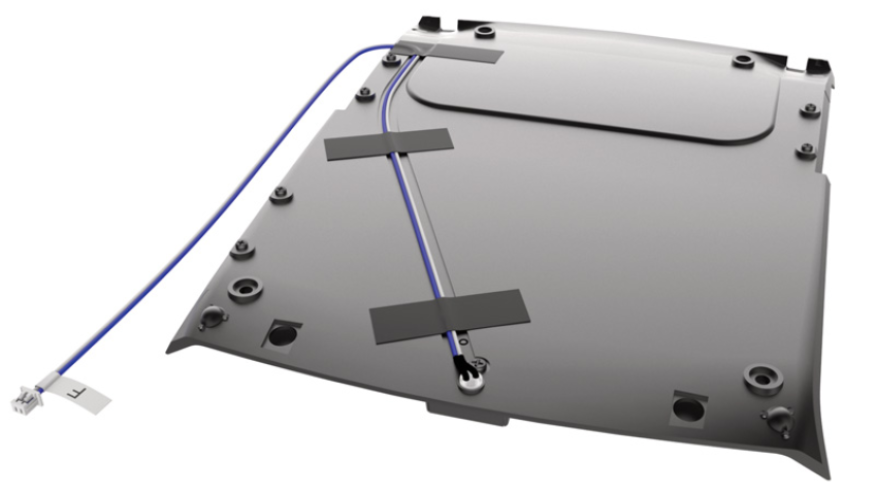
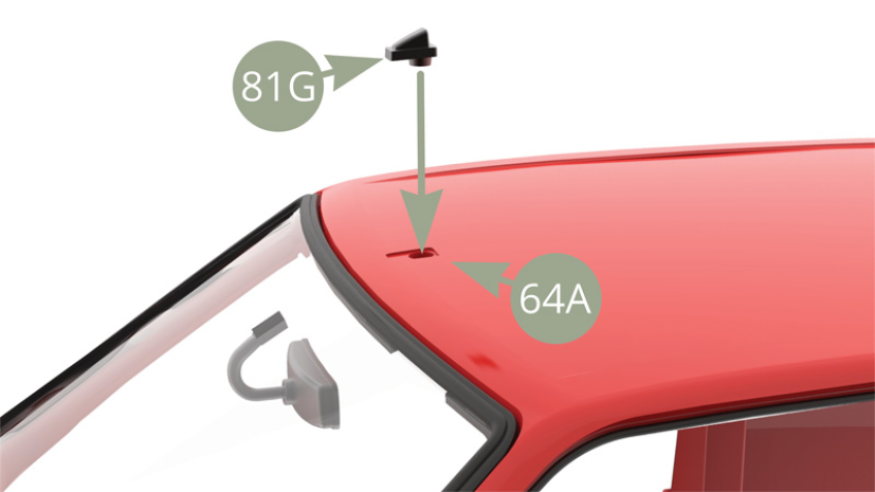
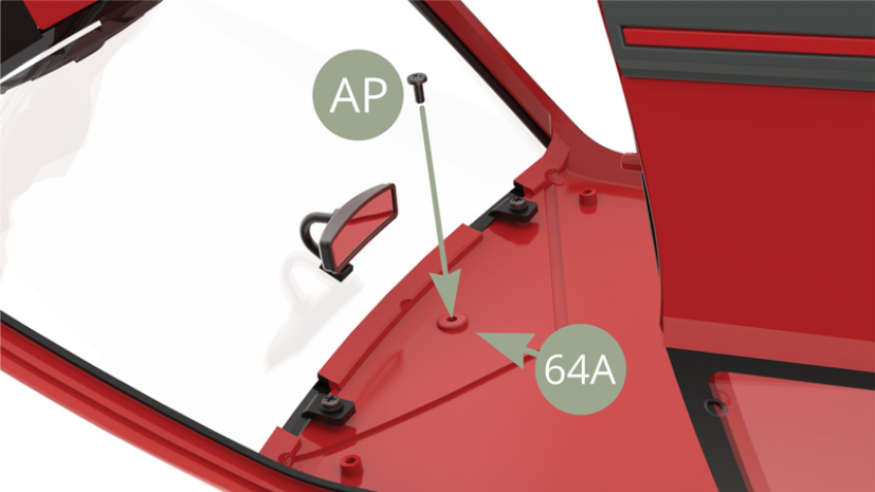
Fit 81G Antenna base to 64A Bodywork , and fix from below with AP screw ( lower illustrations ).
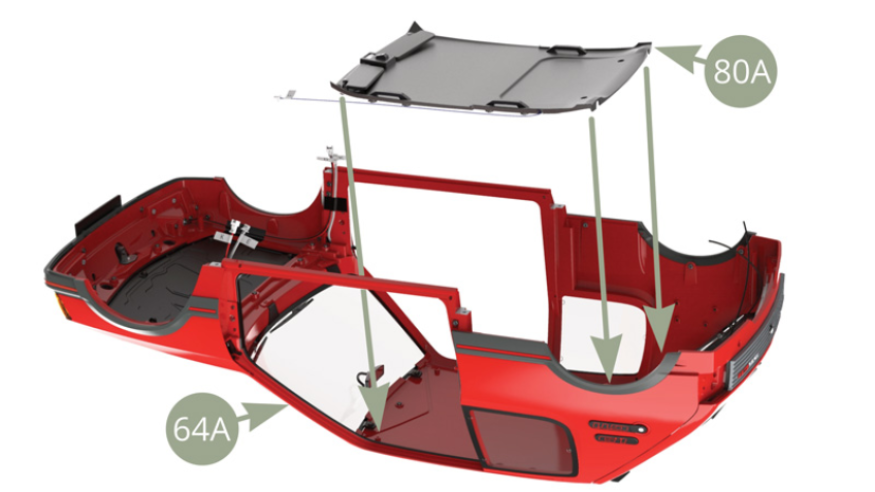
Fit 80A Ceiling panel inside 64A Bodywork.
Raise up 81A Left and 81D Right Sun Visors ( blue arrows ) and fix 80A Ceiling panel at its right corner to 64A Bodywork with BM screw.
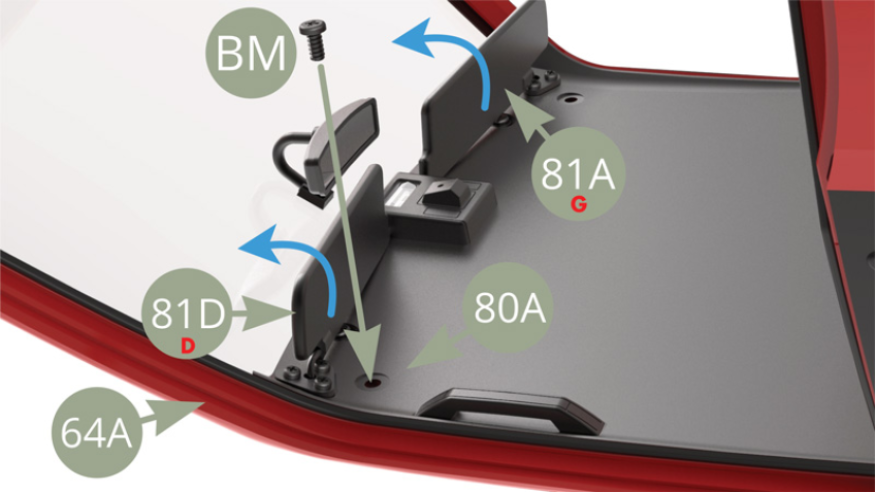
Fix 80A Ceiling panel at its left corner to 64A Bodywork with BM screw.
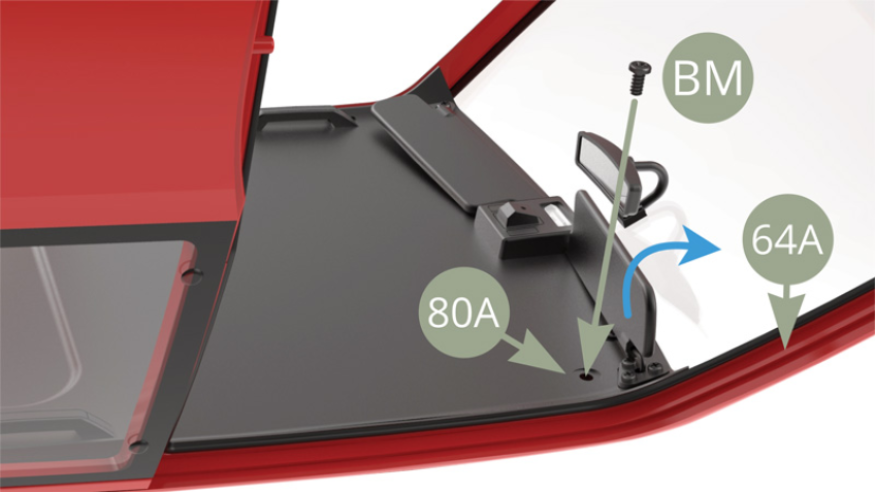
Fix rear area of 80A Ceiling panel to 64A Bodywork with two more BM screws.
Assembly drawings

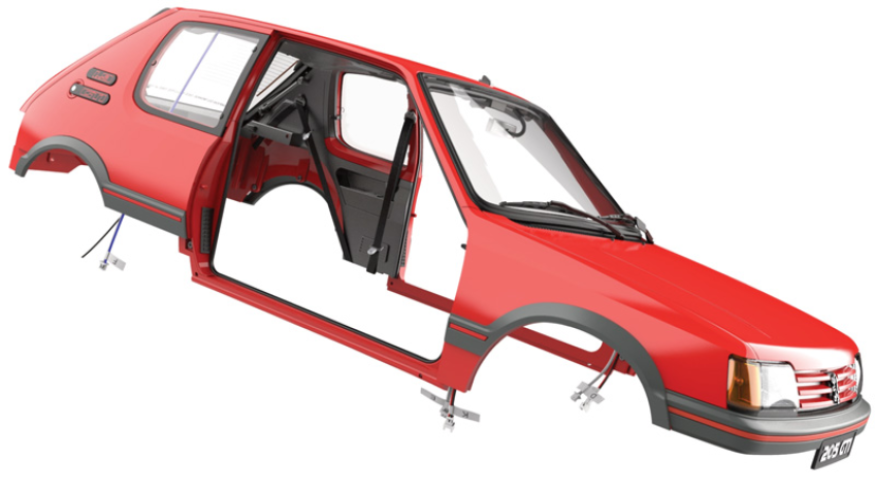
General view
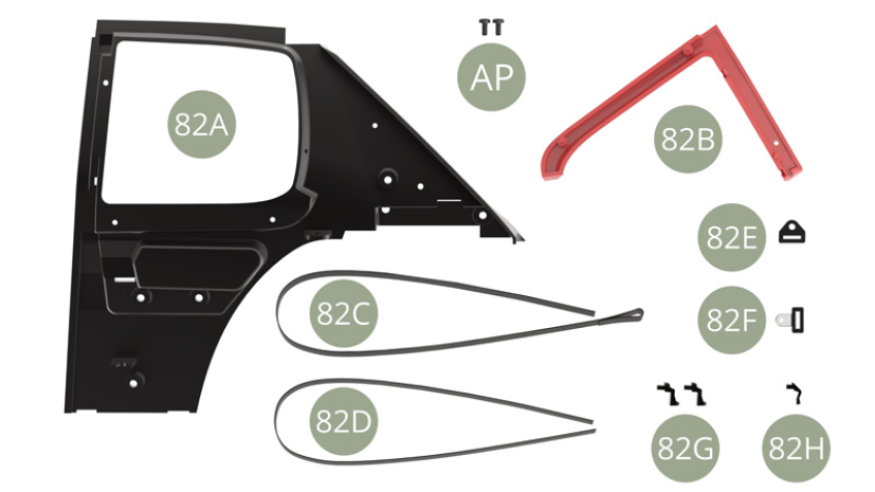
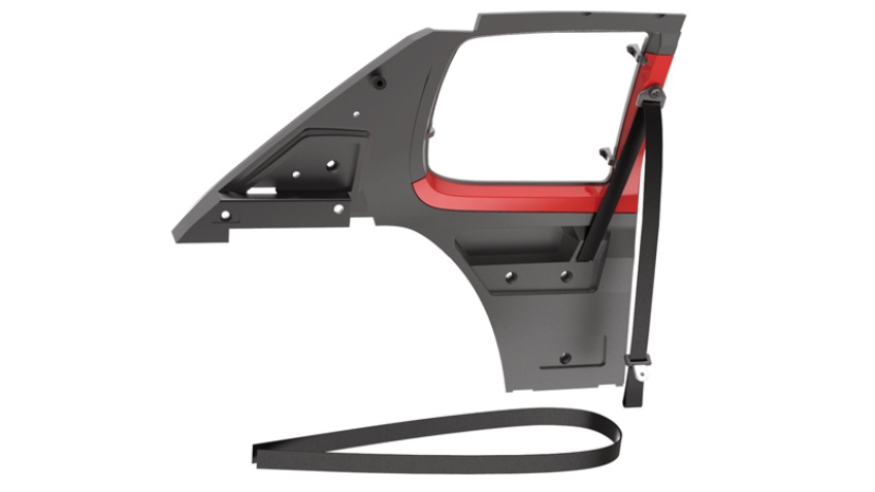
Kit 82
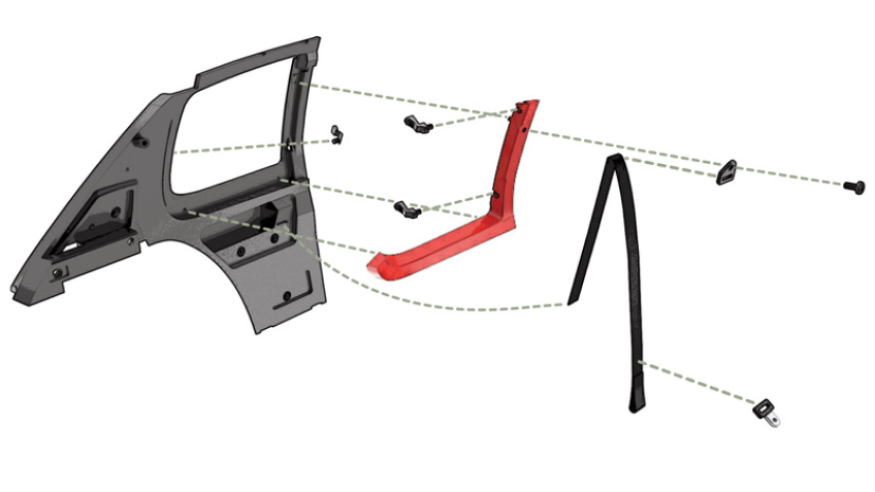
Parts of kit
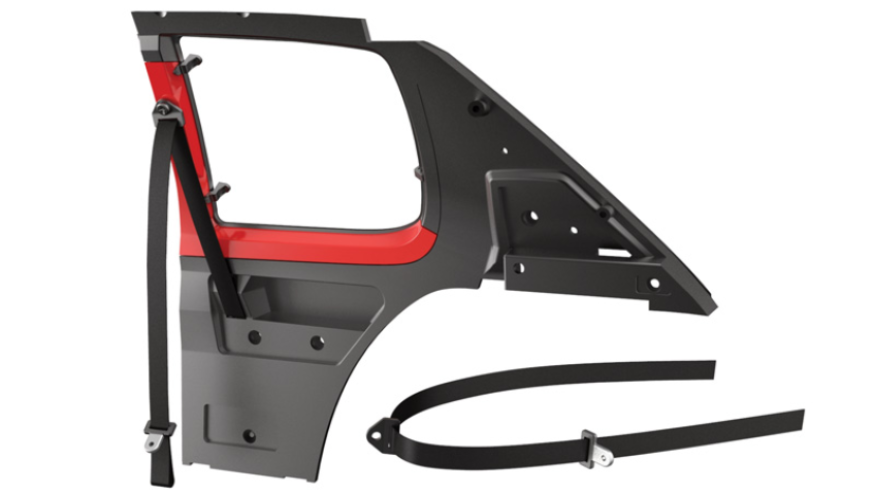
- 82A Interior left panel
- 82B Windowsill frame
- 82C Front left safety belt
- 82D Rear left safety belt
- 82E Belt holder
- 82F Buckle
- 82G Quarterlight glass hinges ( x2 )
- 82H Quarterlight glass lever
- AP M 1,7 x 4 mm (x 2)
Step 2
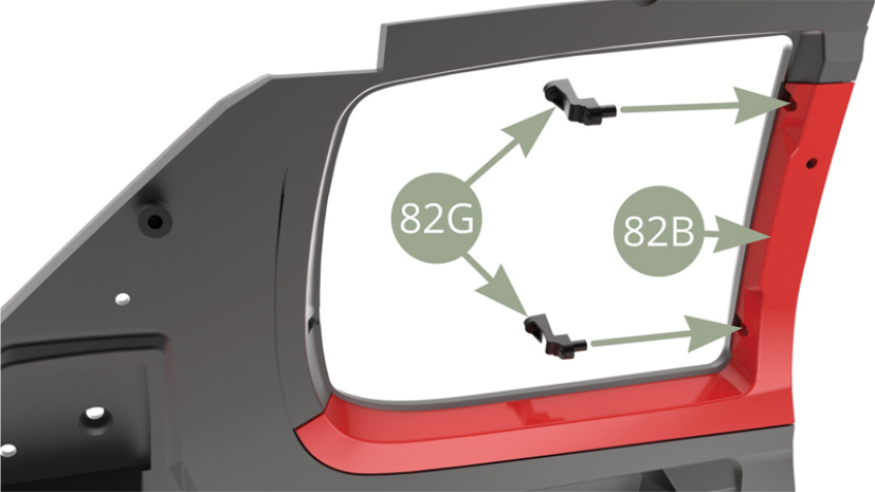
Fit 82B Windowsill frame to 82A Interior left panel.

Fit two 82B Quarterlight glass hinges to 82B Windowsill frame.
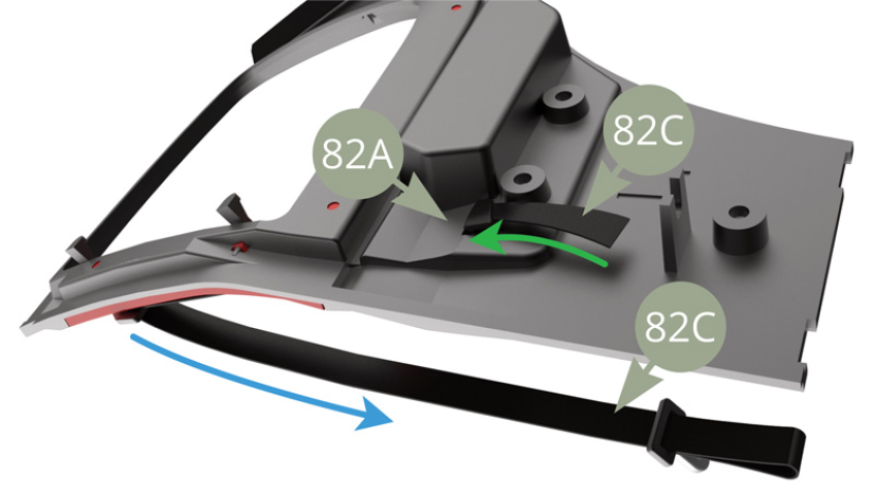
Fit sequentially 82F Buckle and 82E Belt holder to 82C Front left safety belt with loop at the end ( red arrow ).
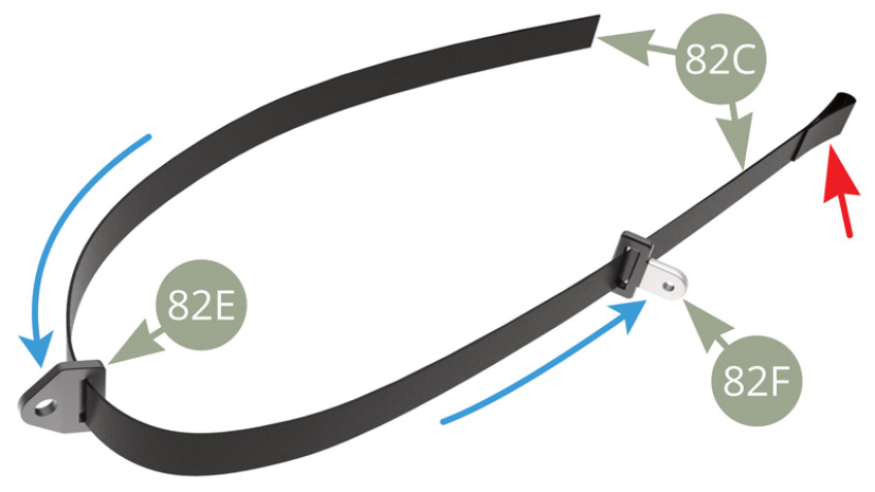
Fit 82E Belt holder to 82B Windowsill frame and fix with AP screw . Lead 82C Front left safety belt into the slot of 82A Interior left panel ( blue arrow ).

Tie a knot ( red arrow ) at approximately 15mm distance form 82C Front left safety belt end , to serve as stopper.
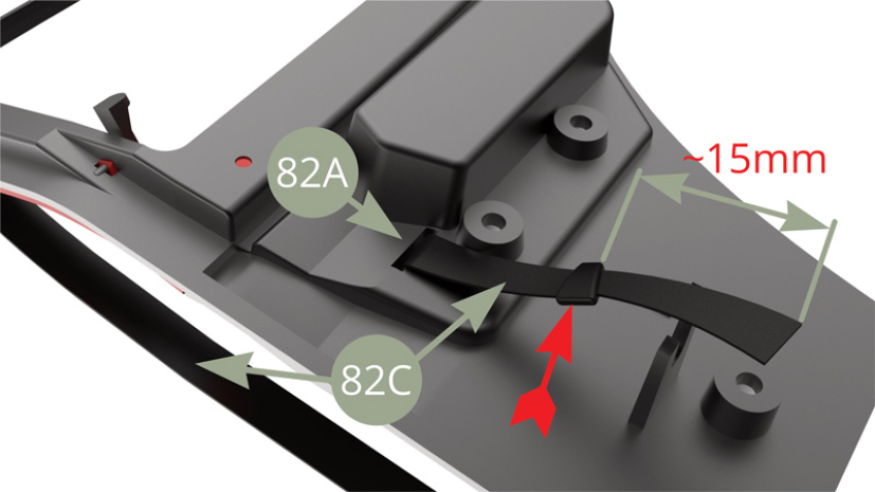
Pull 82C Front left safety belt as blue and green arrows point , to position the belt.
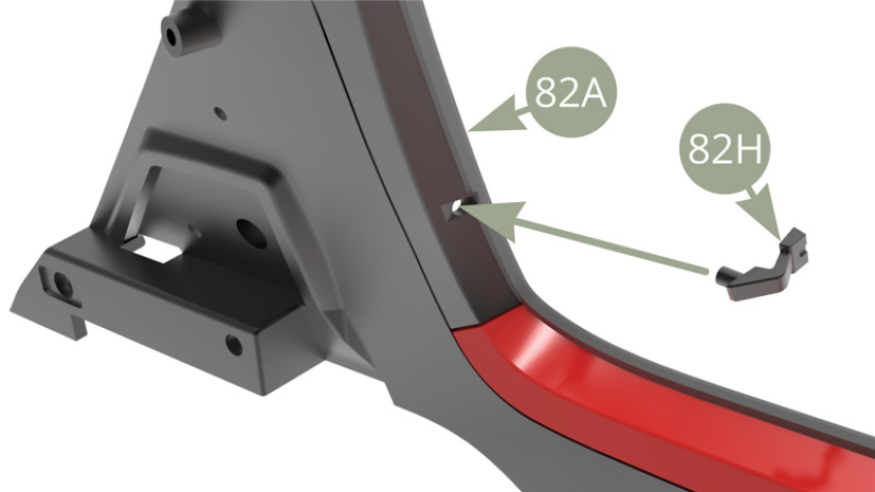
Fit 82H Quarterlight glass lever to 82A Interior left panel.
Assembly drawings
General view

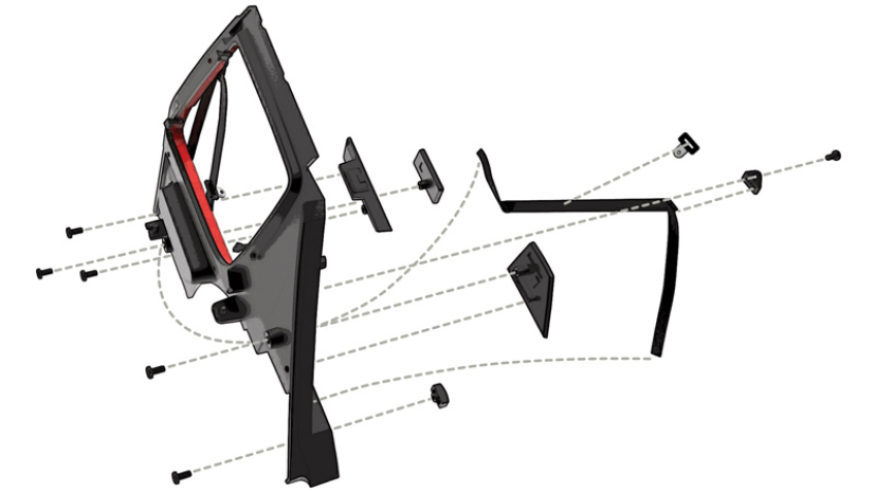
Kit 83
Parts of kit
- 83A Belt holder
- 83B Buckle
- 83C Ash tray panel
- 83D Deco grid panel
- 83E Deco grid panel
- 83F Parcel tray support
- AP M 1,7 x 4 mm (x 9)
- JM M 2,0 x 4 x 5 mm (x 3)

Step 3
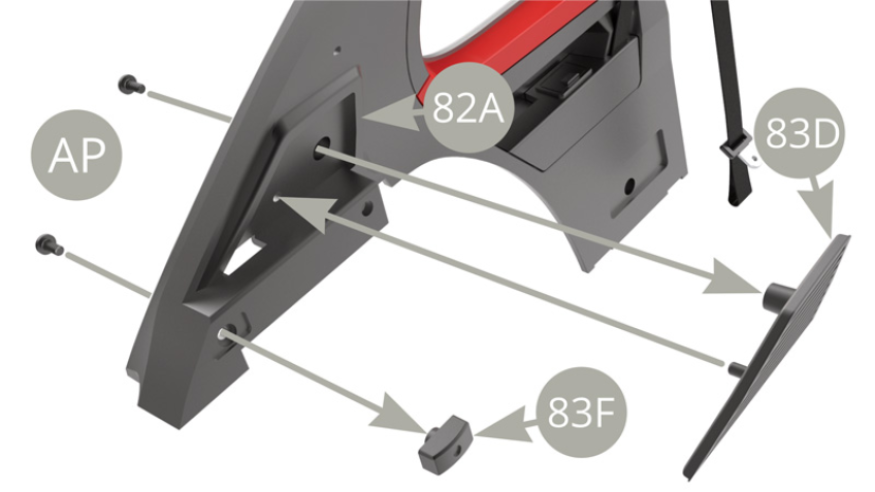
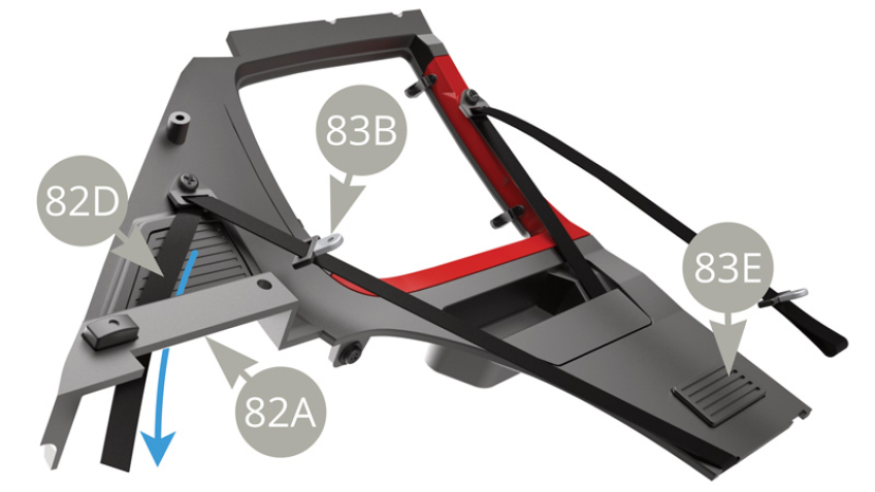
Fit 83C Ash tray panel to 82A Interior left panel and fix with two AP screws.

Fit 83D Deco grid panel and 83F Parcel tray support to 82A Interior left panel and fix each one with AP screw.
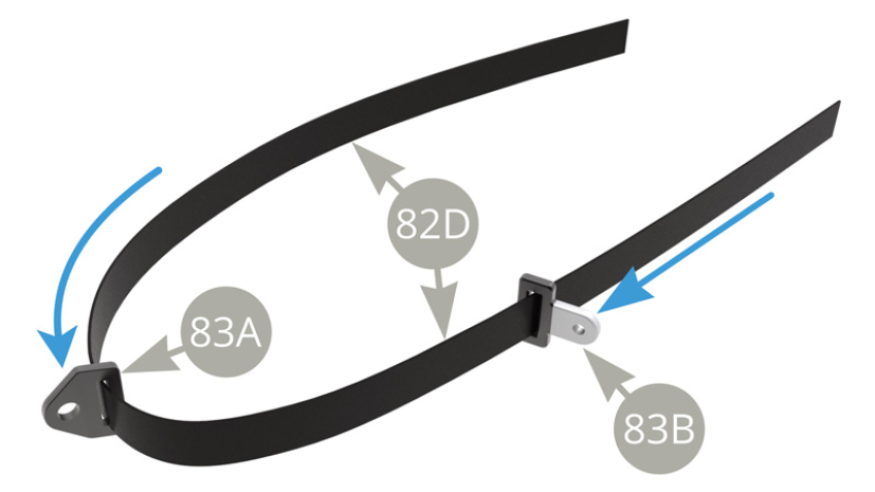
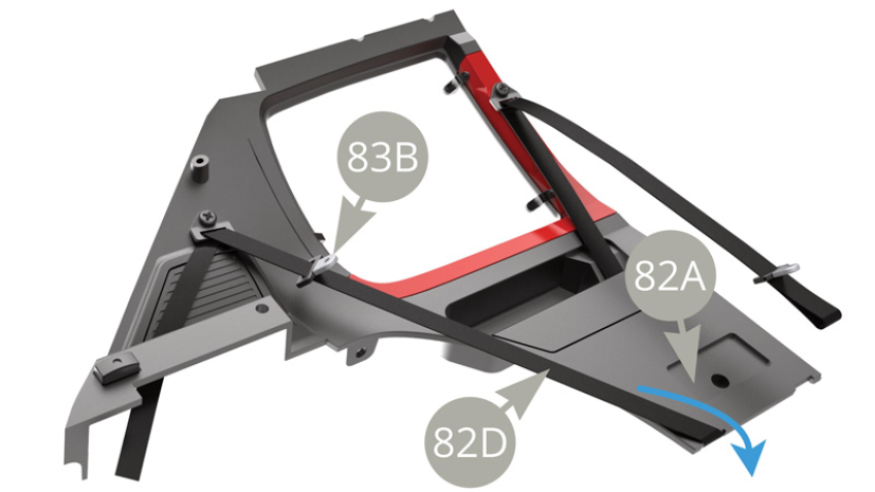
Fit 83A Belt holder and 83B Buckle to 82D Rear left safety belt ( blue arrows ).
Fit 83A Belt holder to 82A Interior left panel and fix with AP screw. Pass one end of 82D Rear left safety belt via the slot in 82A Interior left panel ( blue arrow ).
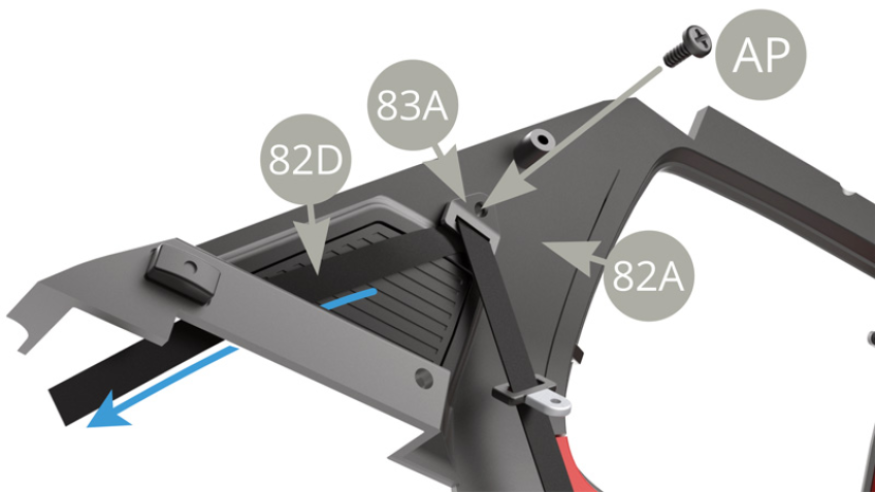
Wrap the other end of 82D Rear left safety belt over the notch in lower edge of 82A Interior left panel ( upper illustration , blue arrow ) and fix it ( punching with thick needle or awl , red arrow , lower illustration ) with AP screw , attaching 83E Deco grid panel at the same time . Note 83B Buckle position on upper illustration.
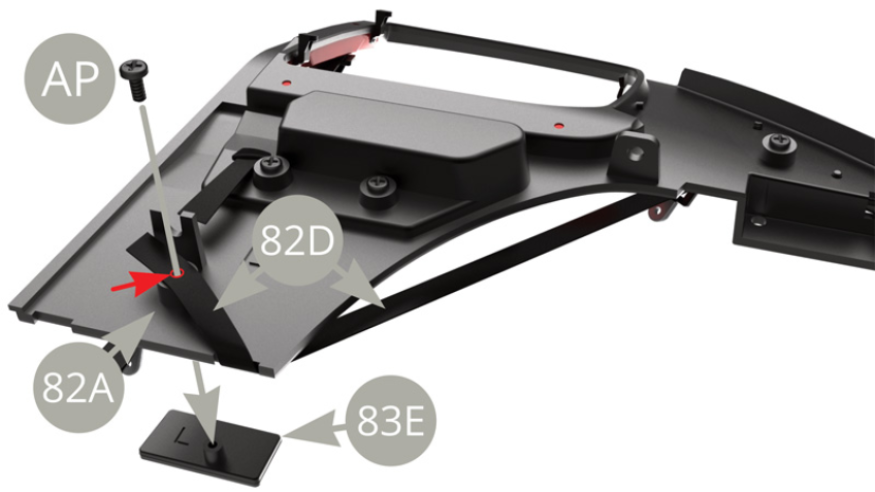
Lower end of 82D Rear left safety belt is attached.
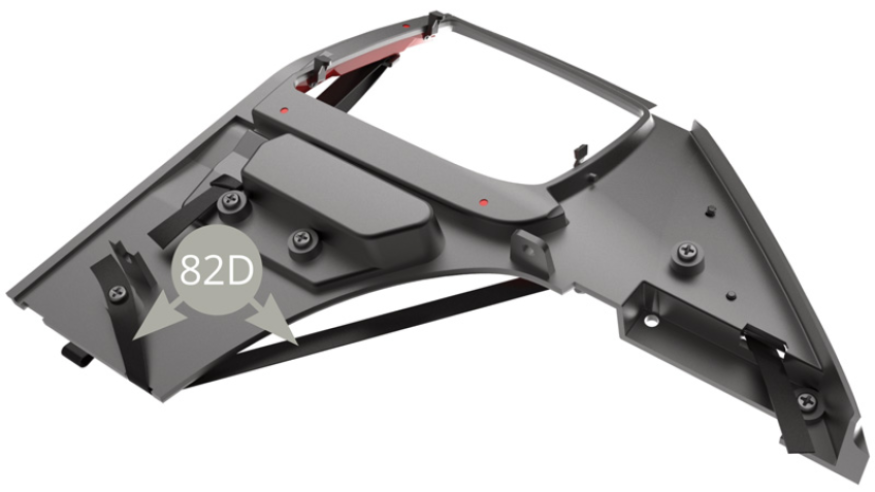
Pull to tighten the upper end of 82D Rear left safety belt ( blue arrow ).
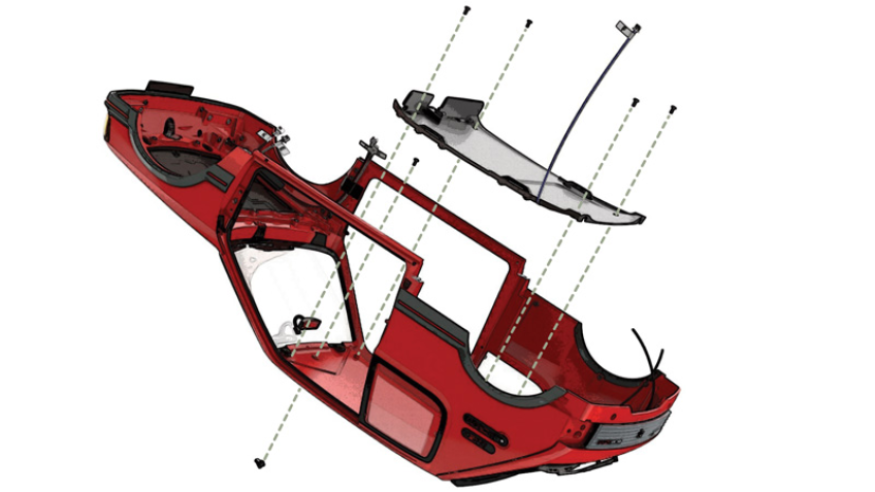
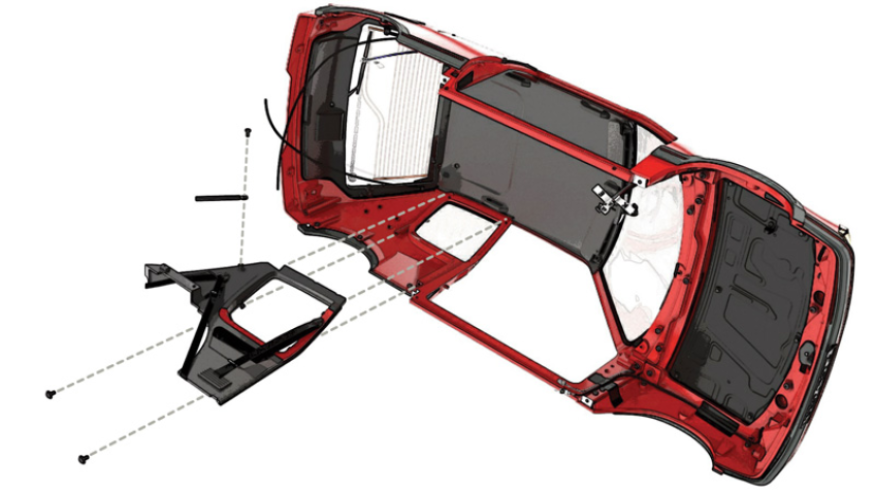
Fit 82A Interior left panel to 64A Bodywork and into the slot along 80A Ceiling panel rear left edge.
Fix 82A Interior left panel to 64A Bodywork with two JM screws.
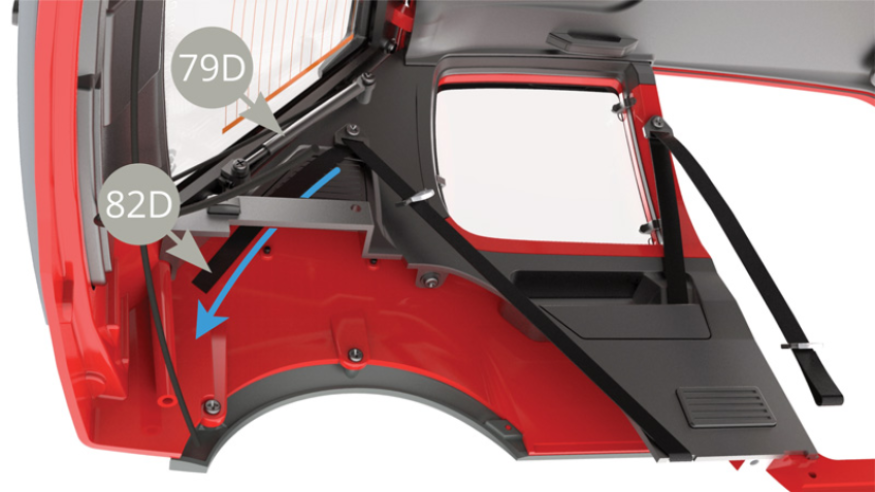
Open up the Tailgate ( blue arrow ) , align and fit 79C Tailgate strut piston into 79D Tailgate strut cylinder. Fit 79D Tailgate strut cylinder to 82A Interior left panel and fix with AP screw , allowing the movement.
Check 79D Tailgate strut with closed Tailgate . Pull to tighten 82D Rear left safety belt ( blue arrow ).
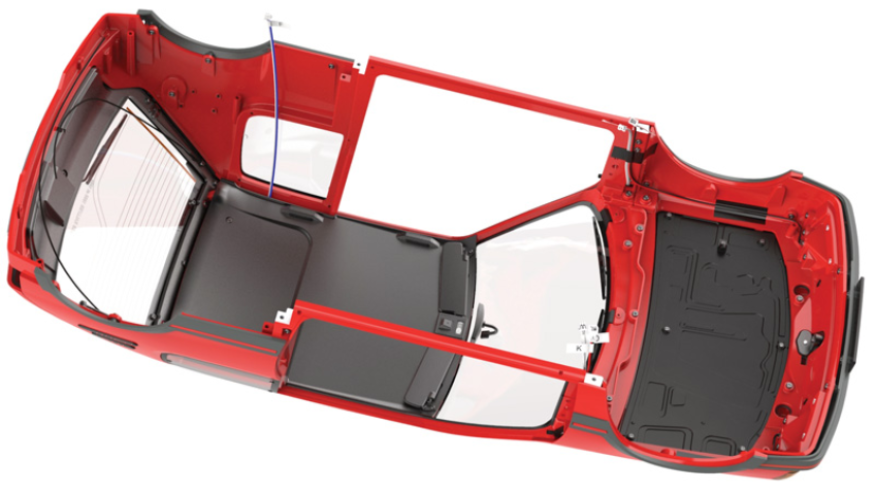
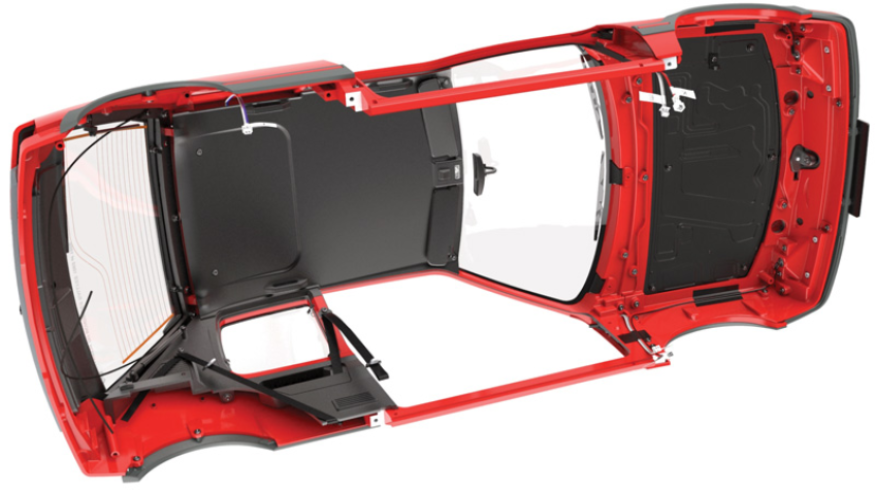
Assembly drawings
General view
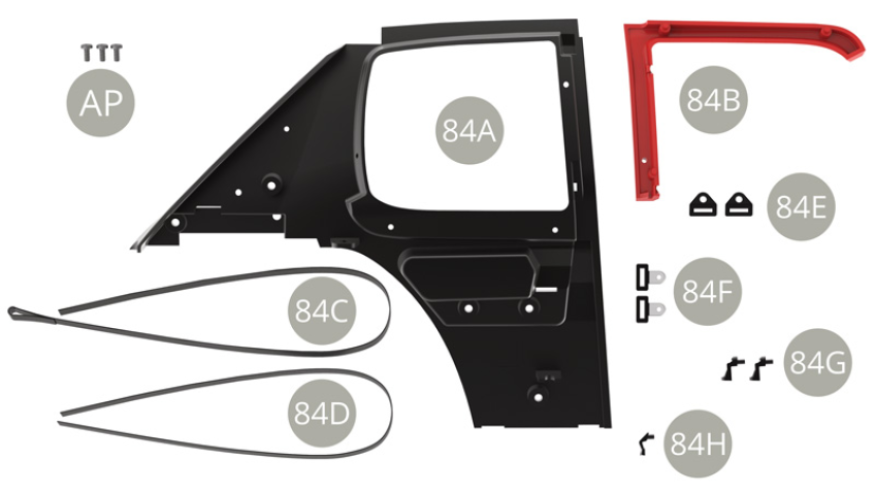
Kit 84
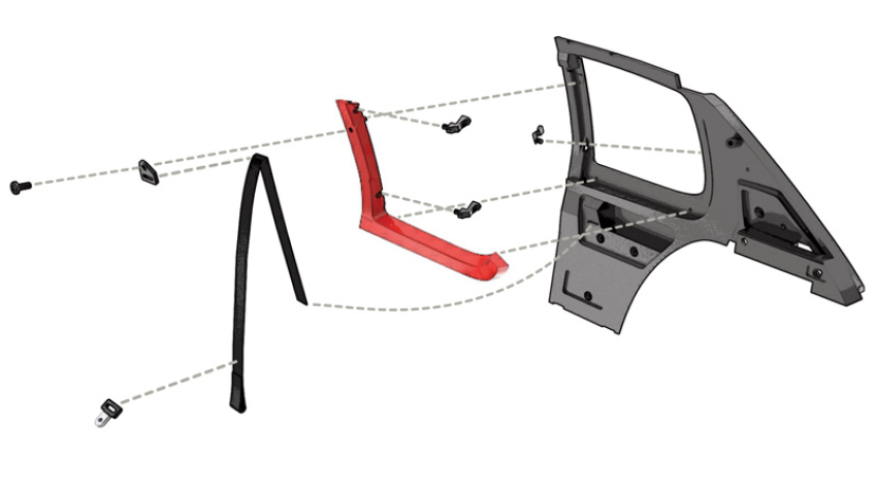
Parts of kit
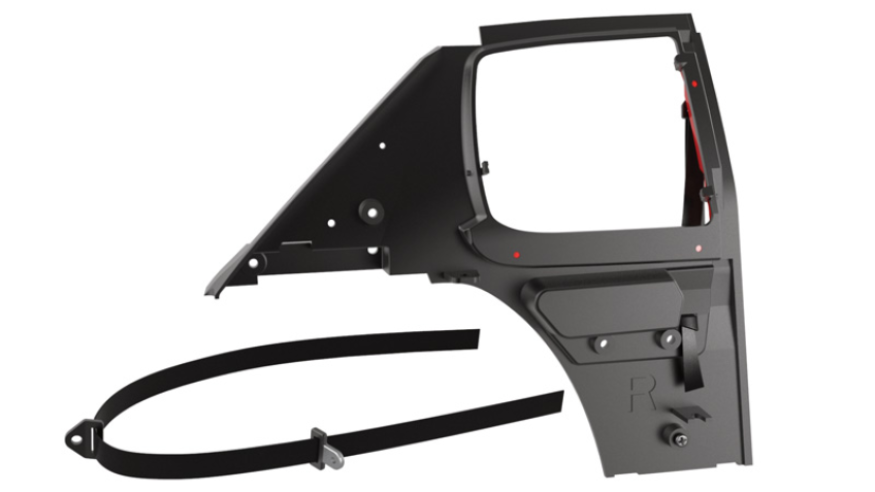
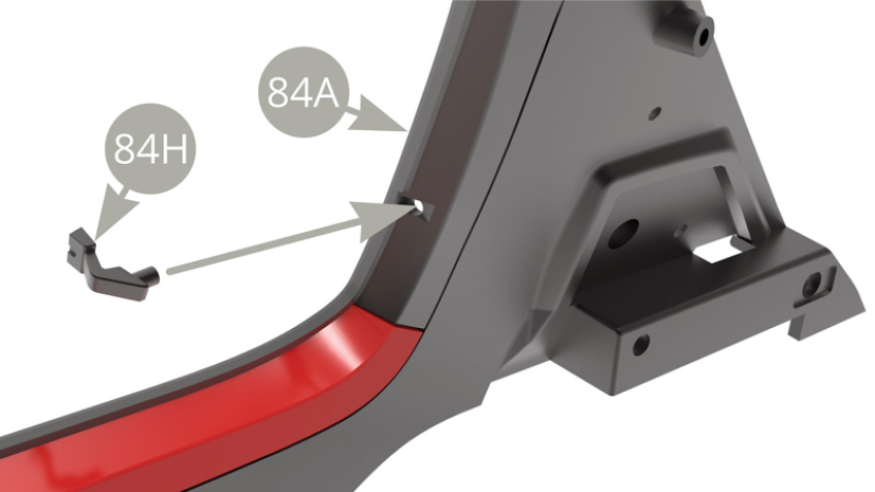
- 84A Interior right panel
- 84B Windowsill frame
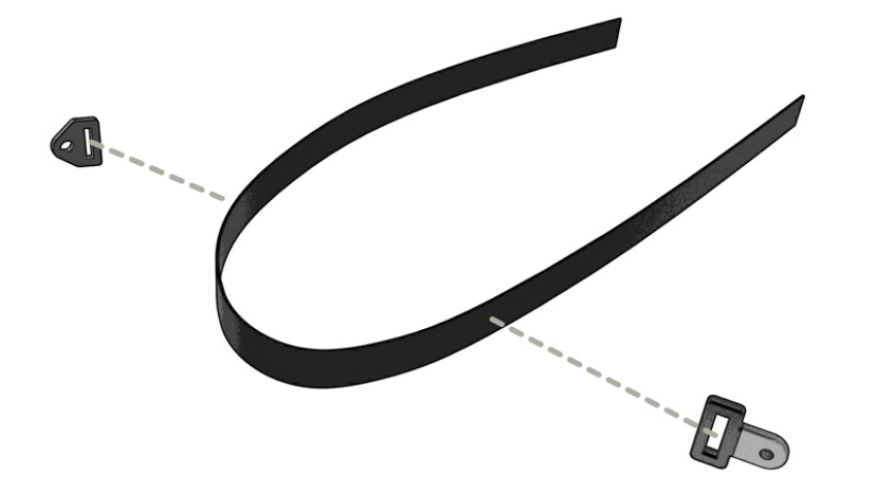
- 84C Front right safety belt
- 84D Rear right safety belt
- 84E Belt holder ( x2 )
- 84F Buckle ( x2 )
- 84G Quarterlight glass hinges ( x2 )
- 84H Quarterlight glass lever
- AP M 1,7 x 4 mm (x 3)
Step 4
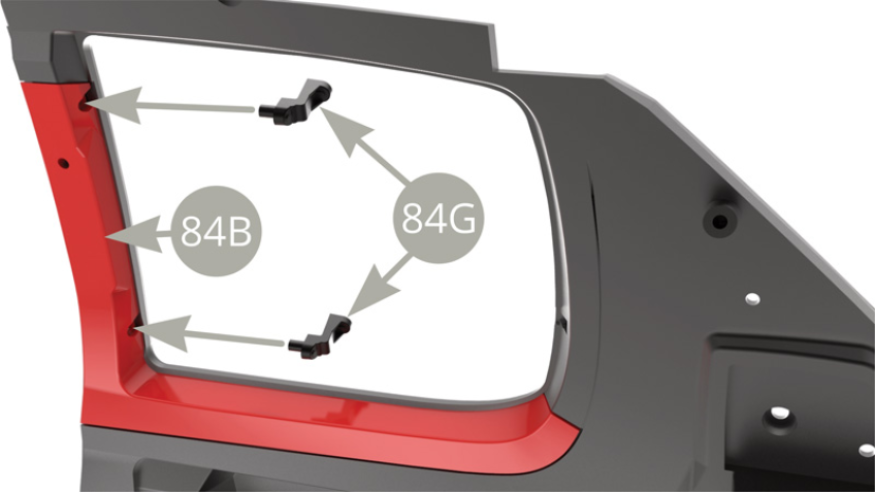
Fit 84B Windowsill frame to 84A Interior right panel.

Fit two 84B Quarterlight glass hinges to 84B Windowsill frame.
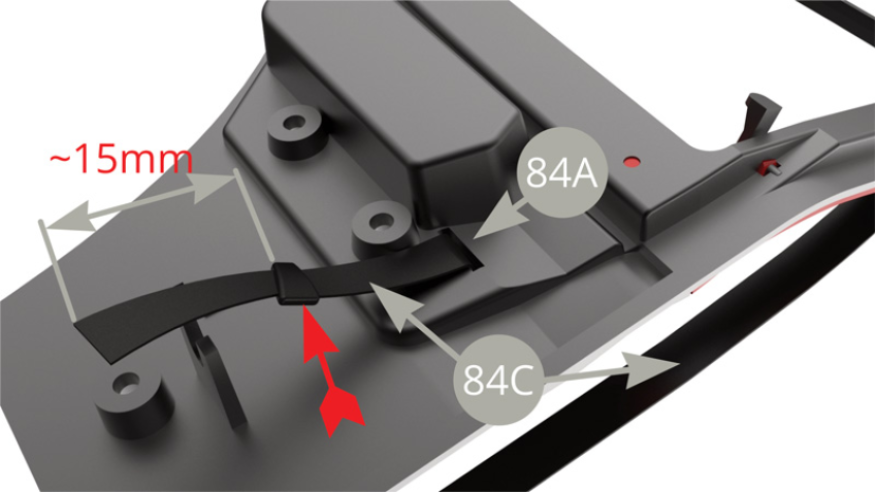
Fit sequentially 84F Buckle and 84E Belt holder to 84C Front right safety belt with loop at the end ( red arrow ).
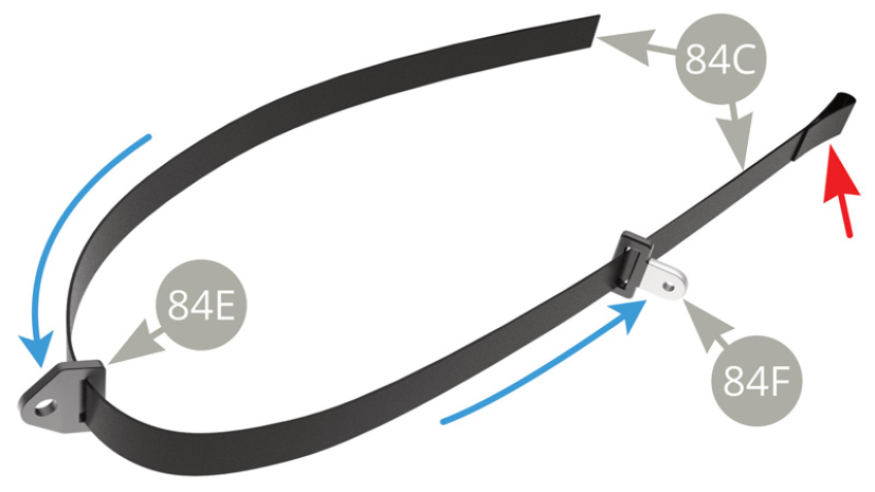
Fit 84E Belt holder to 84B Windowsill frame and fix with AP screw . Lead 84C Front right safety belt into the slot of 84A Interior right panel ( blue arrow ).

Tie a knot ( red arrow ) at approximately 15mm distance form 84C Front right safety belt end , to serve as stopper.
Pull 84C Front right safety belt as blue and green arrows point , to position the belt.

Fit 84H Quarterlight glass lever to 84A Interior right panel.
Fit 84E Belt holder and 84F Buckle to 84D Rear right safety belt ( blue arrows ).

Assembly drawings
General view