English
 français
 Deutsch
 español
 italiano
 português


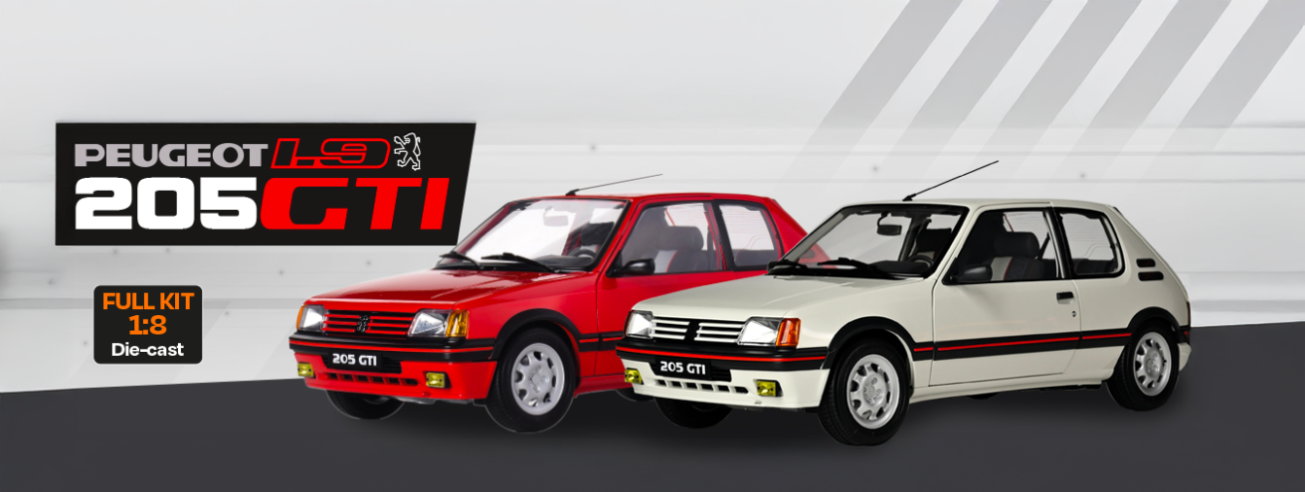
Peugeot 205 GTI 1.9 - Box 22
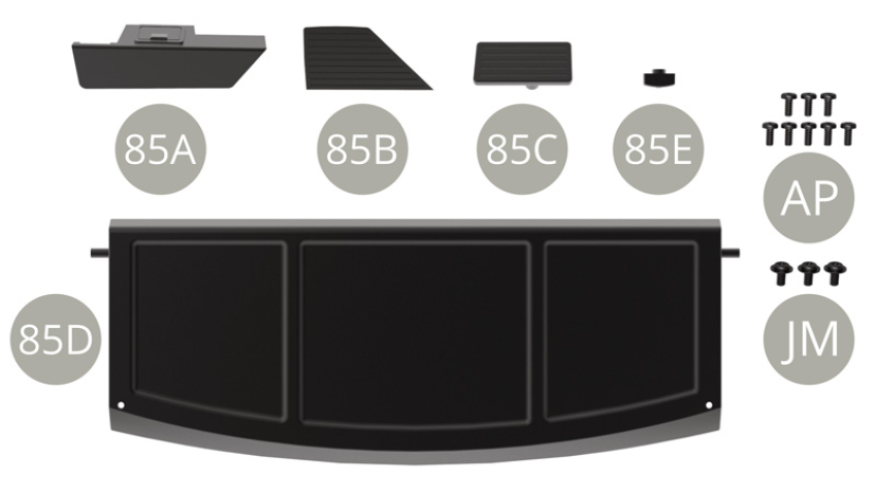
Kit 85
Parts of kit
- 85A Ash tray panel
- 85B Deco grid panel
- 85C Deco grid panel
- 85D Parcel tray
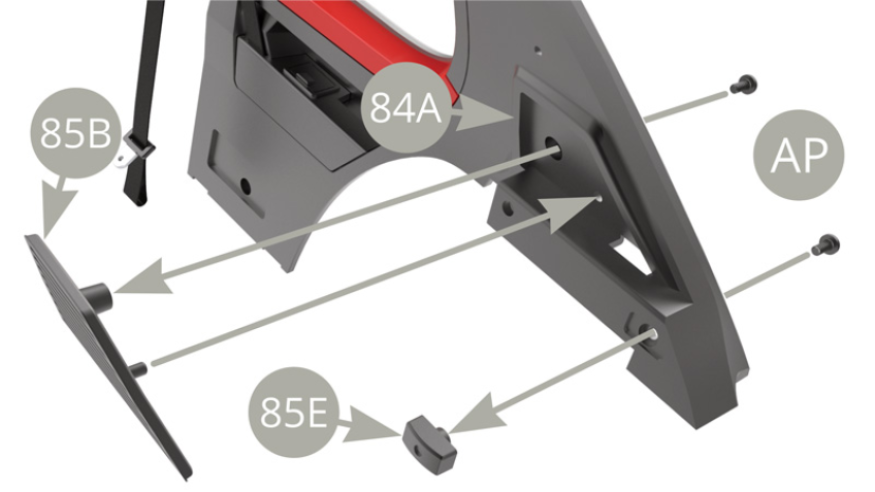
- 85E Parcel tray support
- AP M 1,7 x 4 mm (x 8)
- JM M 2,0 x 4 x 5 mm (x 3)
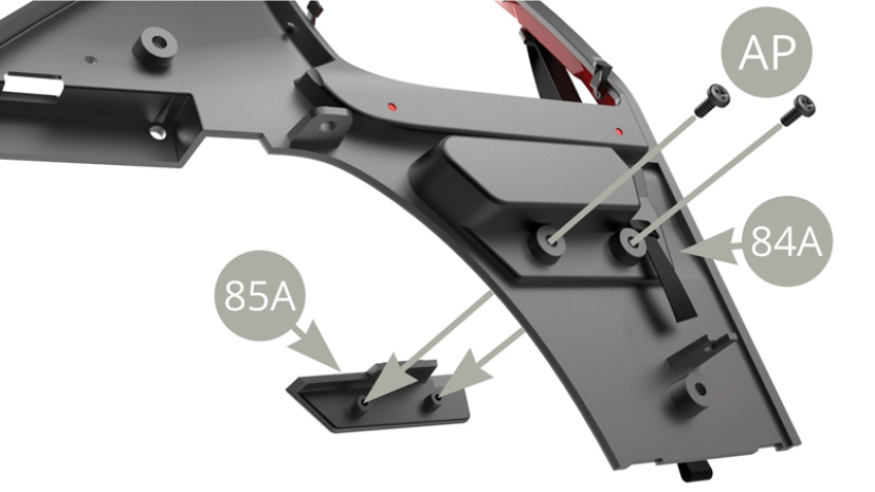
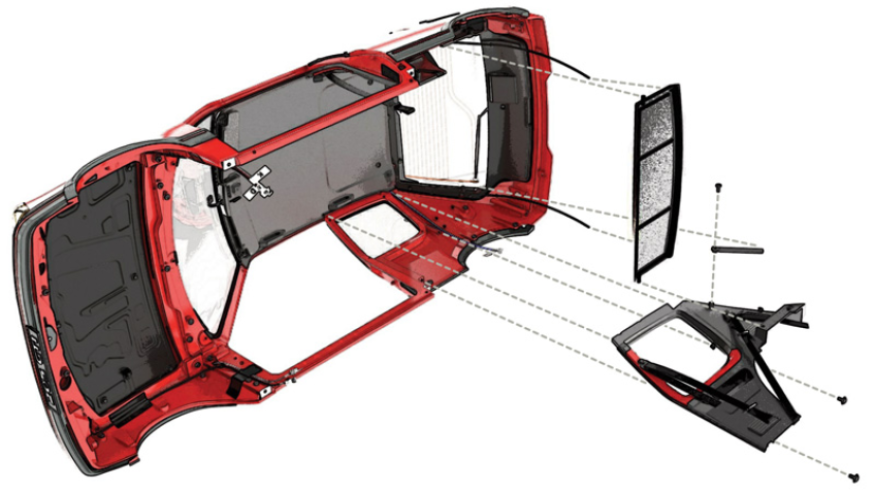
Step 1

Fit 85A Ash tray panel to 84A Interior right panel and fix with two AP screws.
Fit 85B Deco grid panel and 85E Parcel tray support to 84A Interior right panel and fix each one with AP screw.
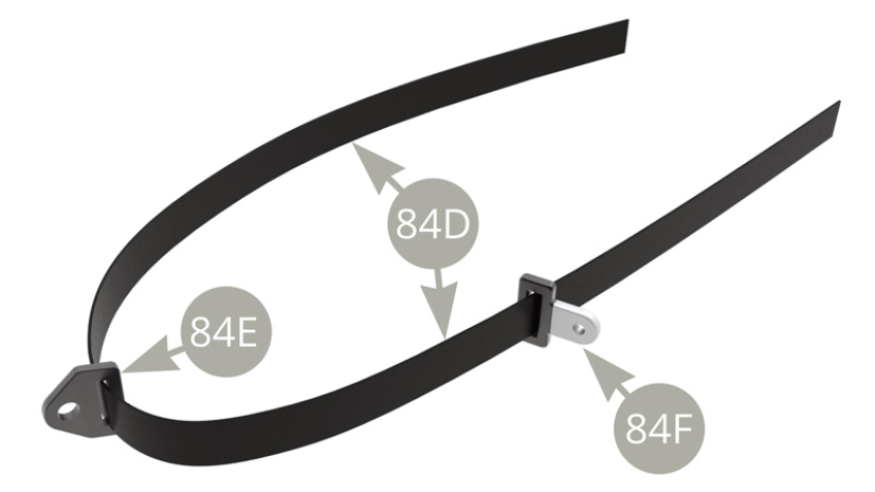
Take previously prepared 84D Rear right safety belt with 84E Belt holder and 84F Buckle on it.
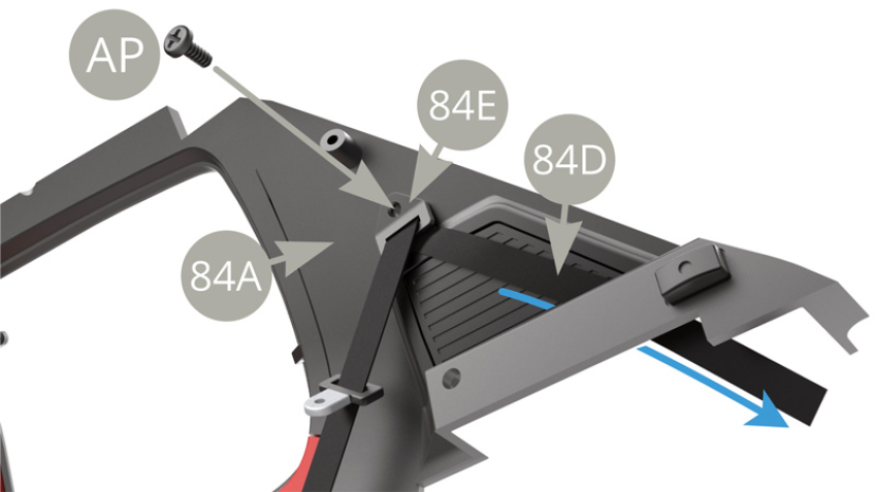
Fit 84E Belt holder to 84A Interior right panel and fix with AP screw . Pass one end of 84D Rear right safety belt via the slot in 84A Interior right panel .( blue arrow ).
Wrap the other end of 84D Rear right safety belt over the notch in lower edge of 84A Interior right panel ( upper illustration , blue arrow ) and fix it ( punching with thick needle or awl , red arrow , lower illustration ) with AP screw , attaching 85C Deco grid panel at the same time . Note 84F Buckle position on upper illustration.
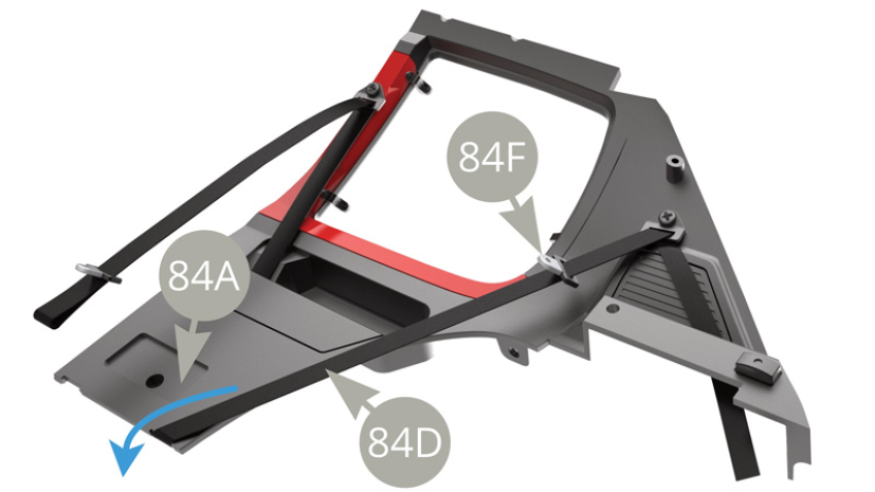
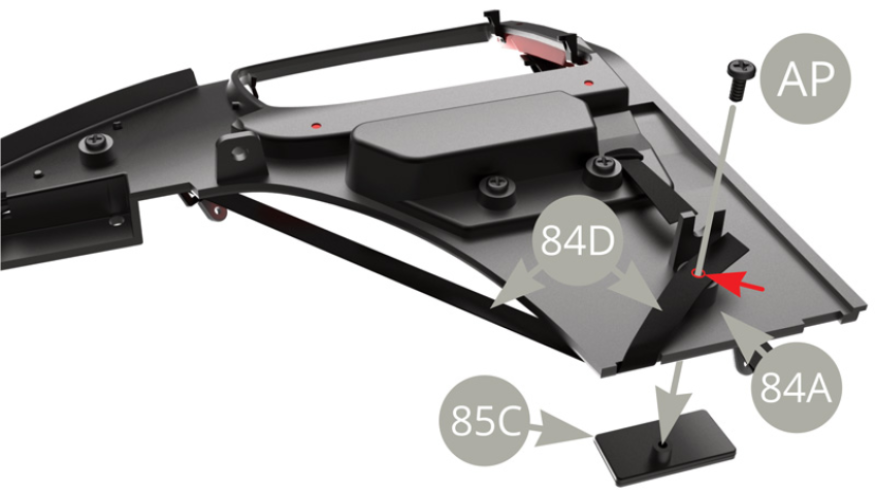

Lower end of 84D Rear right safety belt is attached
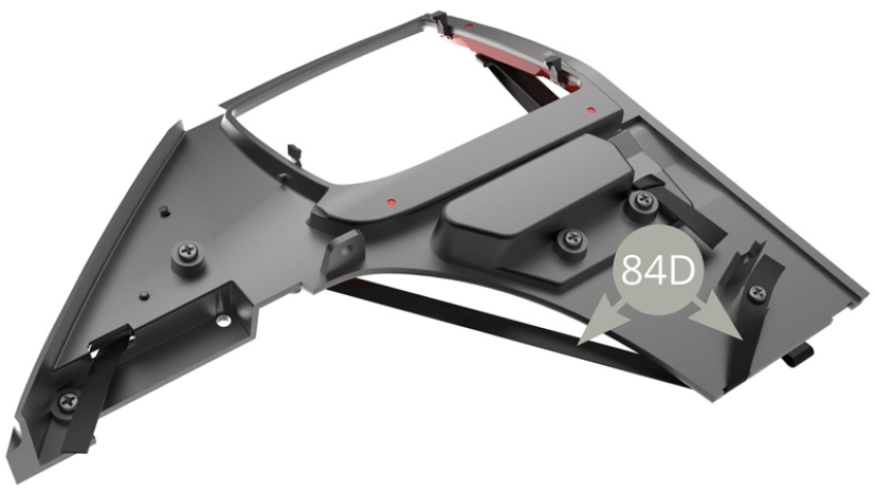
Pull to tighten the upper end of 84D Rear right safety belt ( blue arrow )

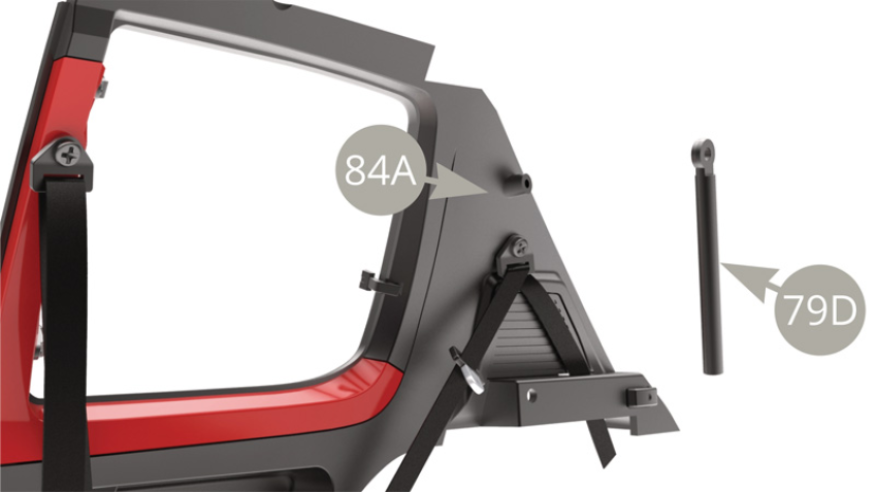
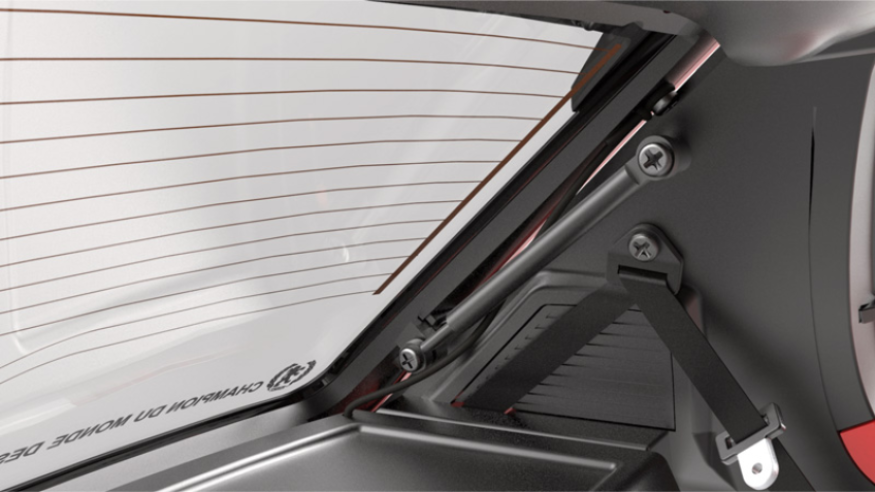
Fit 79D Tailgate strut cylinder to 84A Interior right panel and fix with AP screw , allowing the movement .
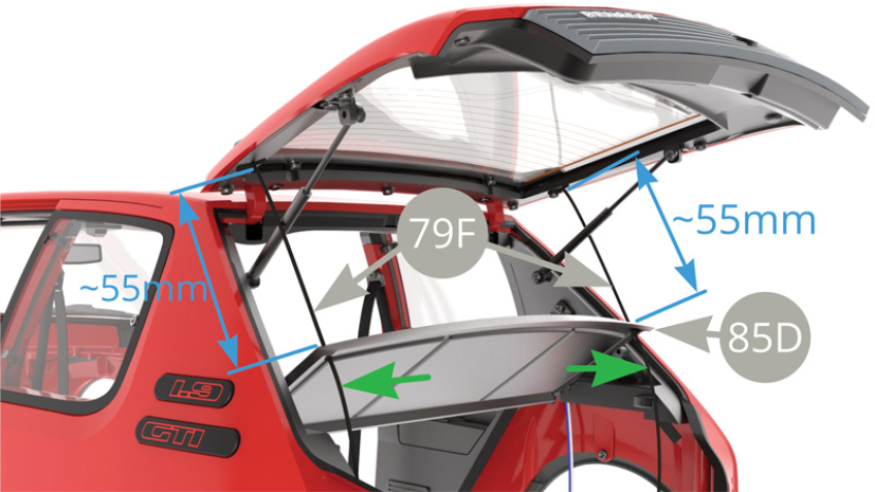
Lead 80C Cable along 80A Ceiling panel edge to exit where green arrow point . Fit 85D Parcel tray left side peg into the socket on 82A Interior left panel , holding it suspended.
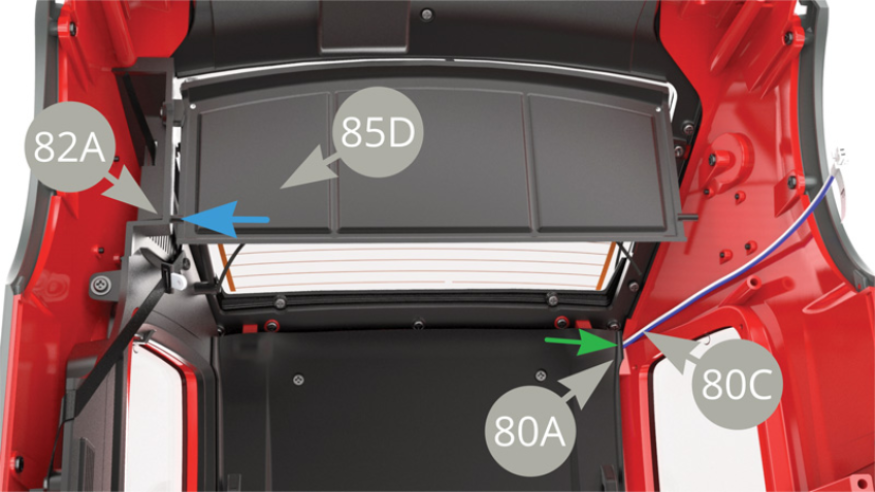
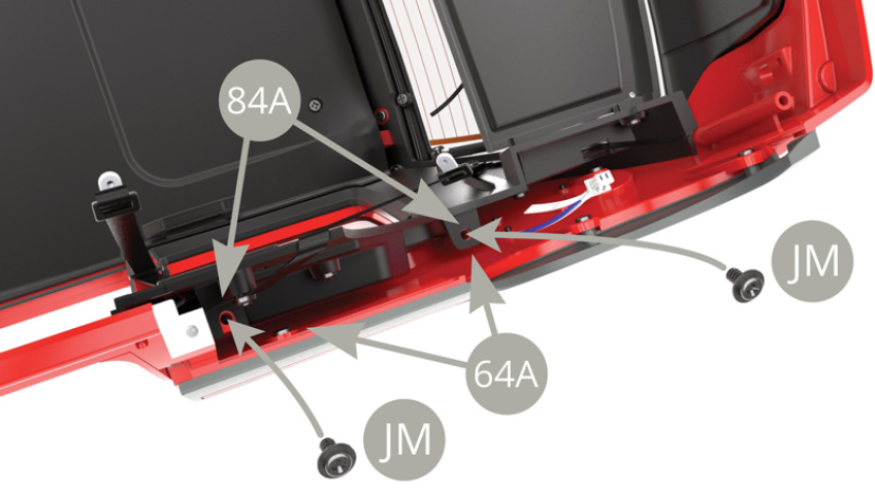
Fit 84A Interior right panel to 64A Bodywork and into the slot along 80A Ceiling panel rear right edge , at the same time catch 85D Parcel tray right side peg into the socket on 84A Interior right panel ( blue arrow ).

Fix 84A Interior right panel to 64A Bodywork with two JM screws.
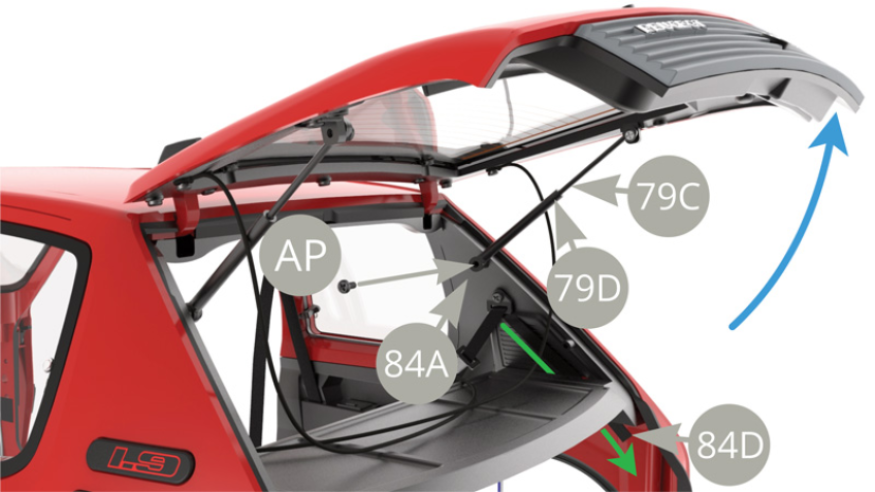
Open up the Tailgate ( blue arrow ) , align and fit 79C Tailgate strut piston into 79D Tailgate strut cylinder on the right side of car . Pull to tighten 84D Rear right safety belt ( blue arrow ).
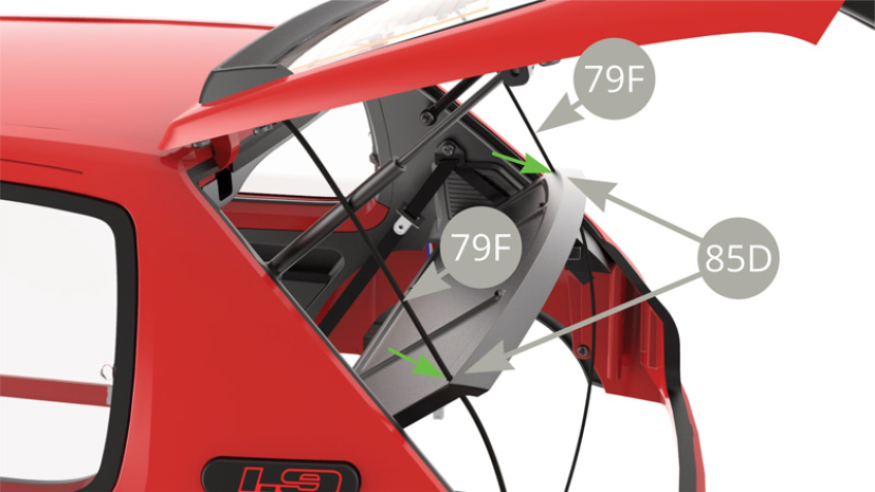
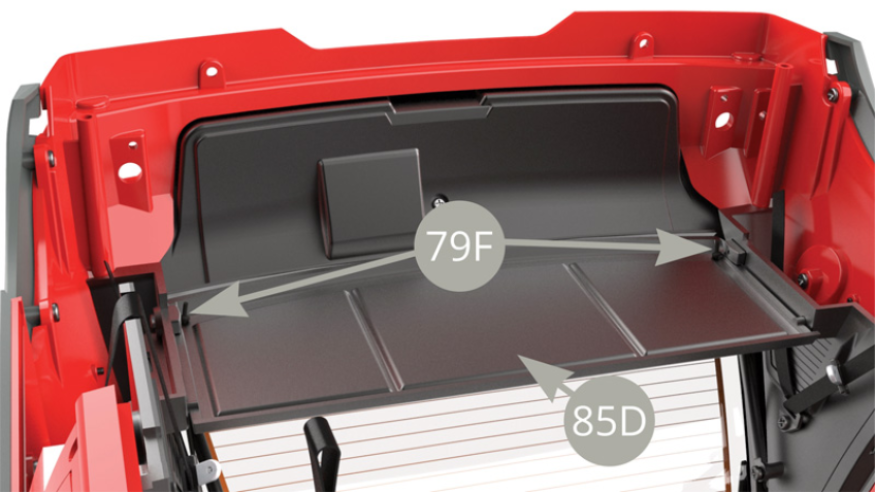
Pass 79F Parcel tray support cords through the openings at rear edge of 85D Parcel tray
Close the Tailgate , upturn the car body , pull 79F Parcel tray support cords to tighten them , with 85D Parcel tray itself in its stowed ( horizontal ) position . Tie 79F Cords to knots close to 85D Parcel tray surface ( blue arrows )
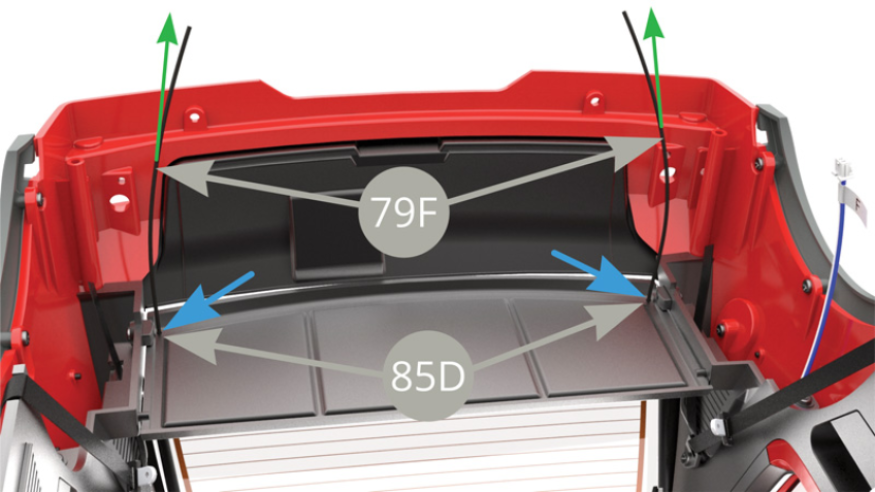
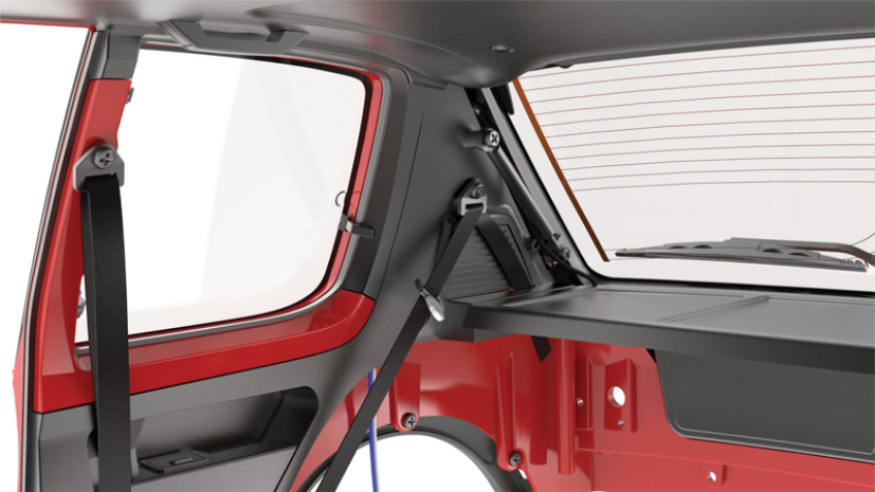
Upturn car body again , open the Tailgate , the 85D Parcel tray will lift up , pulled by 79F Cords . Cut excess lengths of 79F Cords some 5mm lower from the knots ( green arrows )
Excess tails of 79F Cords are cut off some 5mm above knots .
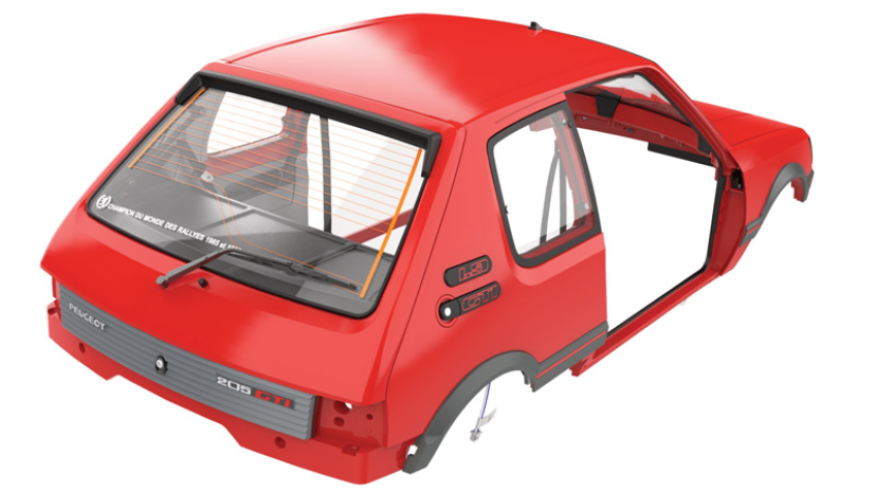
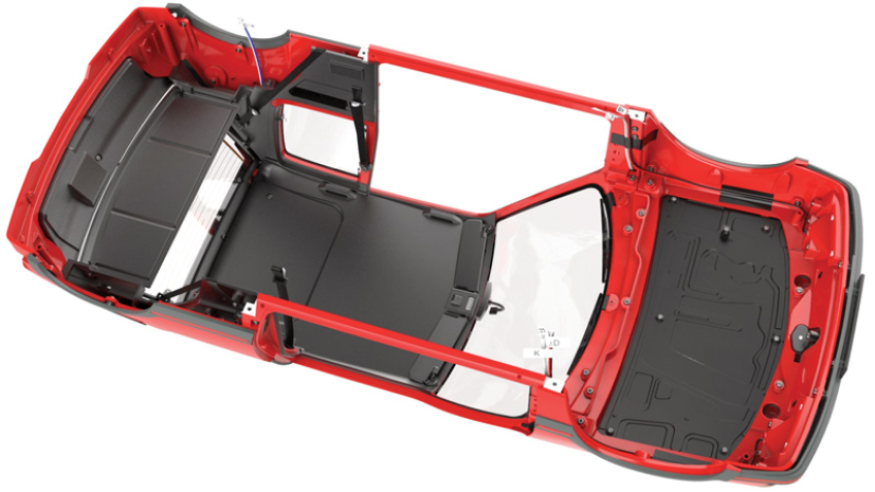
Final rear interior views

Assembly drawings
General view


Kit 86
Parts of kit
Step 2

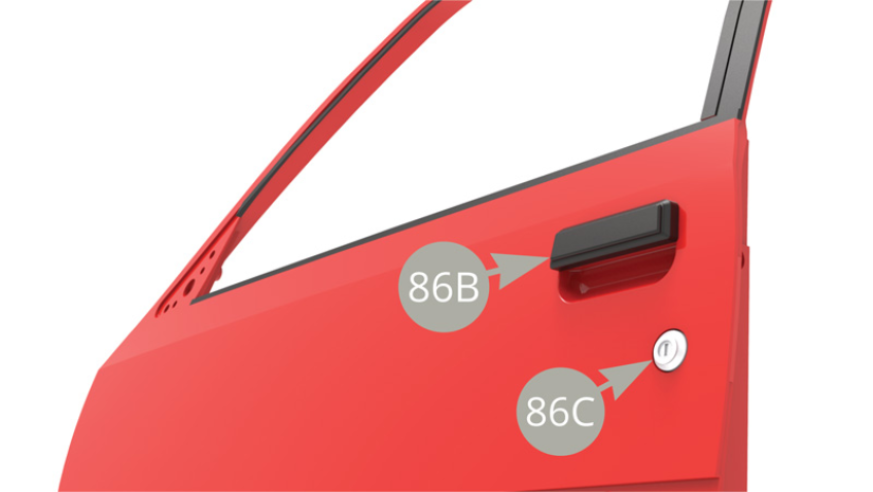
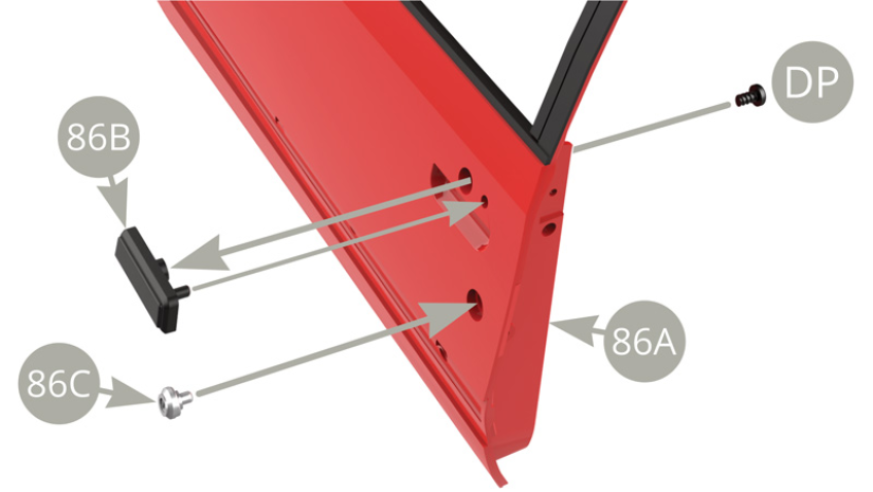
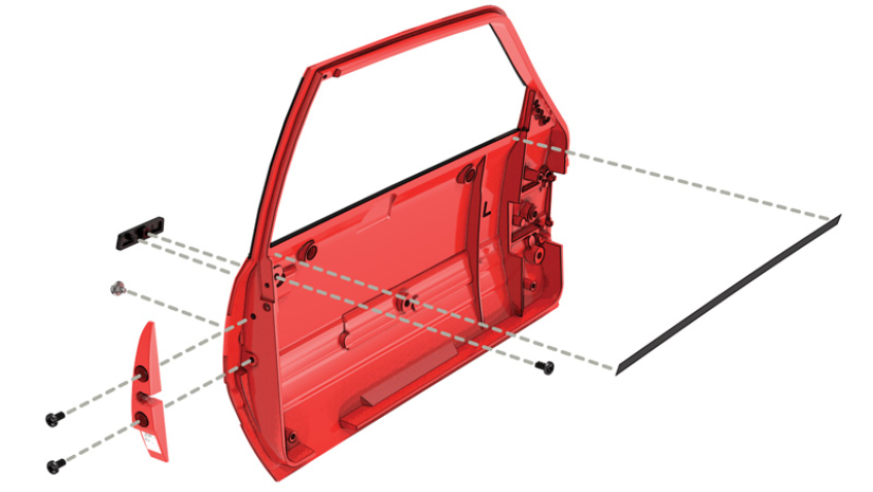
Fit 86B Door handle to 86A Left door and fix with DP screw . Fit 86C Cylinder lock to 86A Left door . ( lower illustrations )

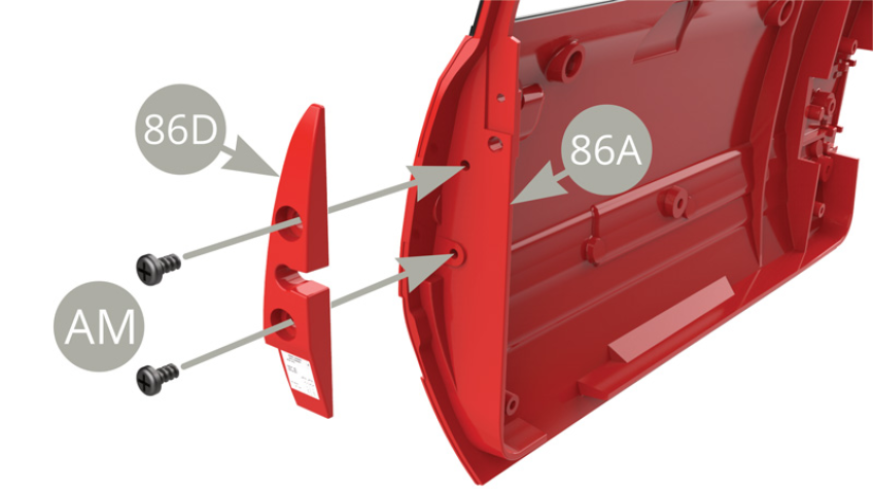
Fit 86D Lock plate to 86A Left door and fix with two AM screws
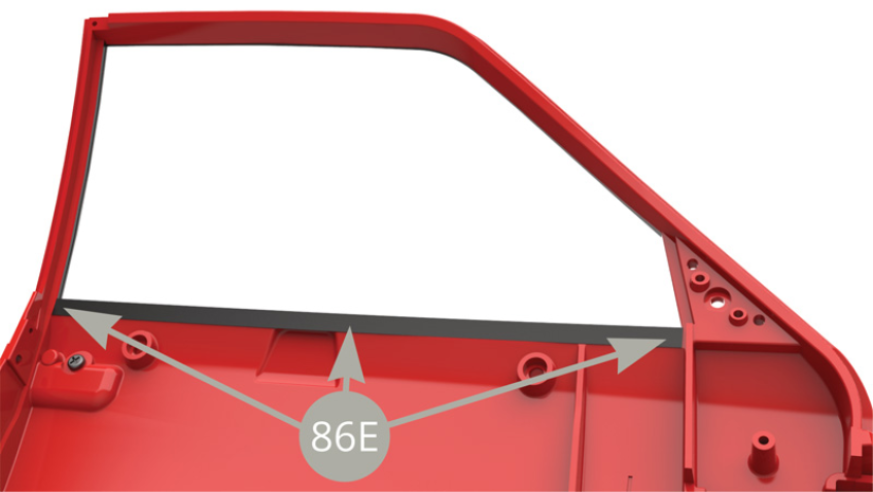
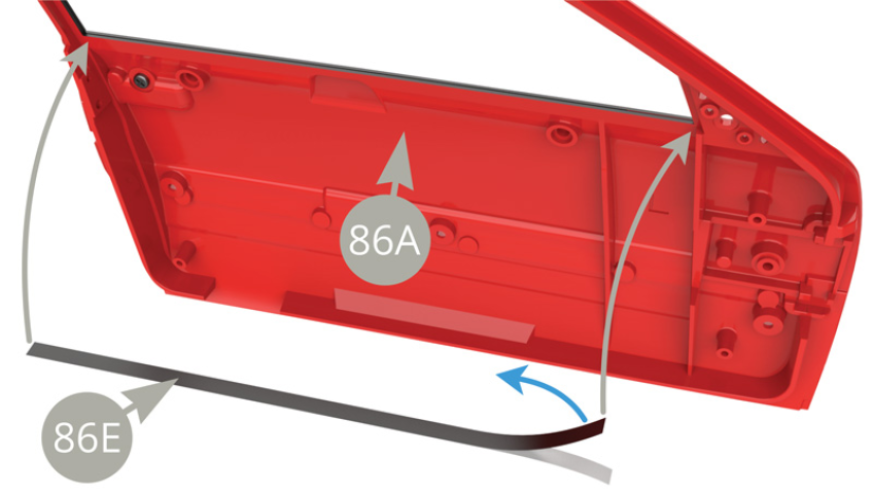
Peel 86E Glass protective strip off its backing ( blue arrow ) and apply along 86A Left door lower inner window edge (lower illustrations)

Assembly drawings
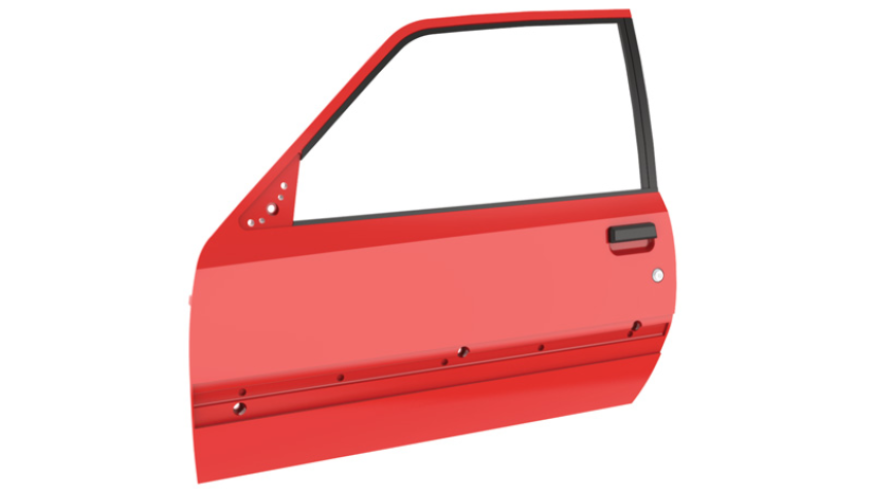
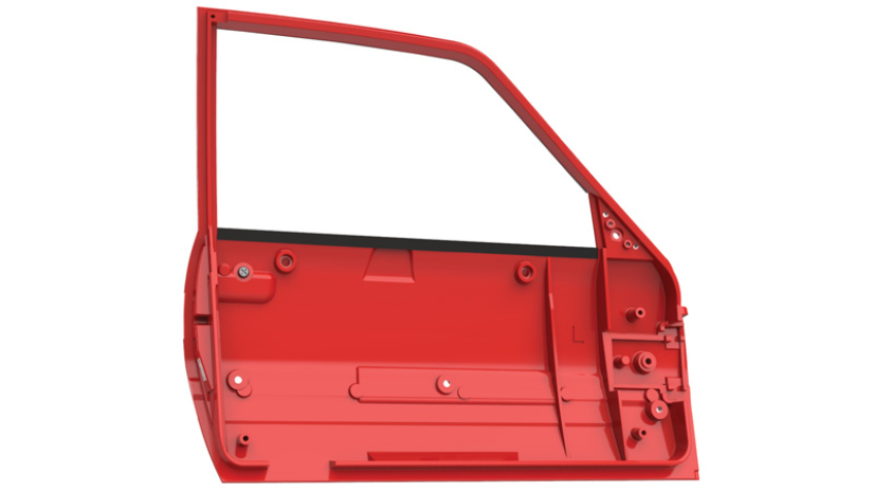
General view
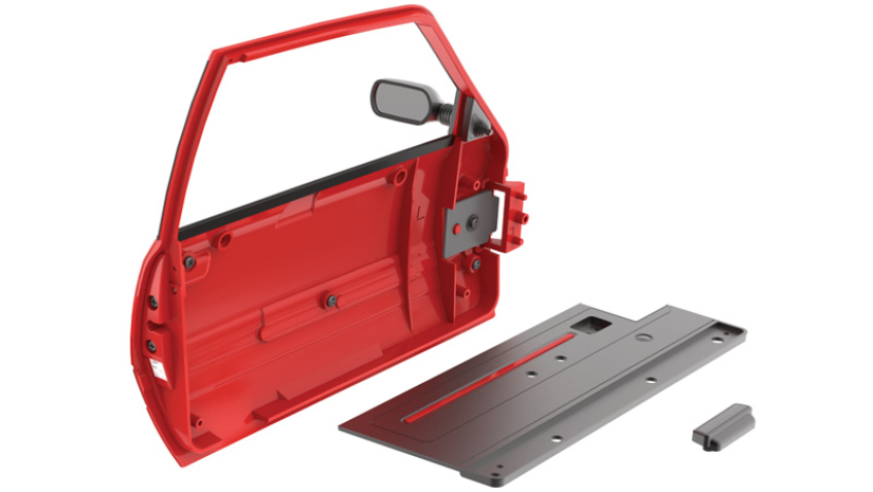
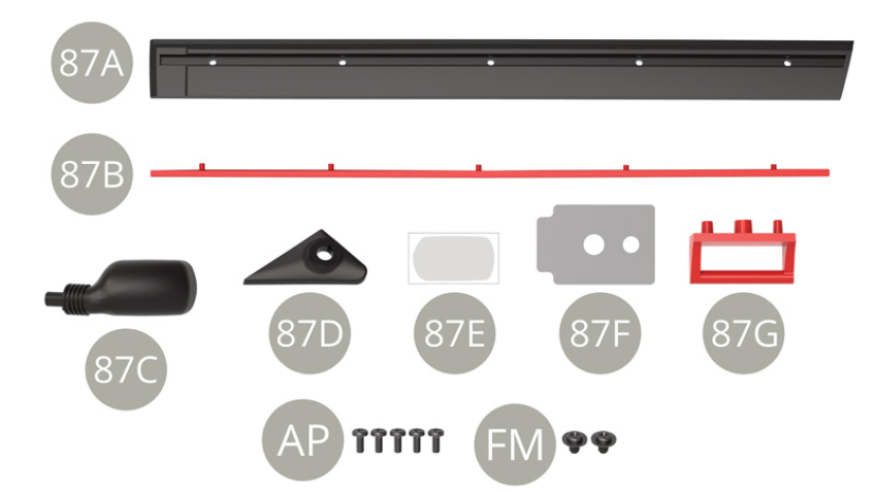
Kit 87
Parts of kit

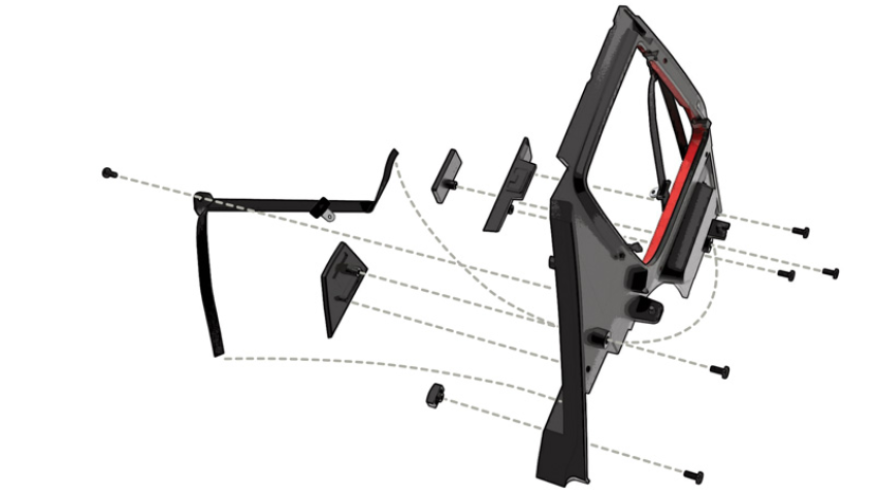
Step 3
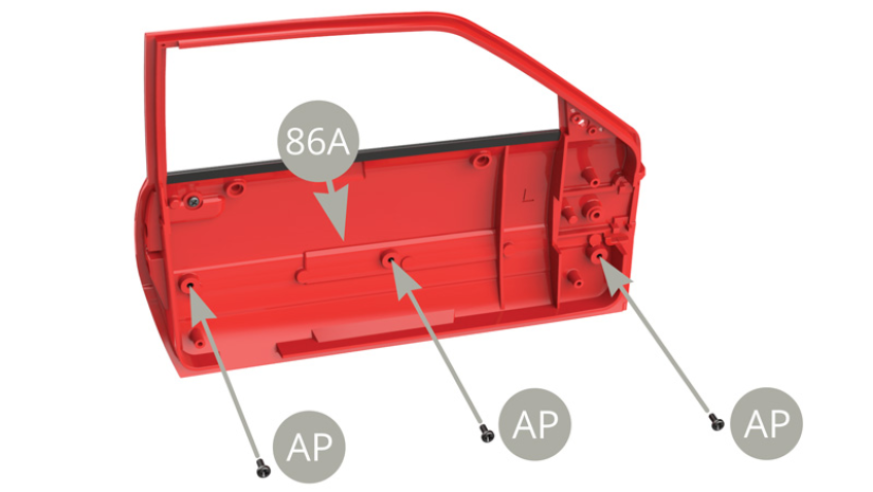
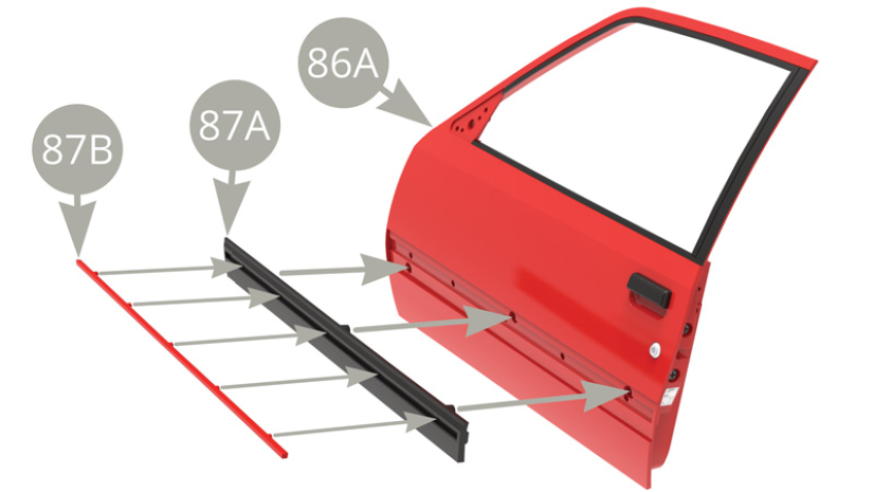
Attach 87B Molding strip to 87A Molding . Fit 87A Molding to 86A Left door and fix with three AP screws from the inner side of door panel (lower illustrations )

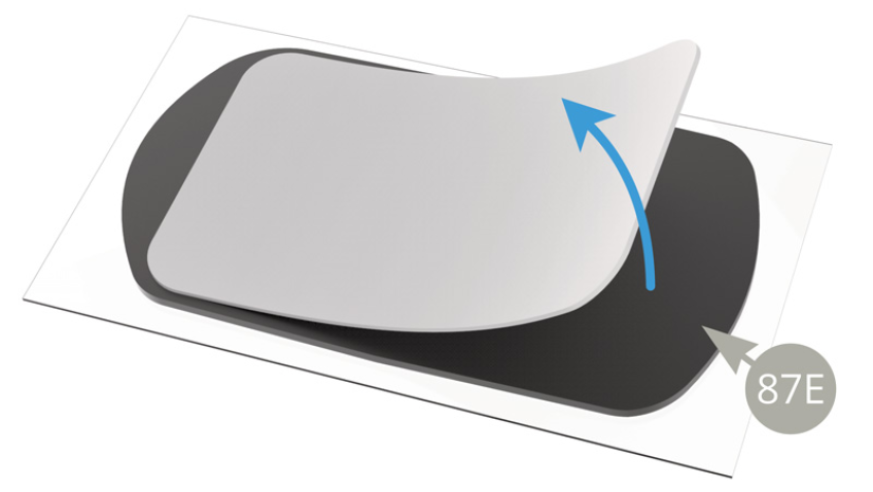
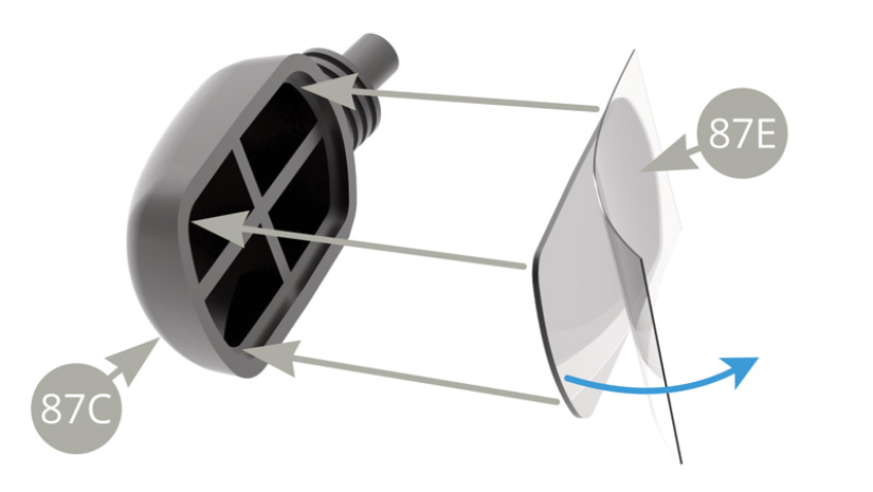
Lift backing paper off 87E Side mirror ( upper image , blue arrow ) and stick the mirror into 87C Side mirror housing , removing external protective film ( lower image , blue arrow )

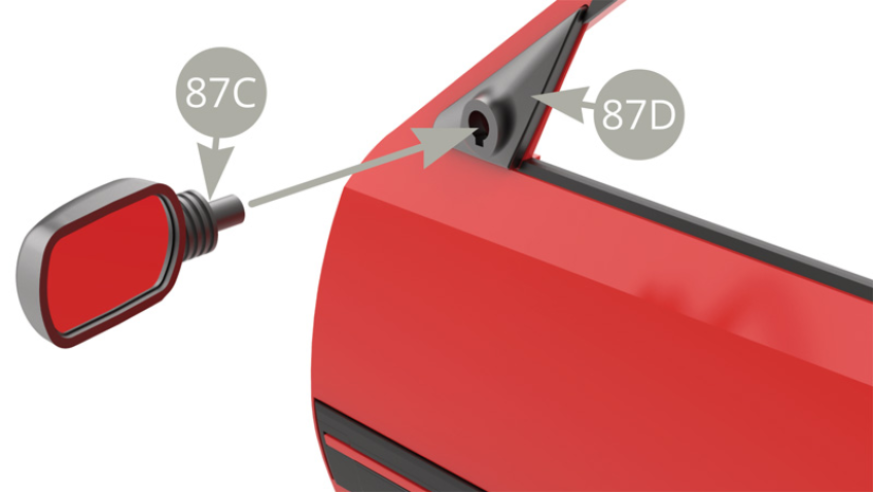
Fit 87D Side mirror base on its two pins to 86A Left door .

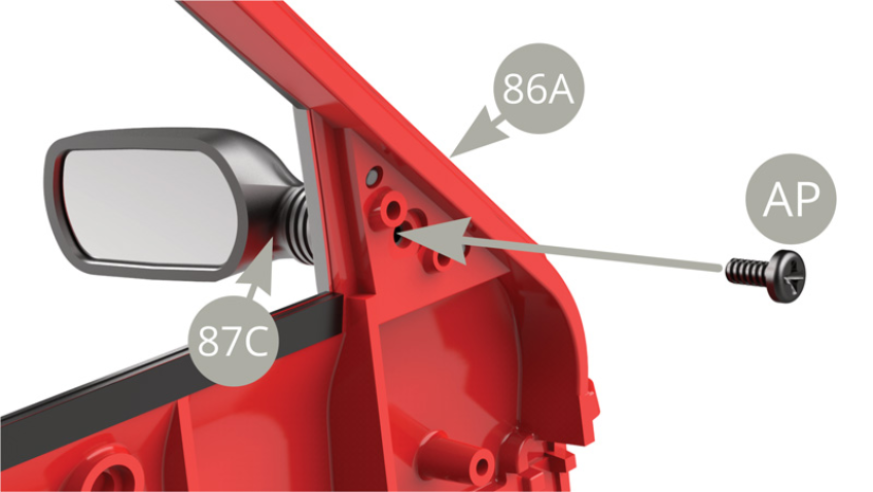
Fit 87C Side mirror housing to 87D Side mirror base and fix to 86A Left door from its inner side with AP screw ( lower illustrations ) .

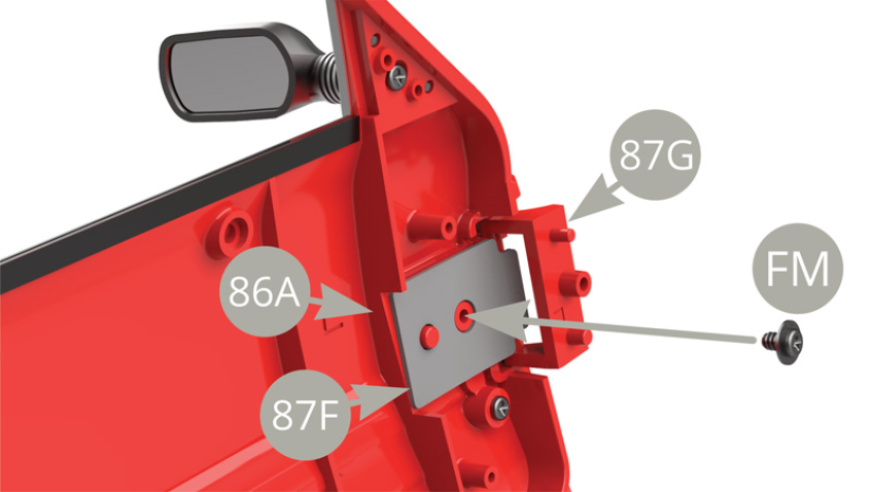
Fit 87G Hinge to 86A Left door ( green arrows ) , then fit 87F Leaf spring to 86A Left door two pins , placing its shorter end over 87G Hinge axis ( blue arrow ) .
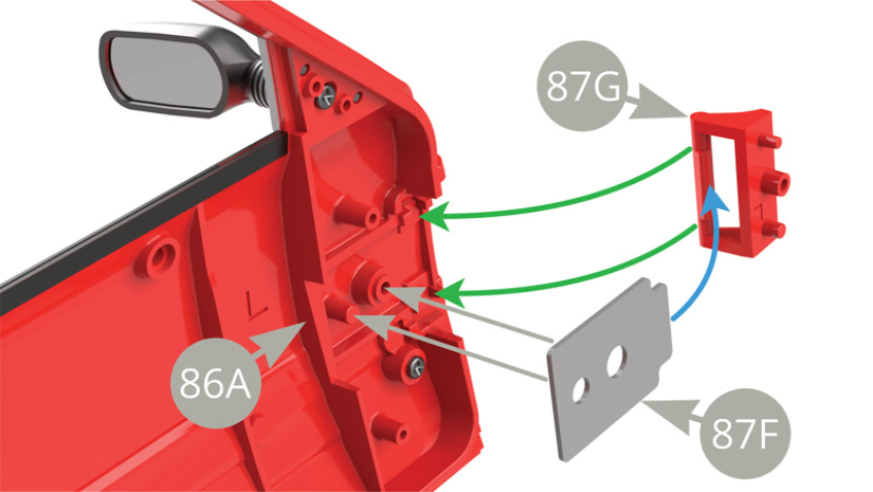
Fix 87F Leaf spring to 86A Left door with FM screw , allowing 87G Hinge to rotate
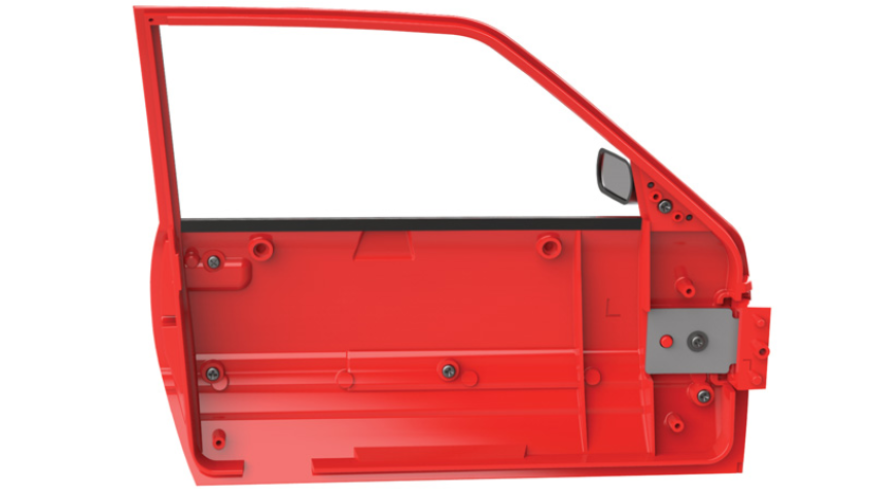
Assembly drawings

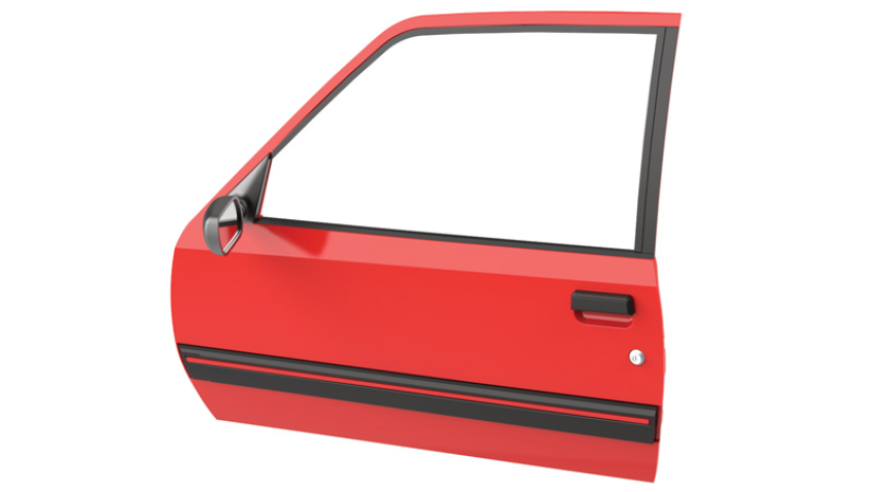
General view
Kit 88
Parts of kit

Step 4
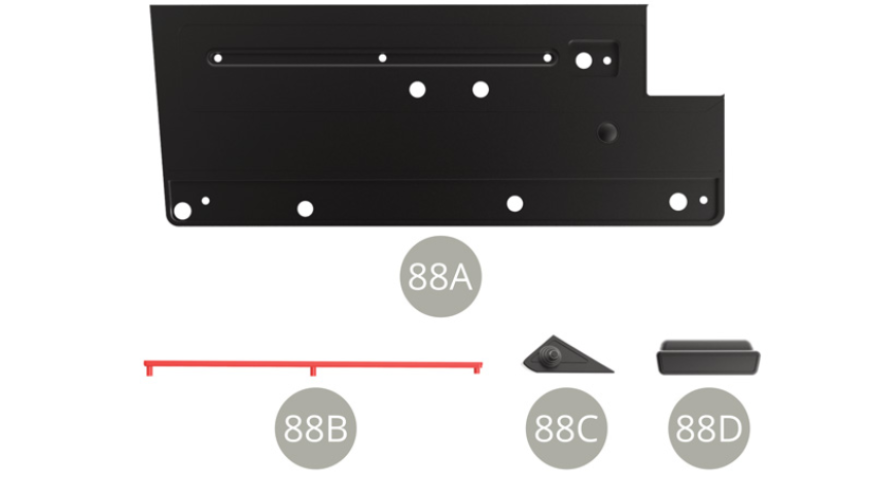
Fit 88B Deco panel trim to 88A Inner deco panel

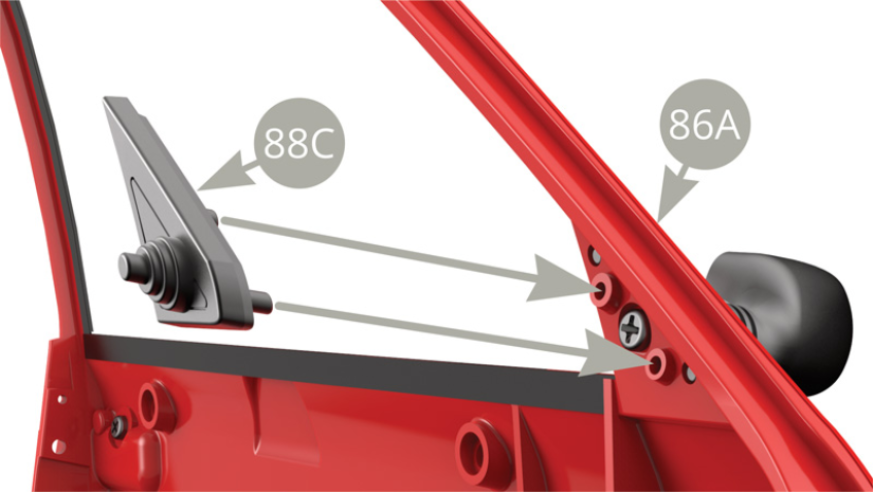
Fit 88C Rear view mirror lever panel to 86A Left door .
Assembly drawings
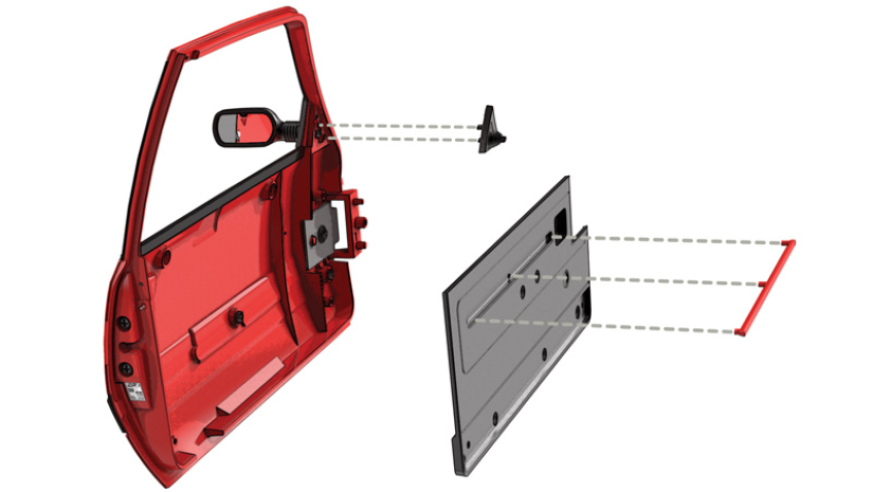
General view